Author: marcoantonio

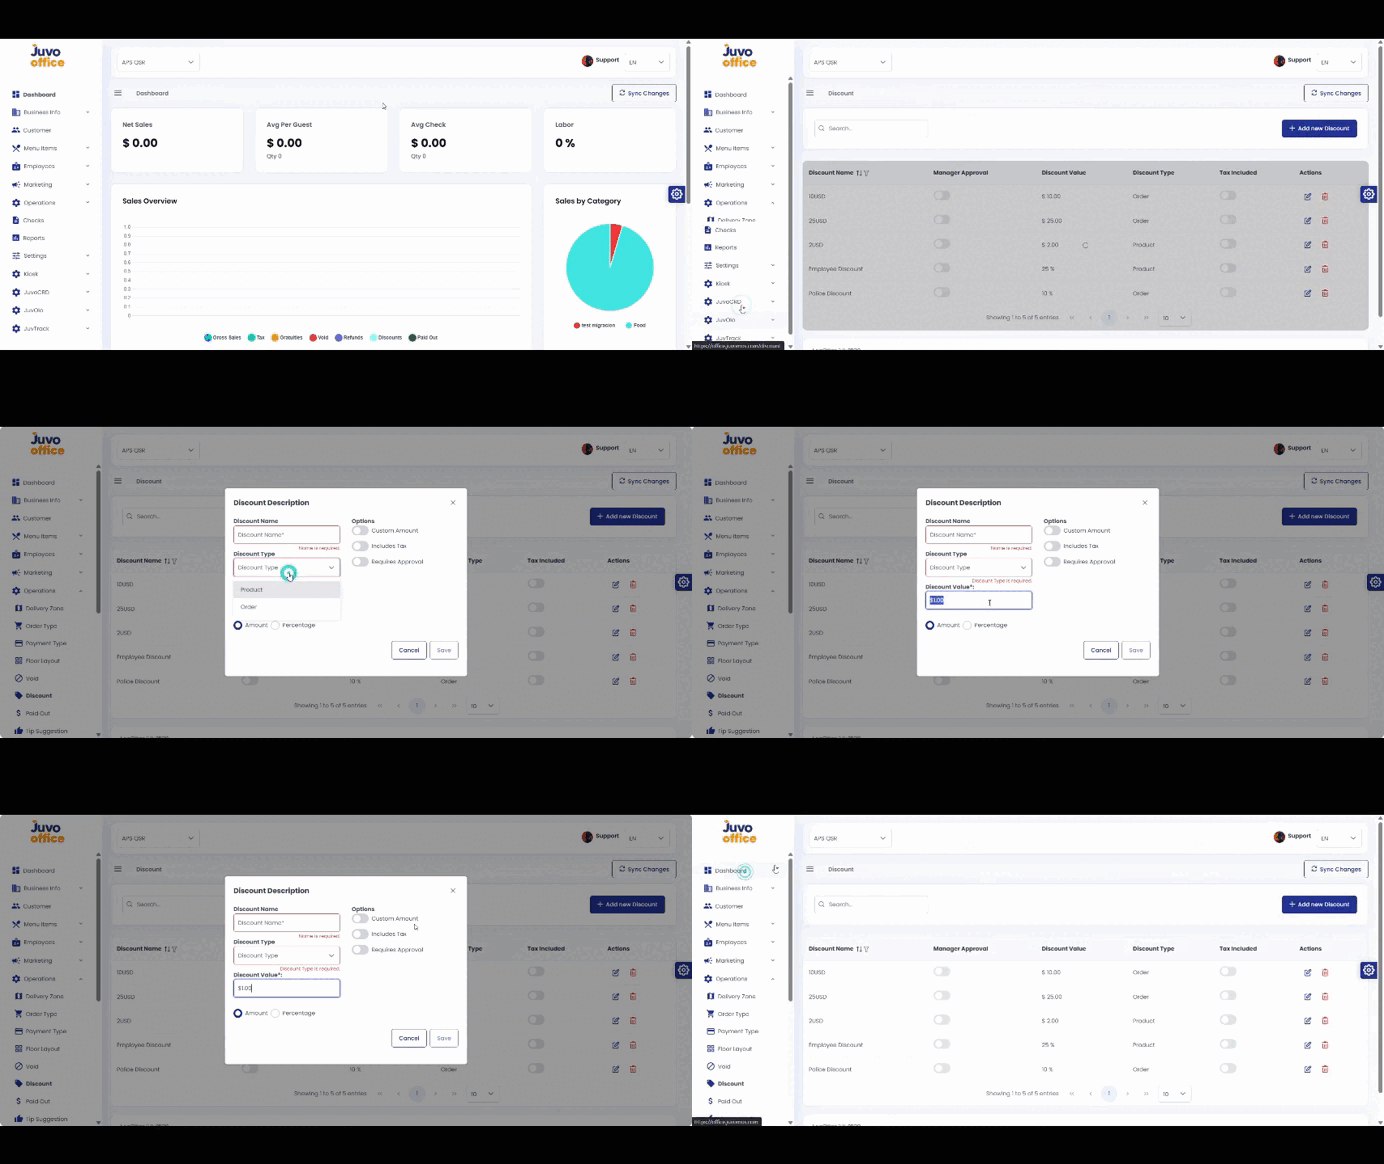
  • Operations → Discount

    Create discounts for an order or individual item.

    1. Open Operations → Discount.
    2. Click Add New Discount.
    3. Enter the name.
    4. Choose Order or Item.
    5. Set a fixed amount or percentage.
    6. Configure Custom Amount, Includes Tax, and Requires Approval as needed.
    7. Review and save.
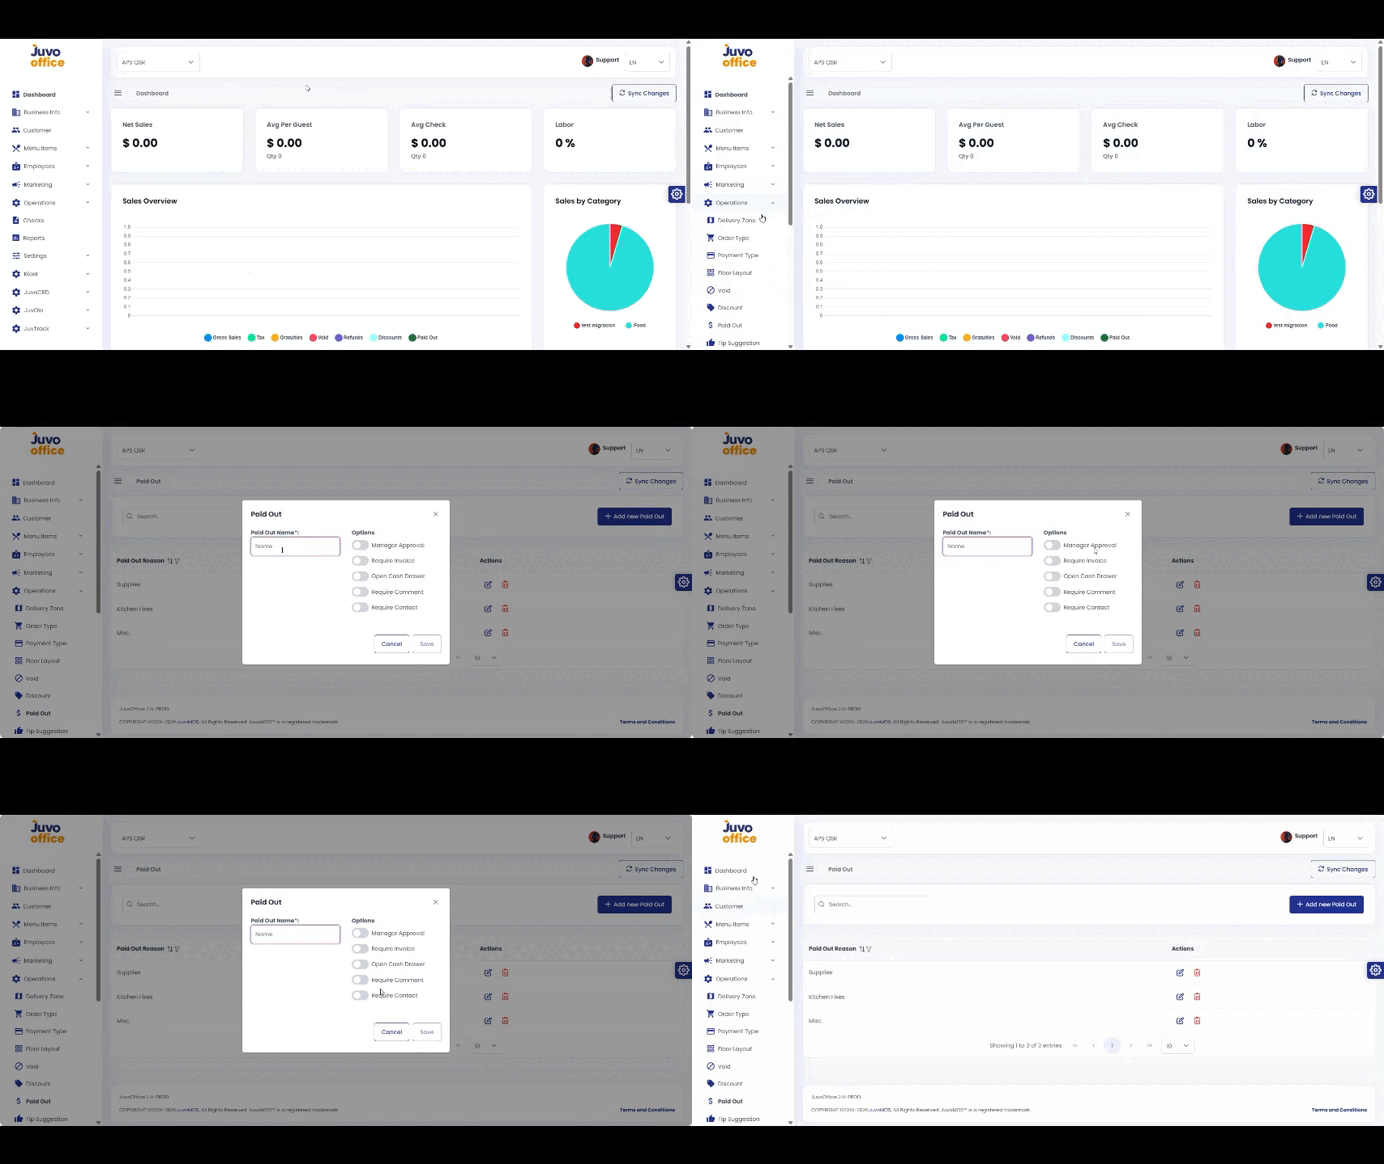
  • Operations → Paid Out

    Create Paid Out reasons for money removed from the cash drawer.

    1. Open Operations → Paid Out.
    2. Click Add New Paid Out.
    3. Enter a reason name.
    4. Configure Manager Approval, Required Invoice, Open Cash Drawer, Require Comment, and Require Contact.
    5. Review and save.
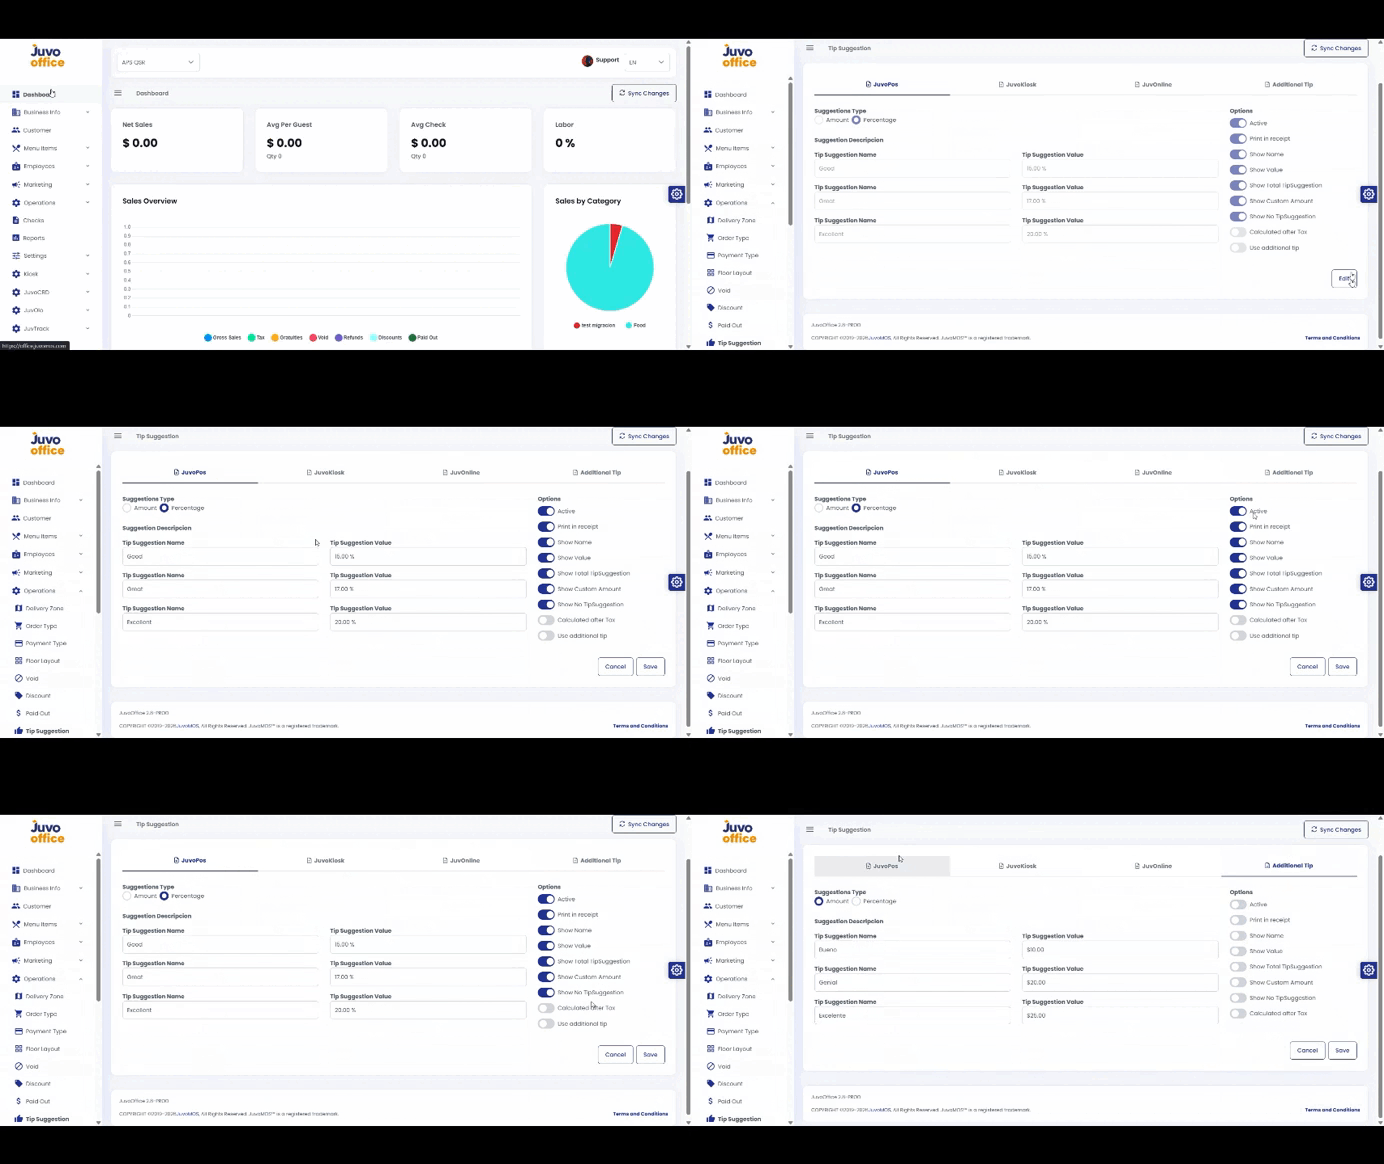
  • Operations → Tip Suggestions

    Configure tipping options shown to customers on different platforms.

    1. Open Operations → Edit Tip Suggestions.
    2. Select a platform.
    3. Enter each suggestion name.
    4. Choose Amount or Percentage and enter the value.
    5. Configure View Options, Active, Show Total Tips, and Show No Tip Suggestions.
    6. Add Additional Tips if needed.
    7. Review each platform and save.
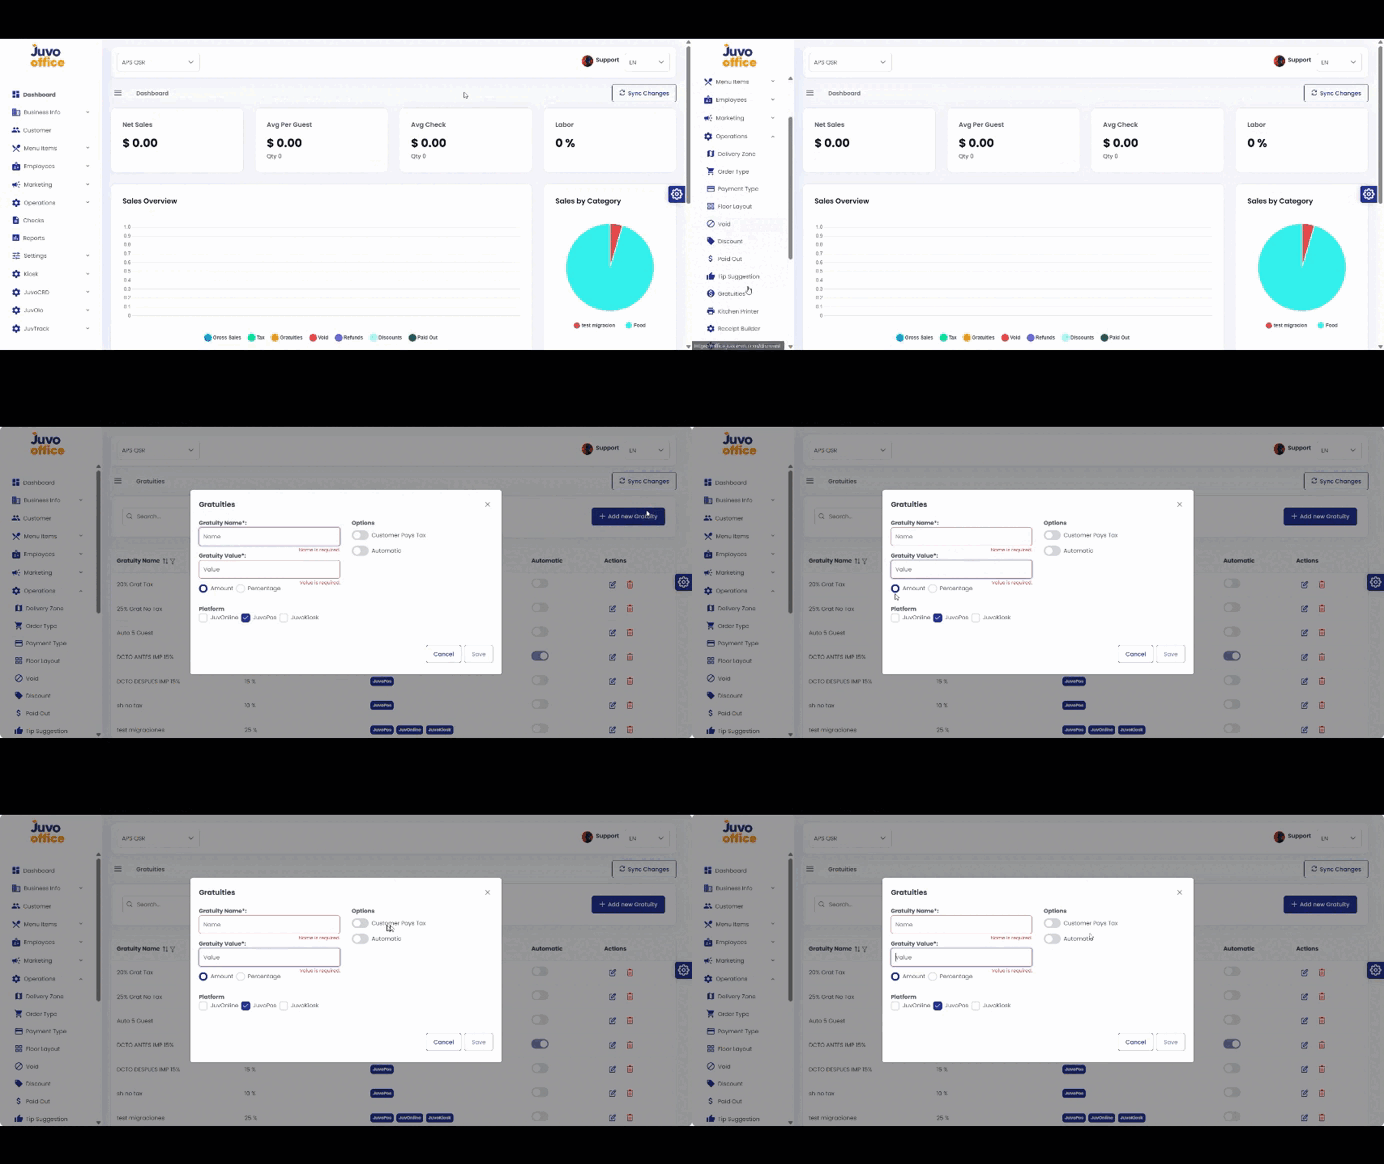
  • Operations → Gratuities

    Create gratuities and configure how they apply to orders.

    1. Open Operations → Gratuities.
    2. Click Add New Gratuity.
    3. Enter the name and an amount or percentage.
    4. Select the platforms.
    5. Configure Customer Pays Tax and Auto Gratuity.
    6. Review and save.
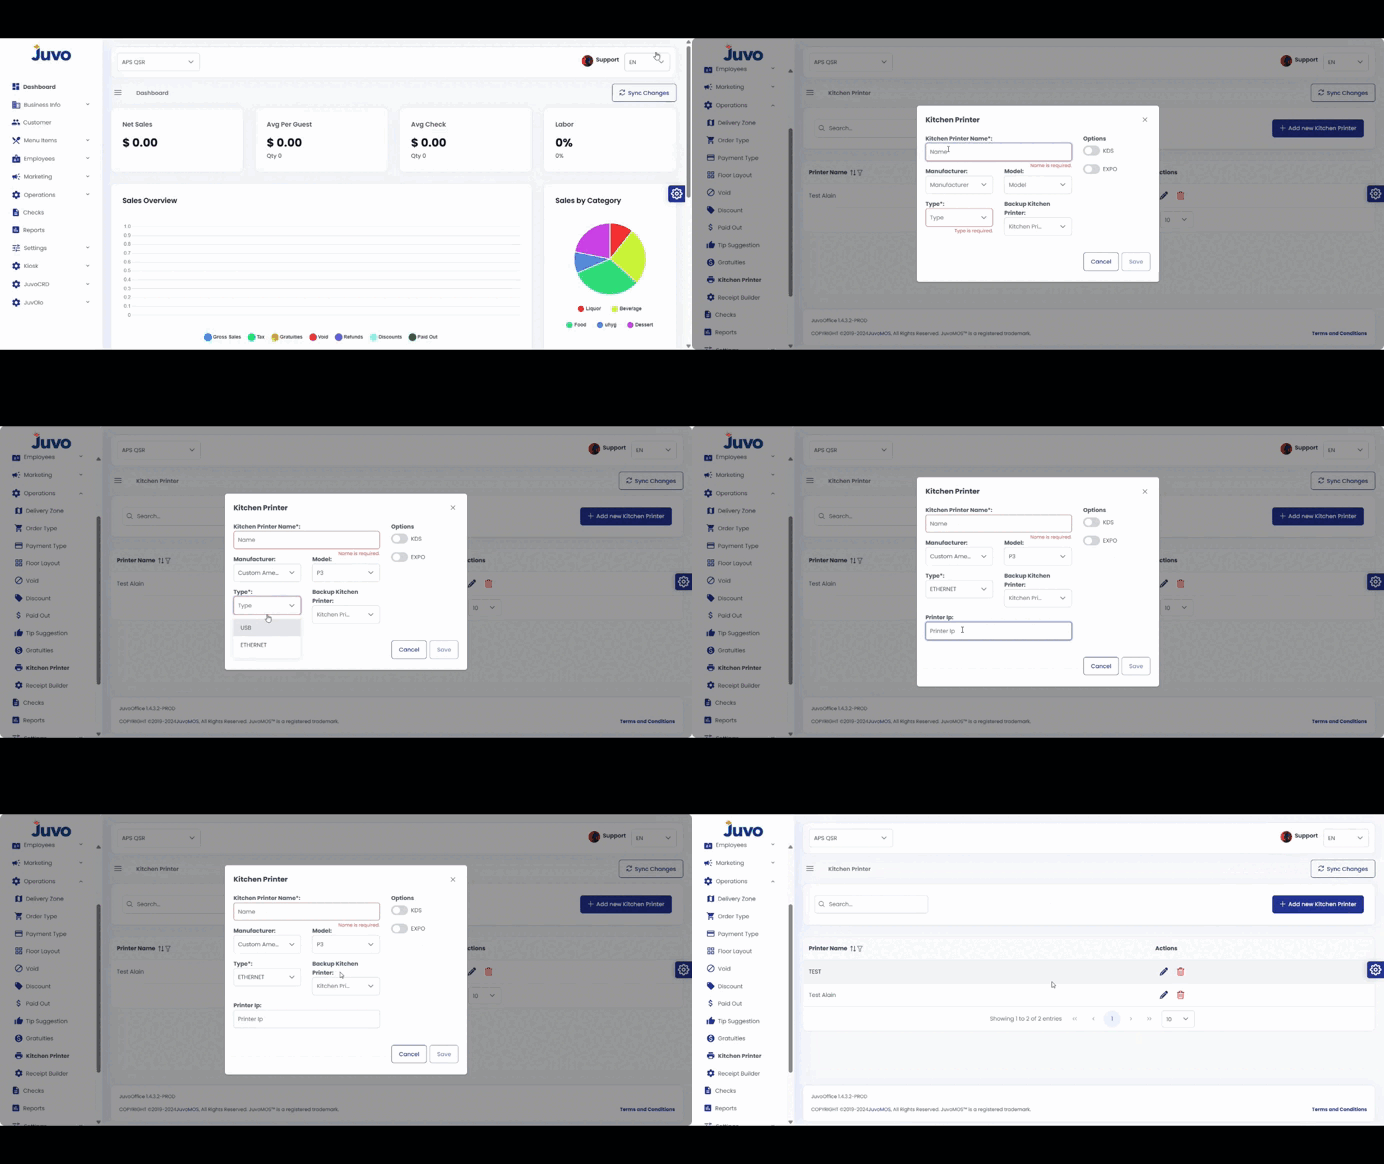
  • Operations → Kitchen Printer

    Register kitchen printers and configure backup printers, KDS, and EXPO stations.

    1. Open Operations → Kitchen Printer.
    2. Click Add New Kitchen Printer.
    3. Enter the name, manufacturer, type, and model.
    4. Select a backup printer when applicable.
    5. Configure KDS and EXPO.
    6. Review and save.
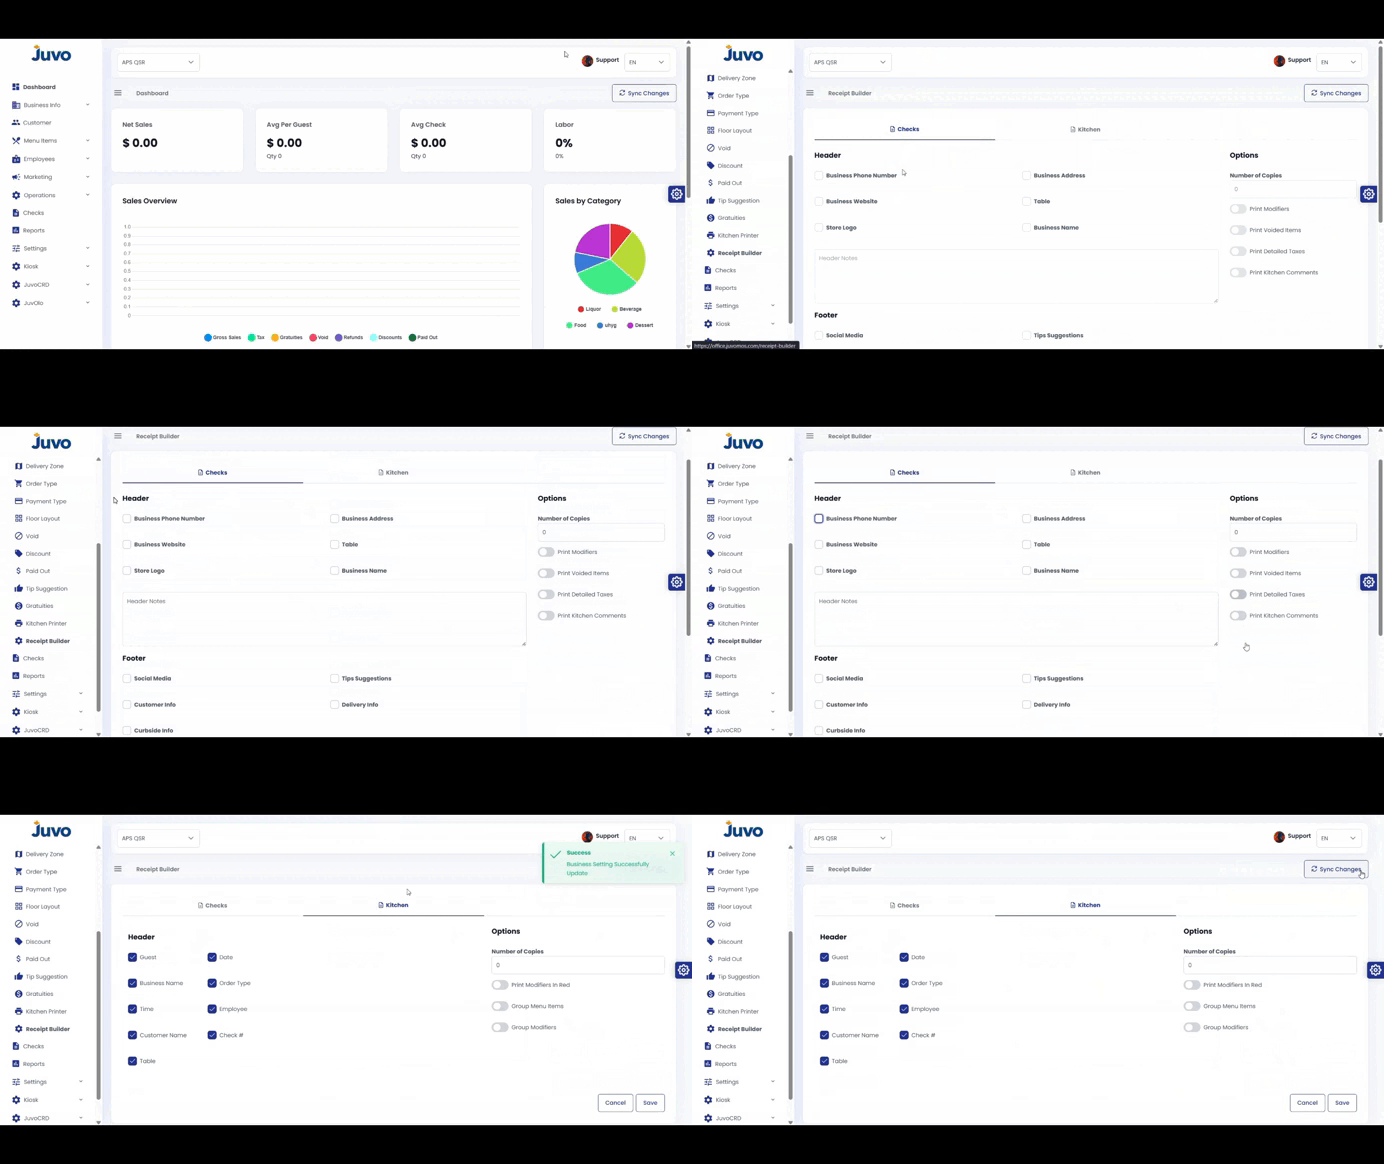
  • Operations → Receipt Builder

    Customize check receipts and kitchen receipts.

    1. Open Operations → Receipt Builder.
    2. Choose Check Receipt or Kitchen Receipt.
    3. Click Edit.
    4. Customize the layout and information.
    5. Review the Preview.
    6. Click Save.
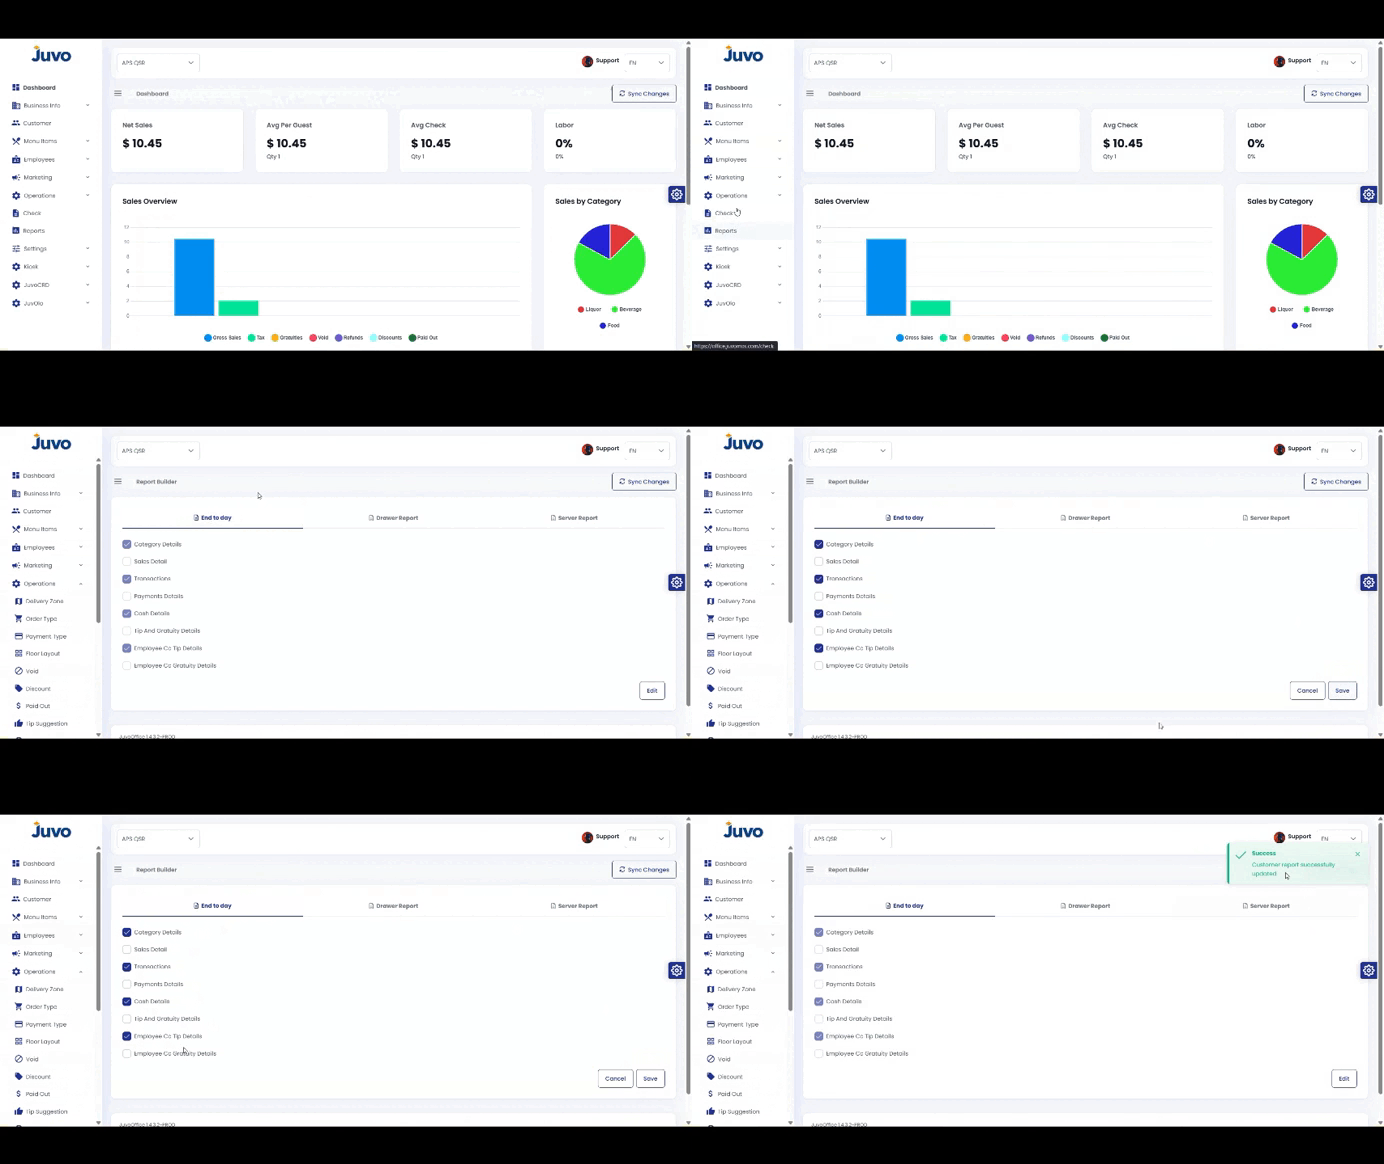
  • Operations → Report Builder POS

    Customize POS reports for daily operational needs.

    1. Open Operations → Report Builder POS.
    2. Choose a report.
    3. Click Edit.
    4. Customize the available settings.
    5. Review and click Save.
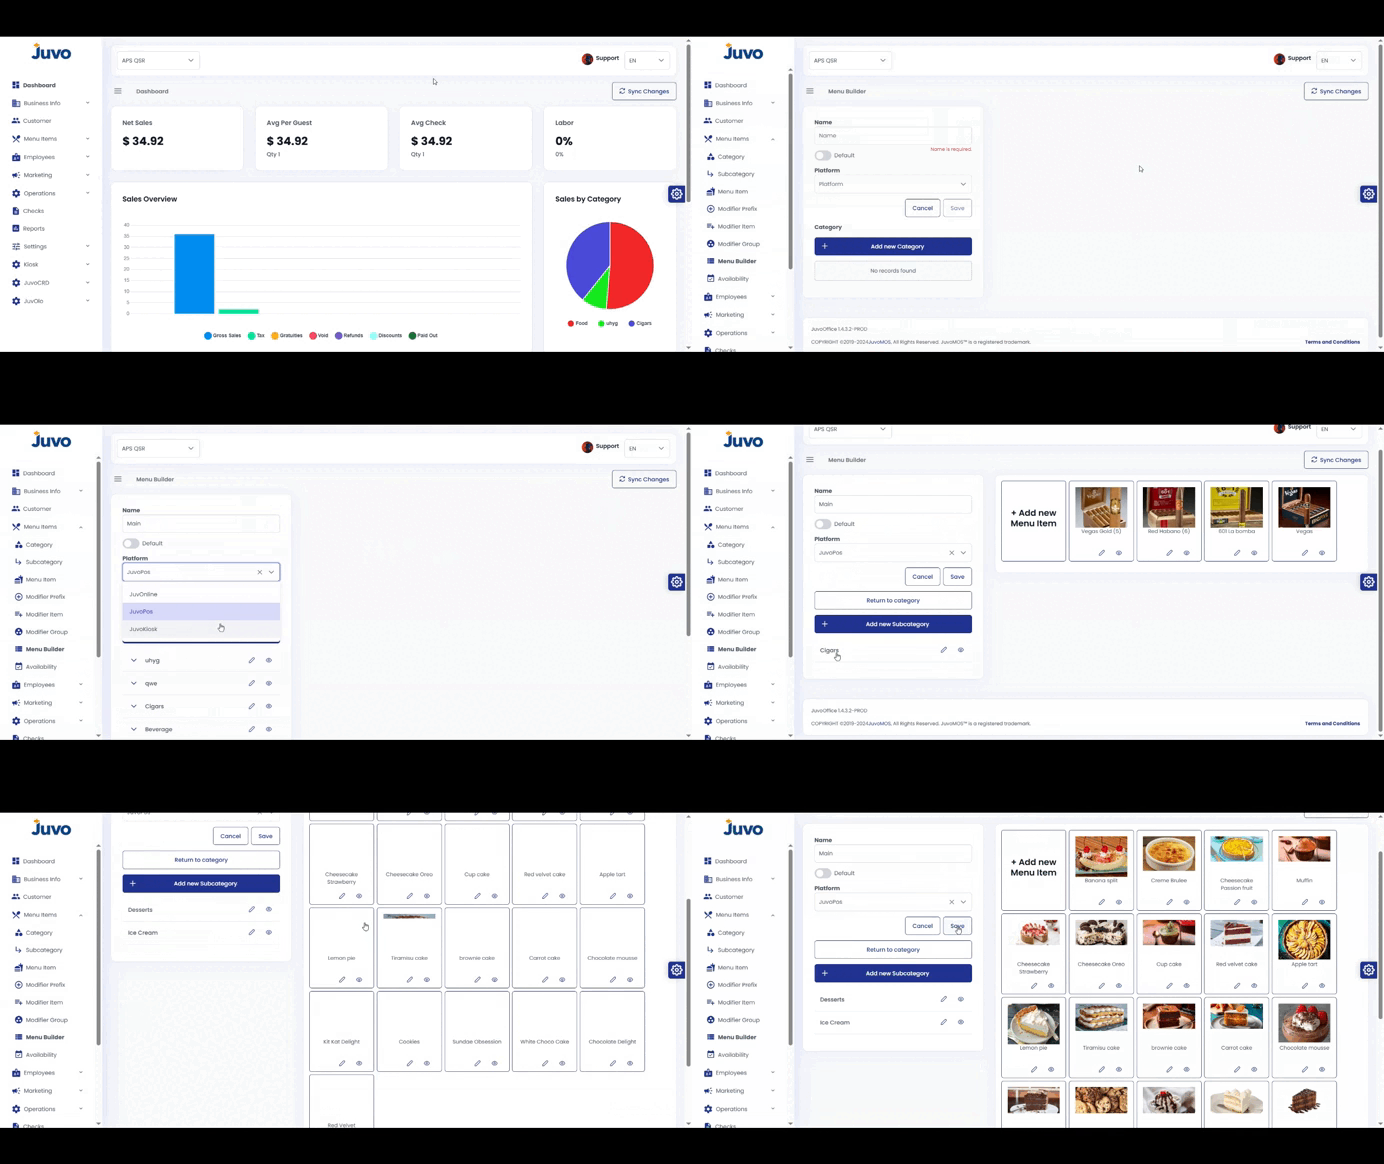
  • Menu Items → Menu Builder

    Customize the menu layout used by staff on POS and Kiosk.

    1. Open Menu Items → Menu Builder.
    2. Select an existing layout or create a new one.
    3. Use drag and drop to arrange categories, sections, and item buttons.
    4. Create categories, subcategories, or items when needed.
    5. Edit individual items and select whether the menu is Default.
    6. Click Save, then Publish or Push to Devices.
    7. Test the layout on one device before rolling it out.
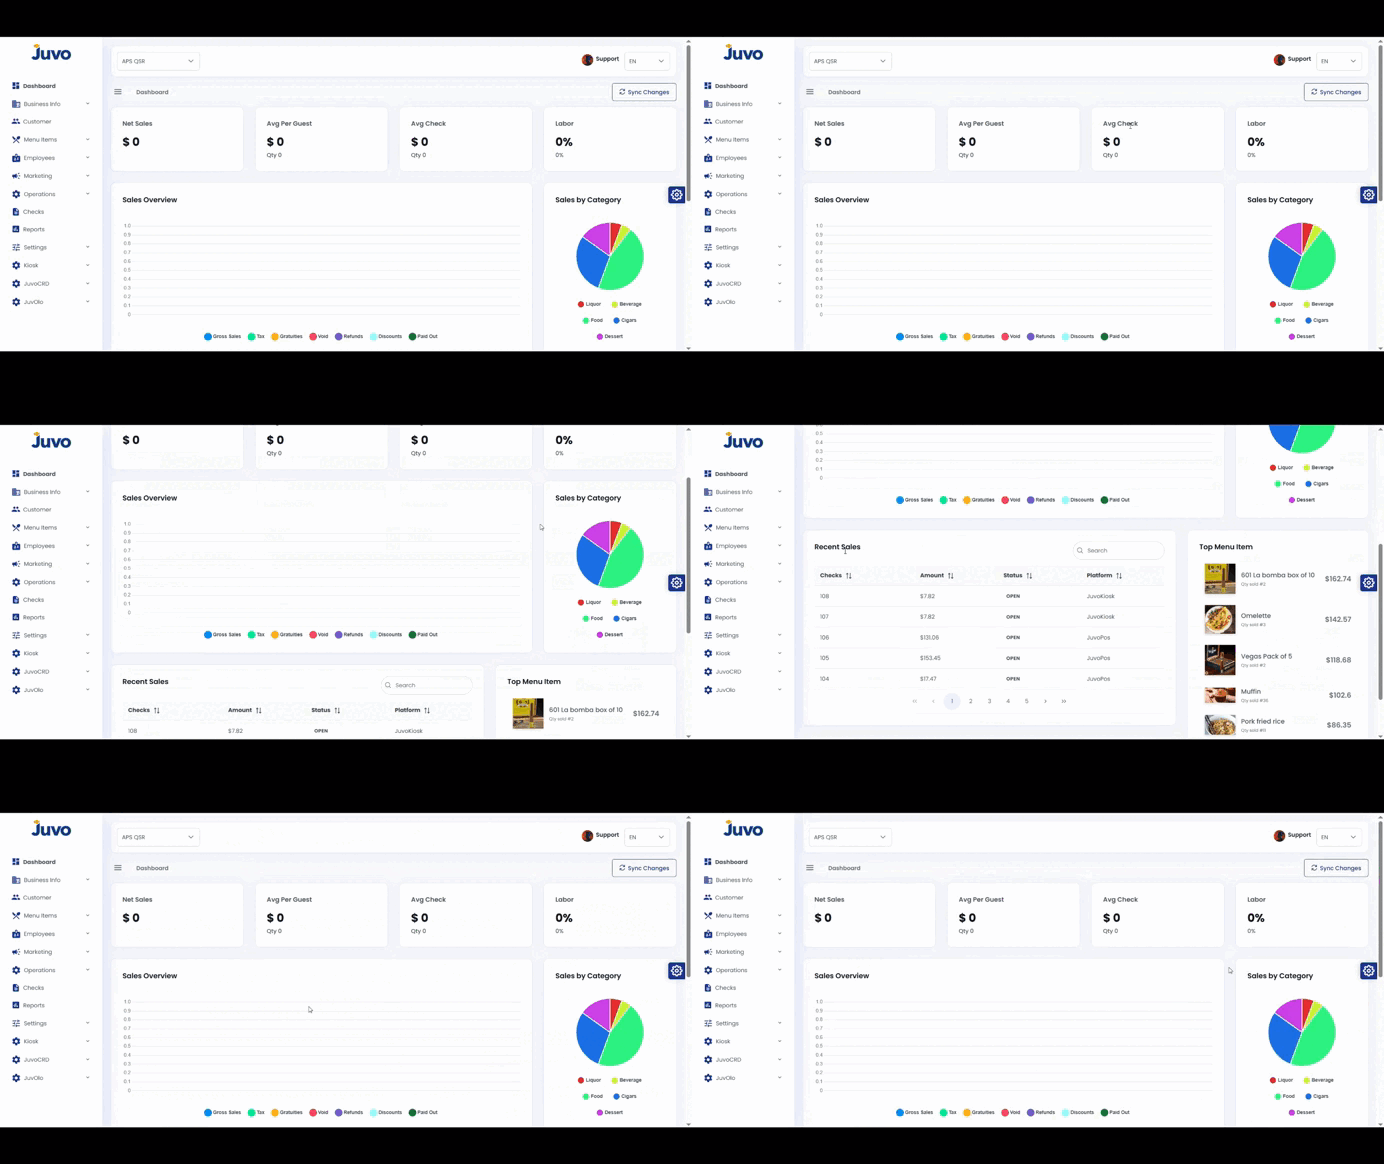
  • Dashboard → Overview

    Learn how to navigate the Juvo Back Office Dashboard and review key business indicators.

    1. Log in to Juvo Back Office.
    2. Click Dashboard in the left-hand menu.
    3. Review the key performance indicators and business information.
    4. Explore the available views and options.
    5. Use the Dashboard as a quick reference for daily store performance.

    Note: Focus on the indicators most relevant to your daily operations.

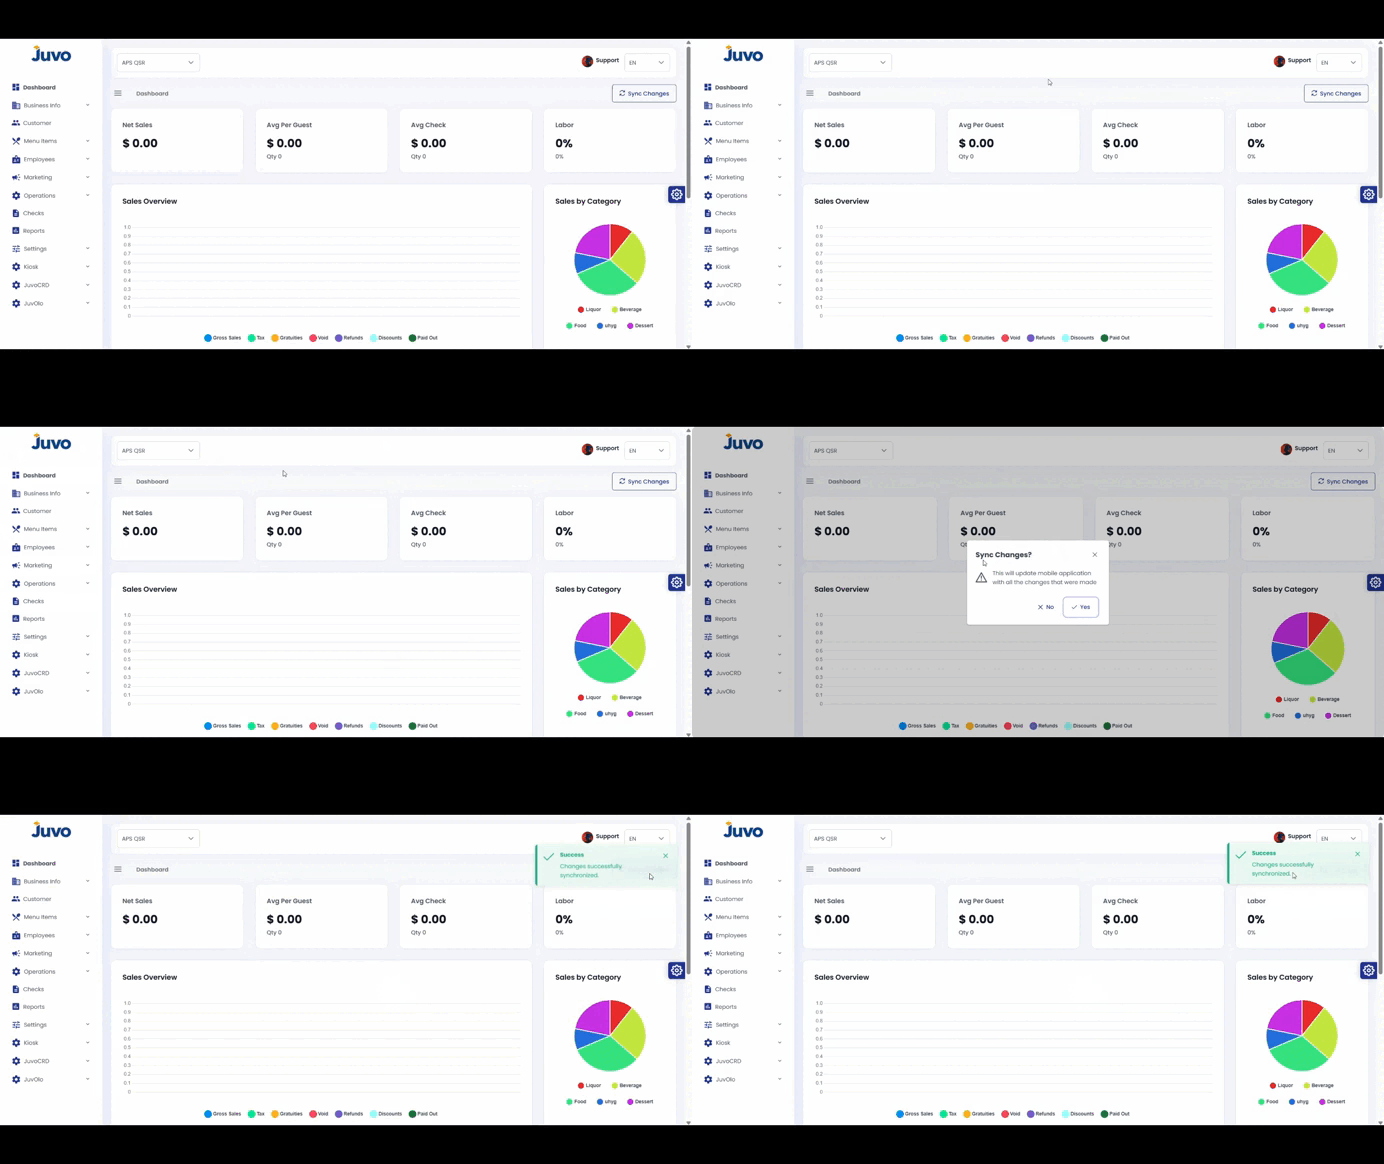
  • Juvo Back Office → Sync Changes

    Learn how to send updated Back Office information to the POS.

    1. Log in to Juvo Back Office.
    2. Go to the top-right corner near the User section.
    3. Click Sync Changes.
    4. Allow synchronization to complete.

    Note: Sync after making Back Office updates so the POS receives the latest information.