Author: marcoantonio

  • Juvo Back Office → Change Language

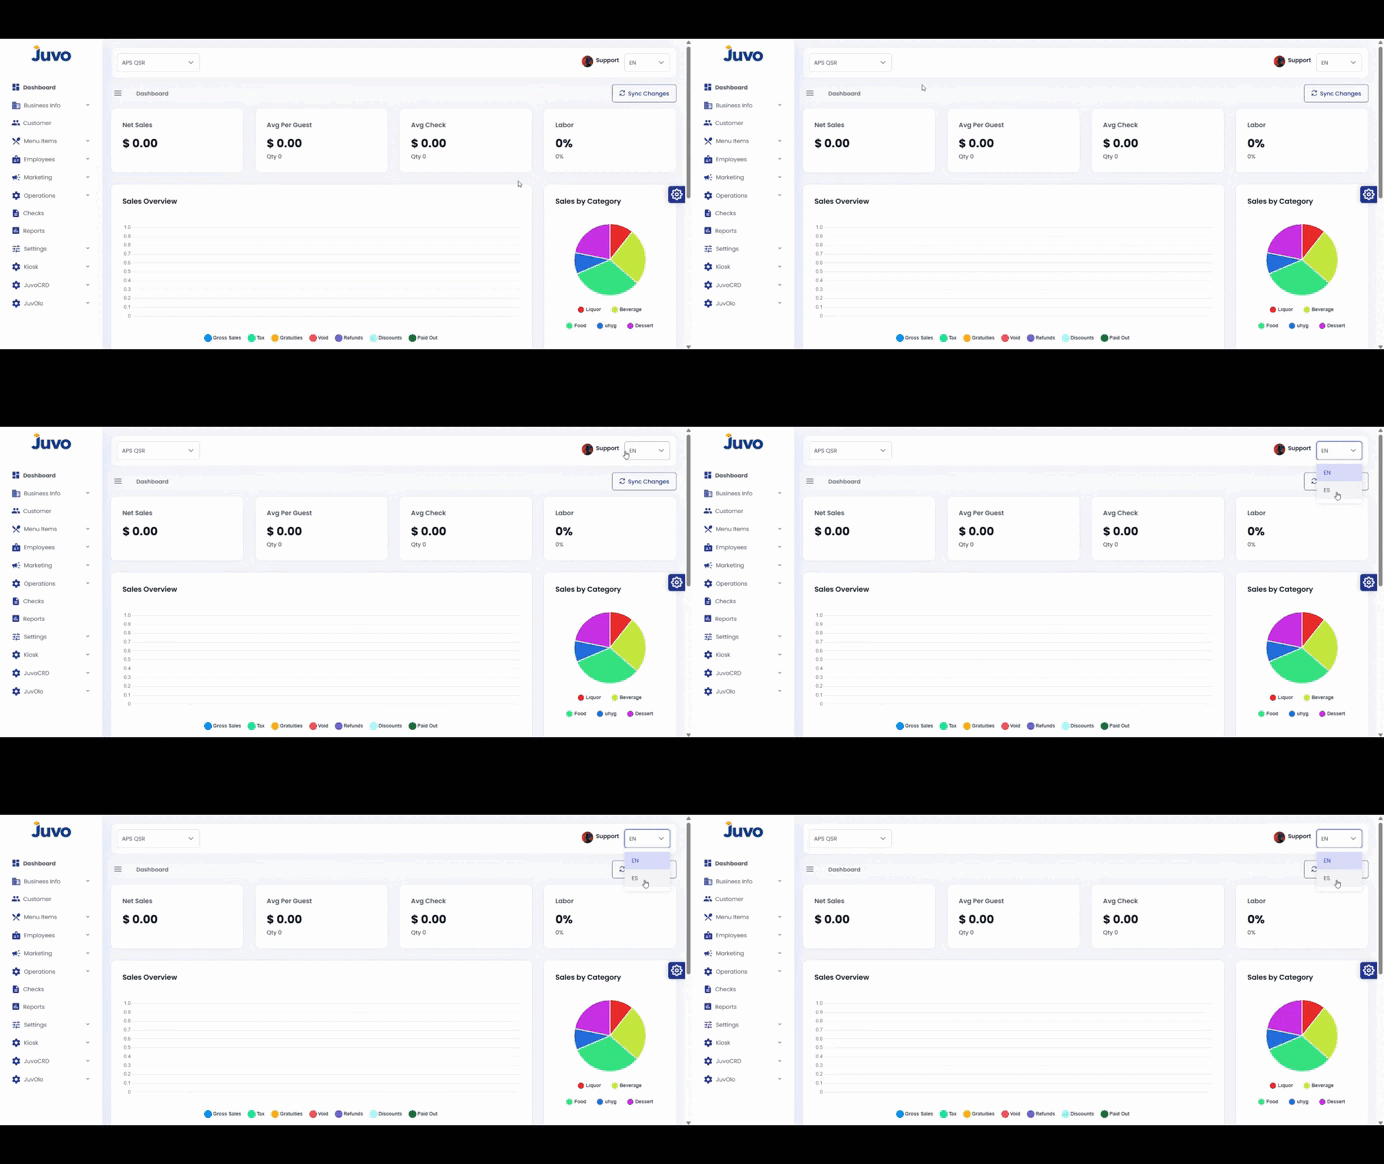
    Change the display language in Juvo Back Office.
    1. Log in to Juvo Back Office.
    2. Go to the top-right corner next to your profile.
    3. Click the language option.
    4. Select your preferred language.
    5. Verify that the interface changed.
  • Business Info → Store Info

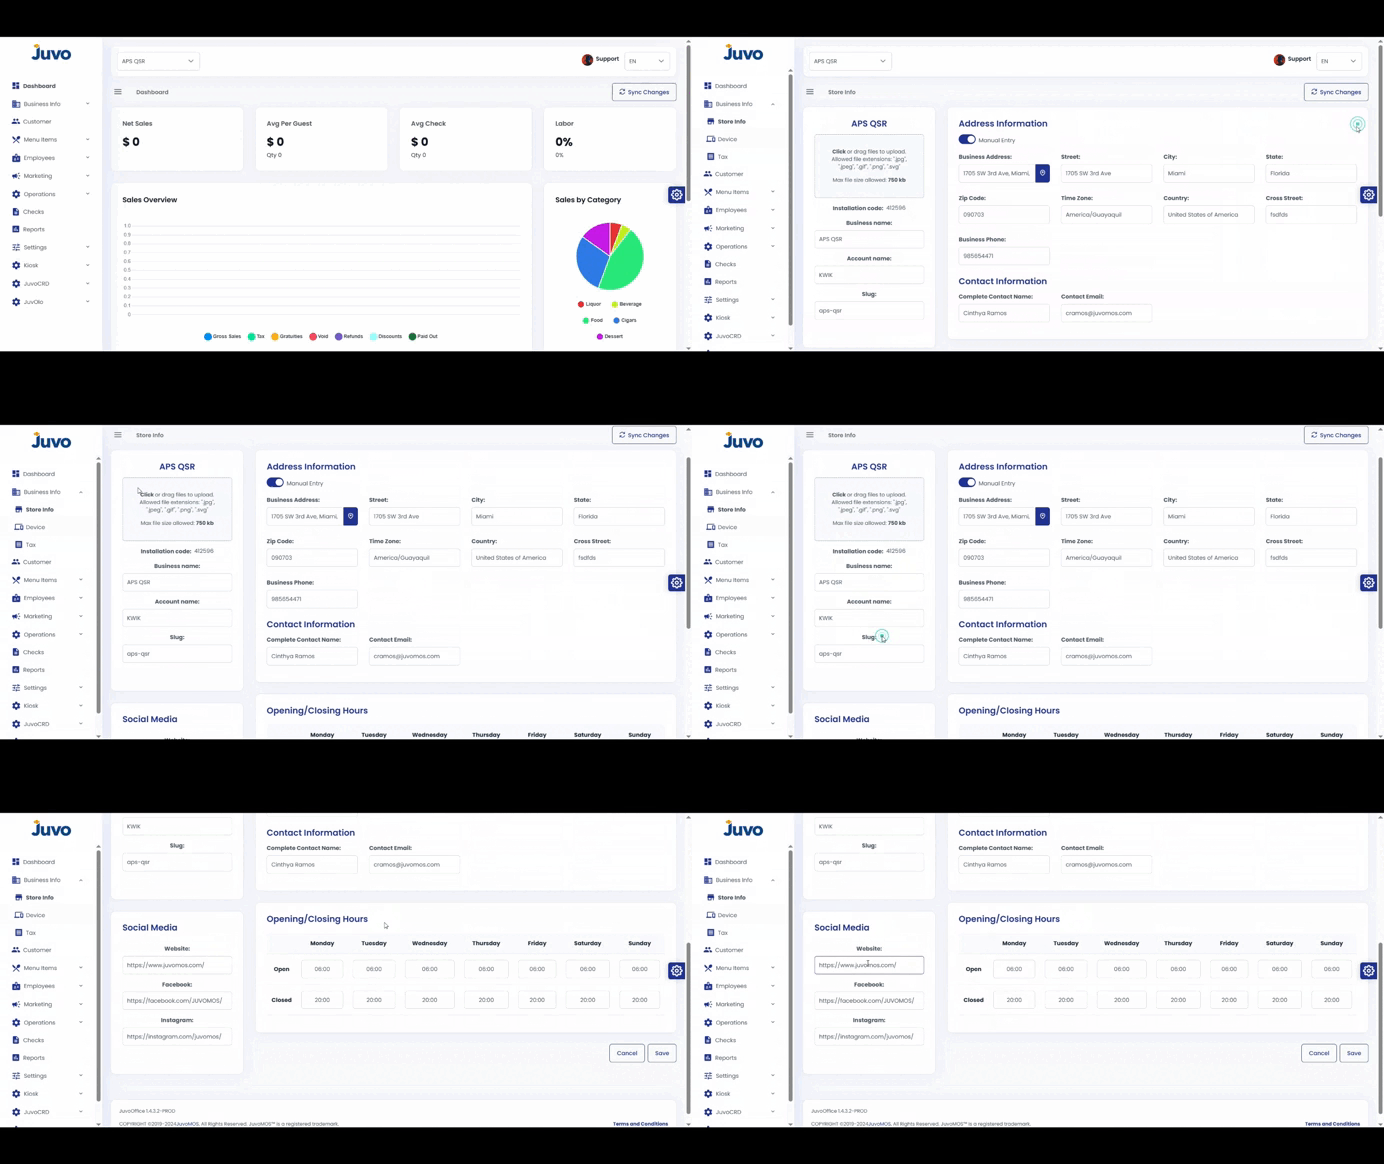
    View and update your store information in Juvo Back Office.

    1. Open Business Info.
    2. Select Store Info.
    3. Click Edit in the top-right corner.
    4. Update the name, address, phone, email, or other details.
    5. Review and click Save.

    Note: Confirm that the information is correct before saving.
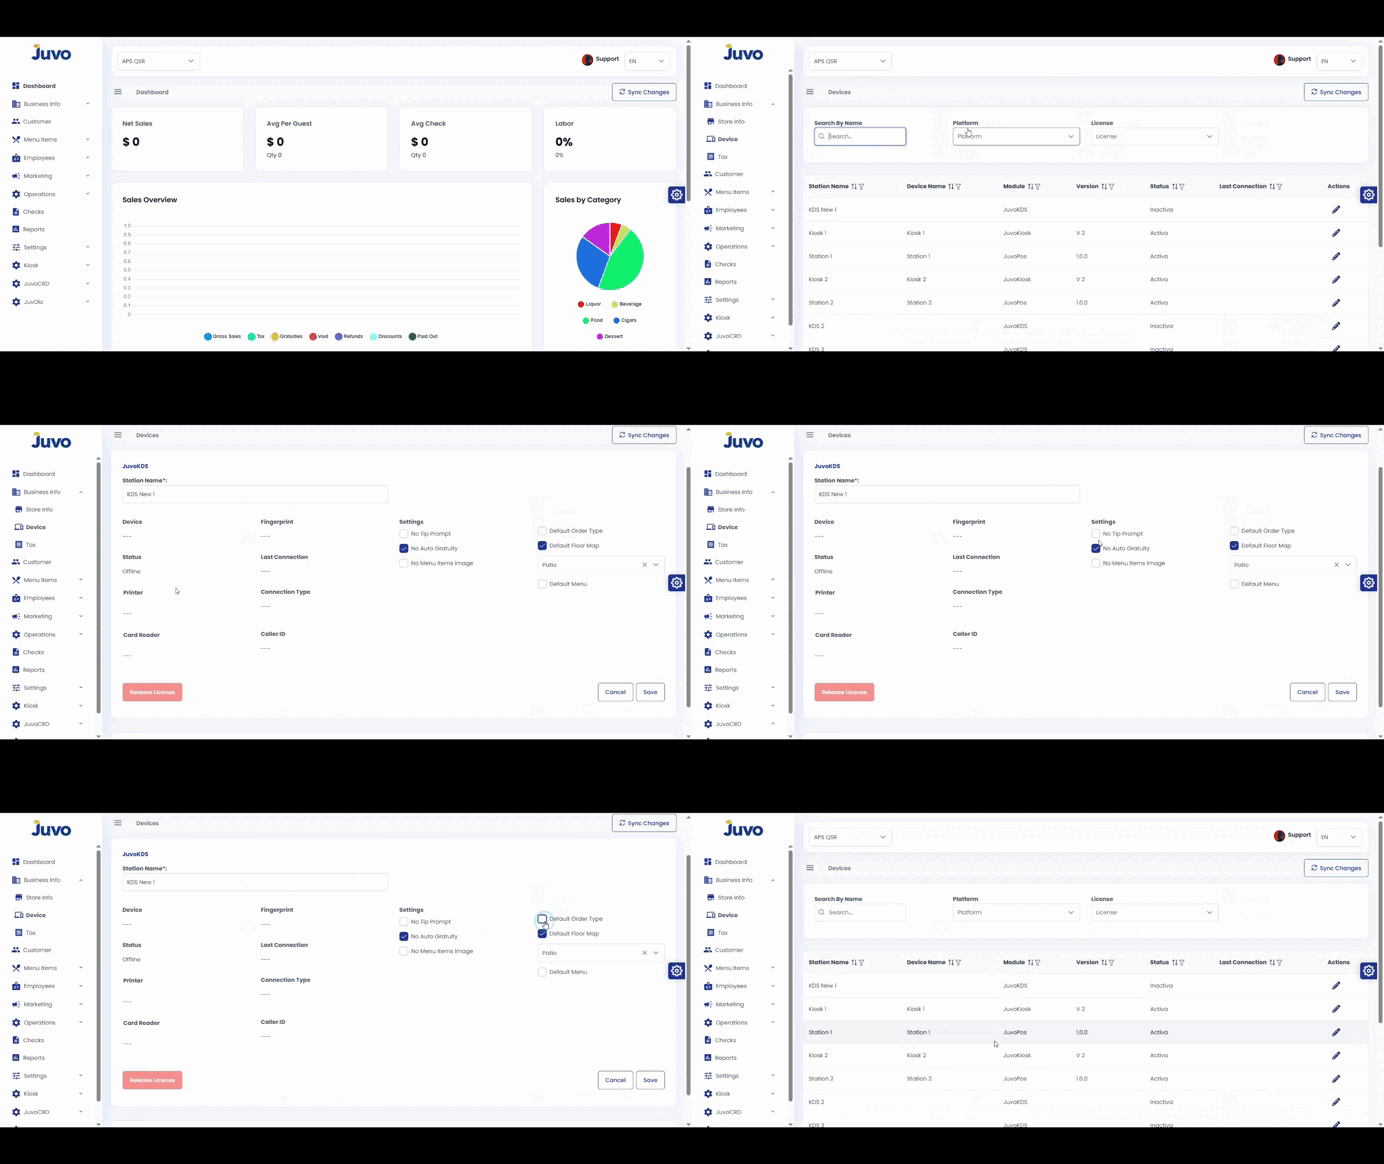
  • Business Info → Devices

    Manage registered devices in Juvo Back Office.
    1. Open Business Info.
    2. Select Devices.
    3. Filter if needed and select a device.
    4. Edit the device name, settings, release license, default status, or other available options.
    5. Click Save.
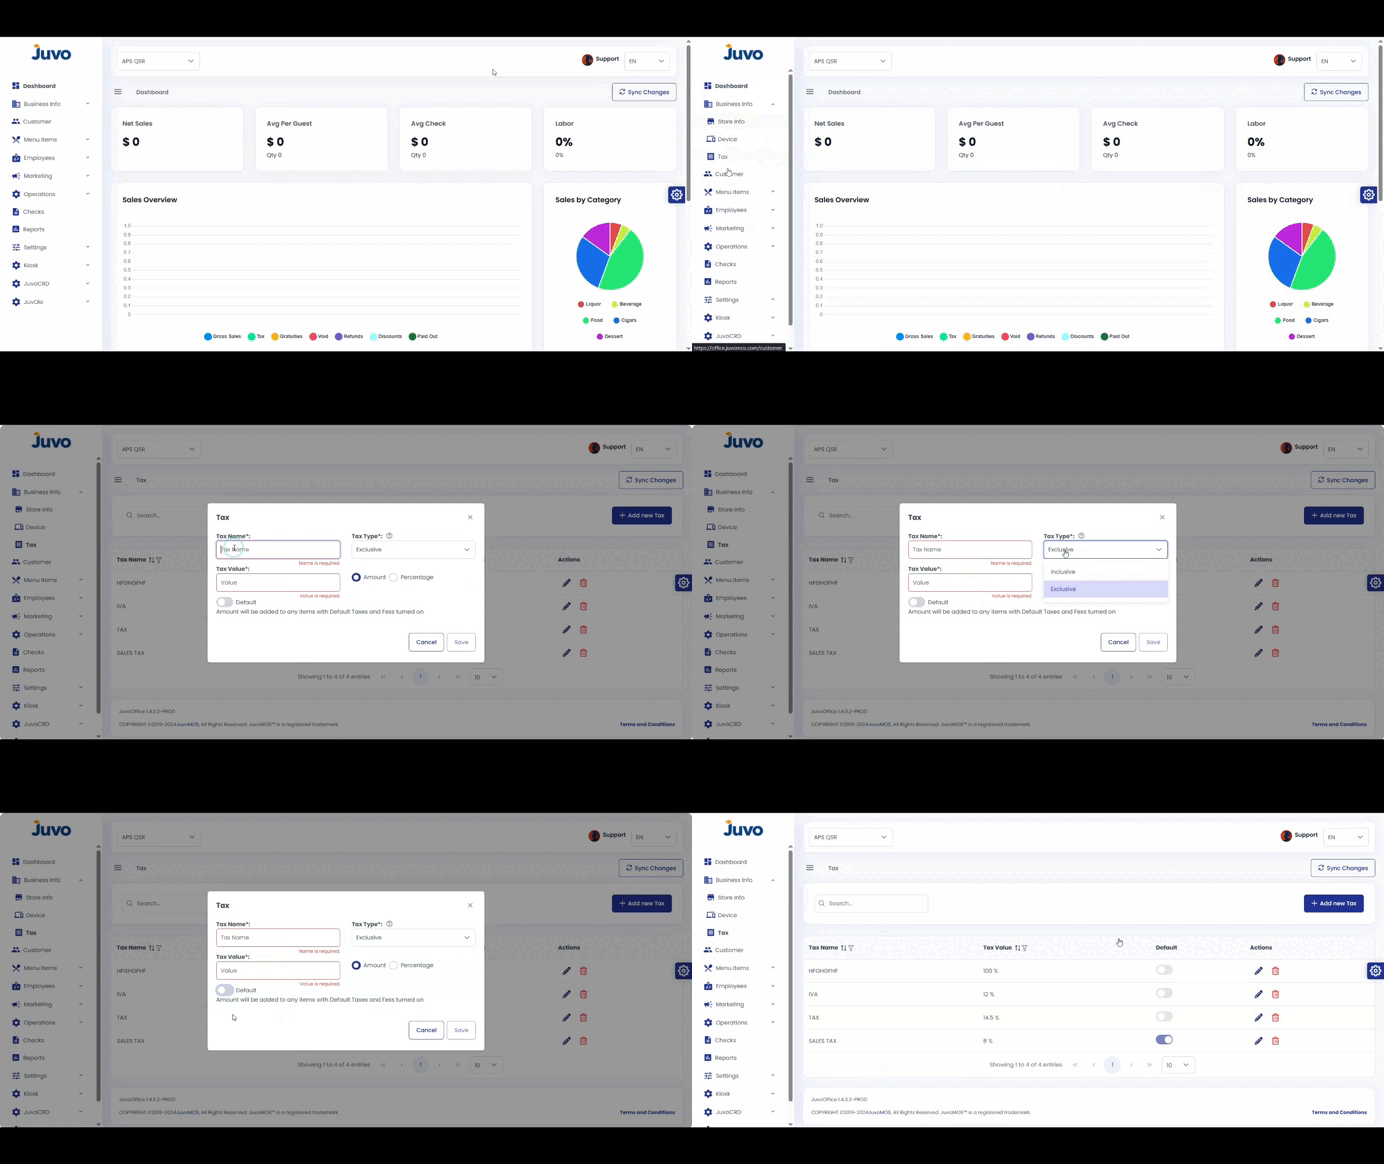
  • Business Info → Tax

    Create or update tax configurations.

    1. Go to Business Info → Tax.
    2. Click Add Tax or Edit.
    3. Enter the tax name and percentage or amount.
    4. Mark Default if it should apply to all newly created items.
    5. Click Save.
  • Customers

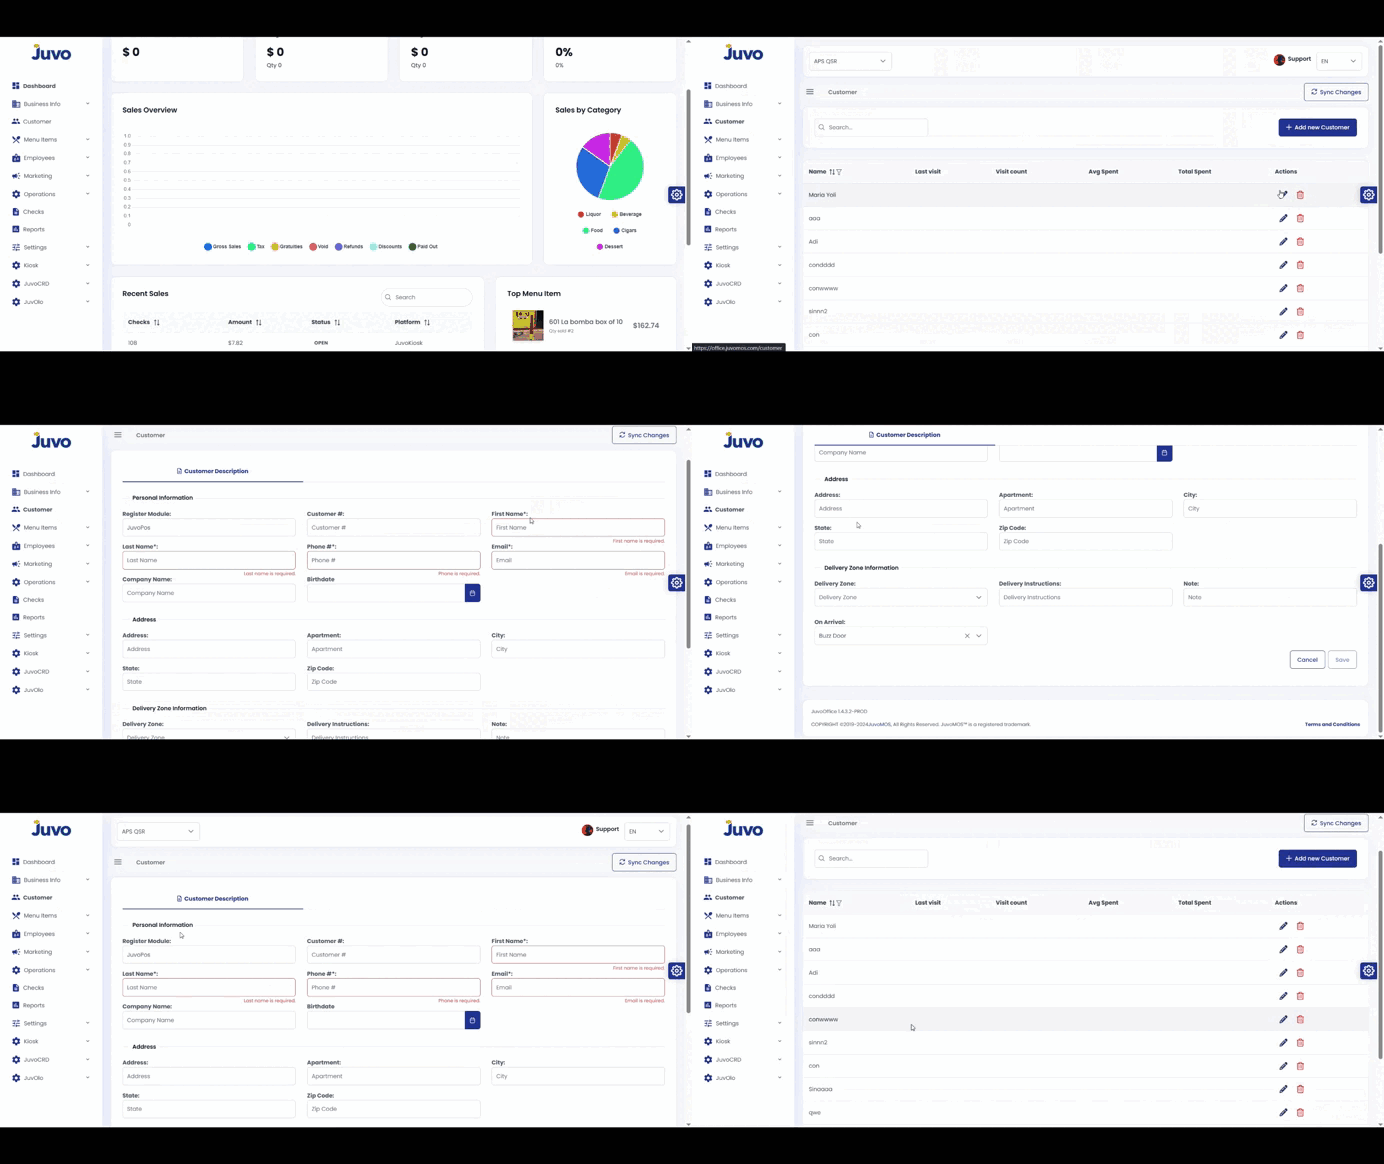
    Create and manage customer profiles.

    1. Open Customers.
    2. Click Add Customer.
    3. Enter the name, email, phone, address, and notes.
    4. Click Save.
    5. Use the search bar to find the customer later.
  • Menu Items → Add Category and Subcategory

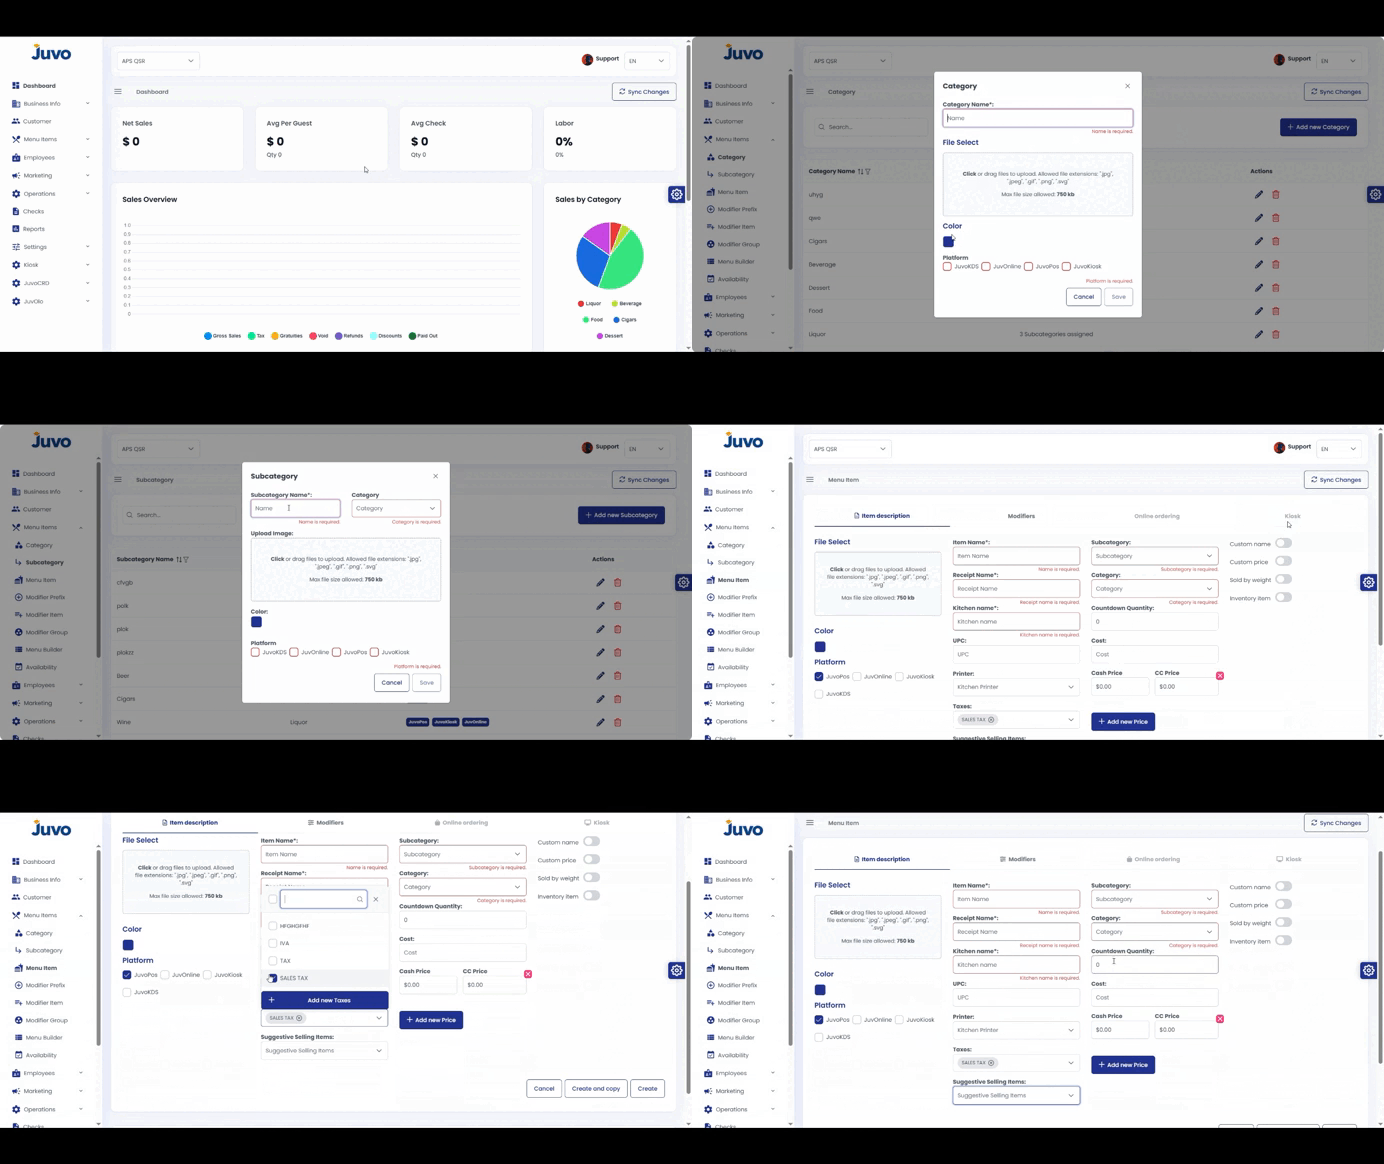
    Create menu categories and subcategories.
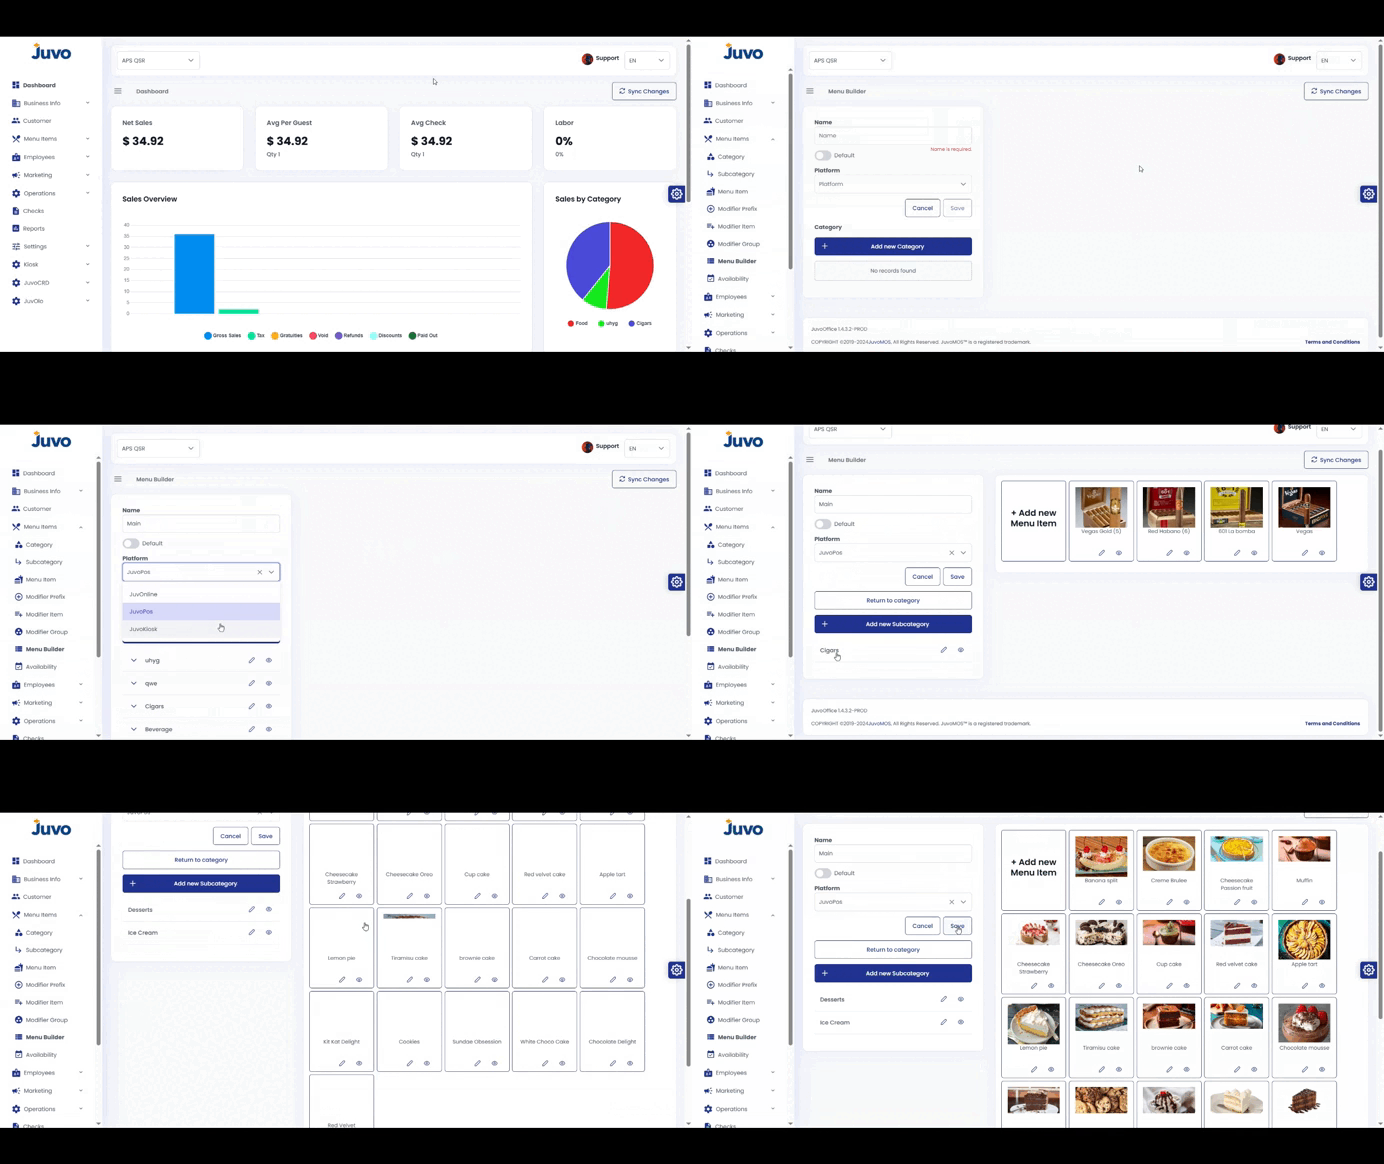
    1. Open Menu Items and select Category or Sub Category.
    2. Click Add Category or Add Sub Category.
    3. Enter the name, such as Drinks or Food.
    4. Click Save.
    5. Repeat as needed.
  • Menu Items → Add Menu Item

    Create and configure a menu item.

    1. Go to Menu Items → Menu Item.
    2. Click Add Item.
    3. Enter the product name, price, category, tax, and optional image.
    4. Configure suggestive selling items, with up to three suggestions for CDS.
    5. Configure modifier groups when needed.
    6. Enable Kiosk or OLO and choose default or specific items when applicable.
    7. Click Save.
  • Menu Items → Modifiers

    Create modifier prefixes, items, and groups.
    1. Open Menu Items.
    2. Select Modifier Prefix, Modifier Item, or Modifier Group.
    3. Create prefixes such as No, Extra, or Add.
    4. Create modifier items such as Cheese or Bacon.
    5. Combine items into modifier groups such as Toppings.
    6. Click Save after each setup.
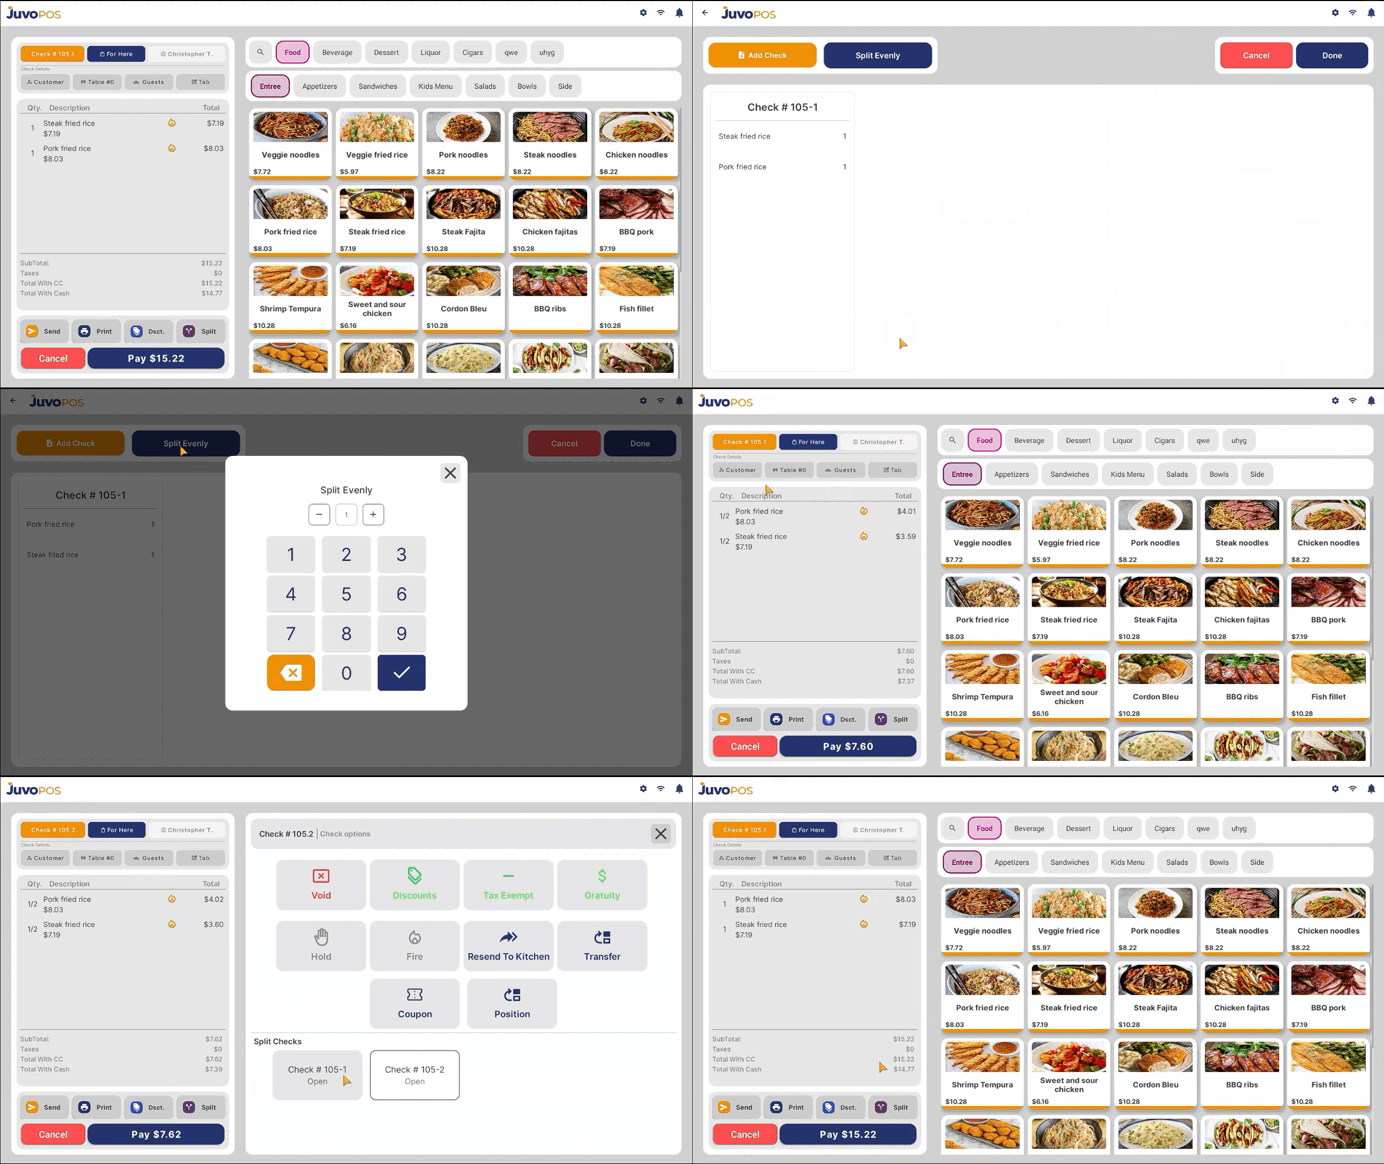
  • Splitting an Item in POS

    To split an item in the POS:

    1. Select the item you want to split.
    2. Tap the Split button.
    3. Press and hold the item until the split option appears.
    4. Enter the number of splits you want.
    5. The item will now be split into the selected number of portions.

    If you want to move items to other checks:

    1. Tap Add Check to create another check.
    2. Drag and drop the items to the desired check.
    3. You can verify that the items were split correctly by switching between the different checks.

    The items are now successfully split between the checks.
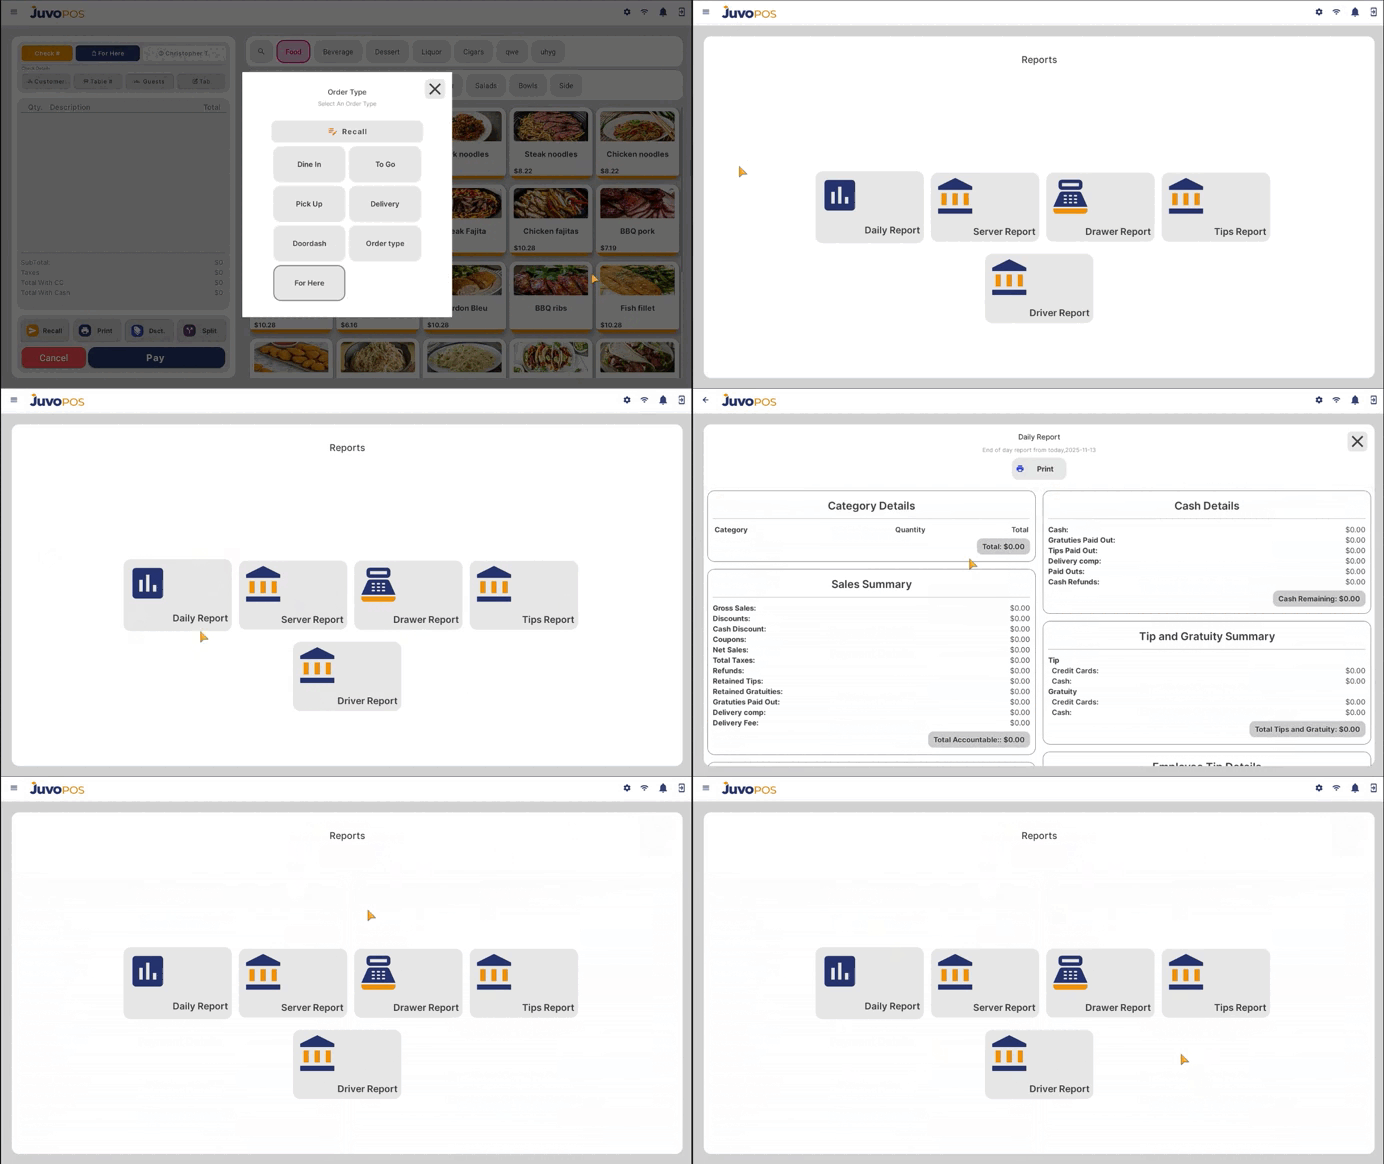
  • Reports – Juvo POS

    In this guide, we will learn how to access and review daily business reports in Juvo POS.

    1. From the main POS screen, open the Functions menu.
    2. Select the Reports section to access the available reports.
    3. Review your daily business information to monitor your store’s activity and performance.
    4. If needed, use the available print option to print the report for your records.

    Juvo POS makes it easy to access your daily business reports directly from the POS, helping you review important business information and keep track of your daily operations.