Author: marcoantonio

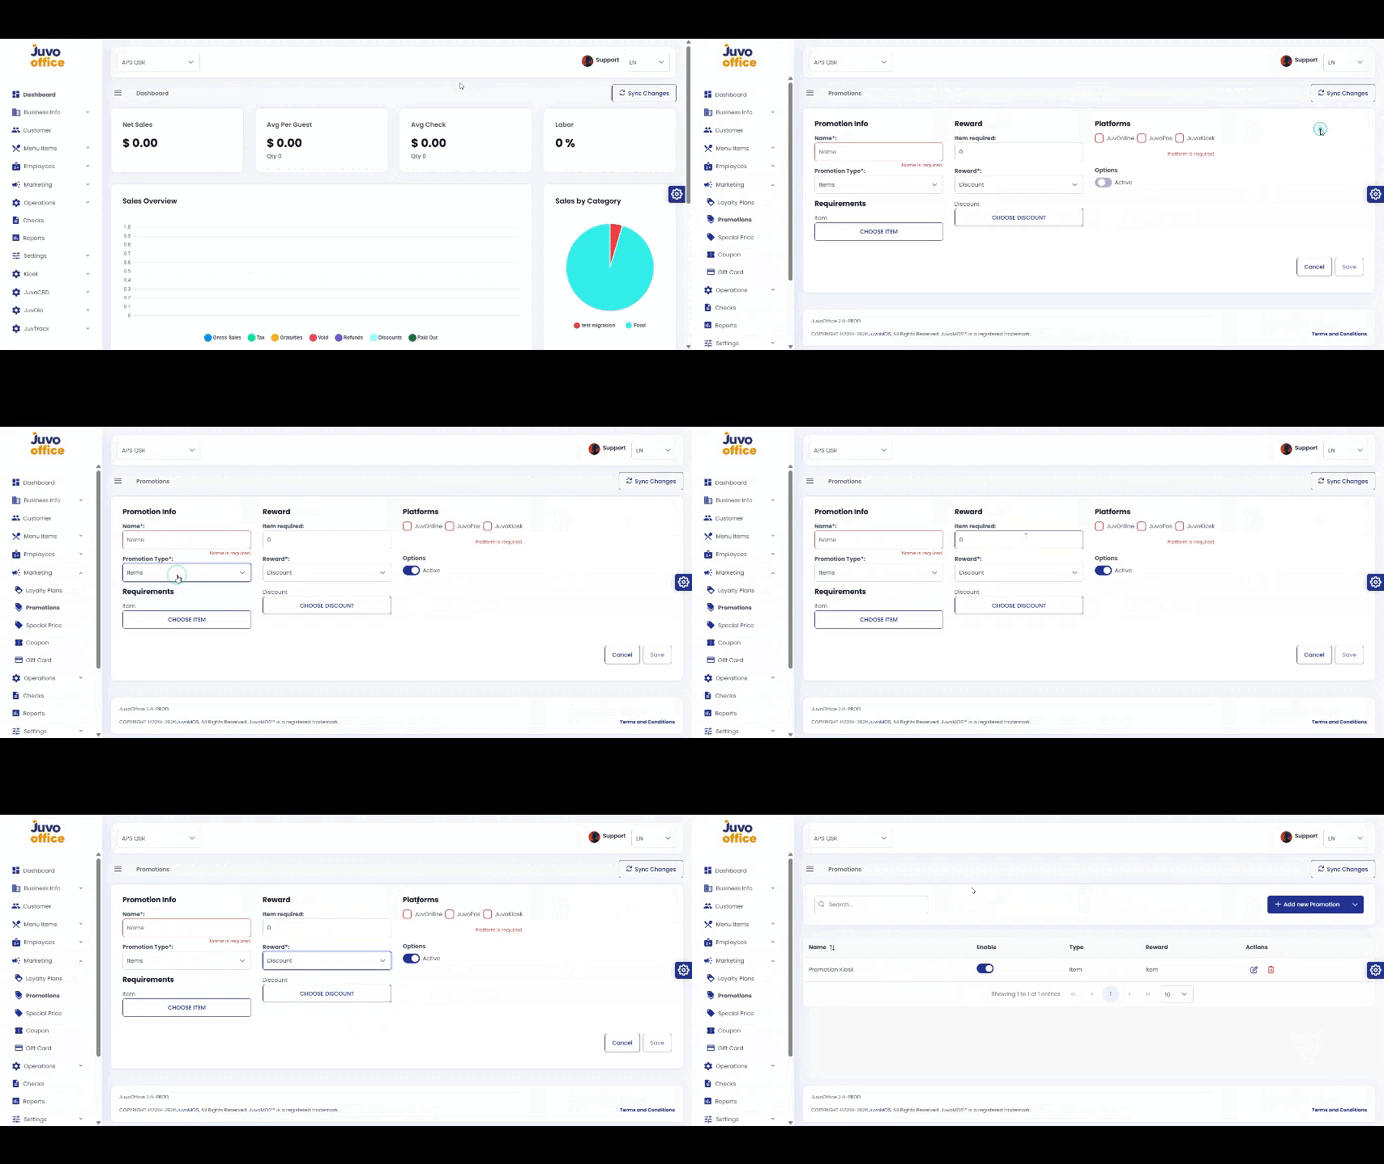
  • Marketing → Promotions

    Create promotions with requirements and rewards.
    1. Open Marketing → Promotions.
    2. Click Add Promotion.
    3. Enter the promotion name and type.
    4. Configure requirements and reward.
    5. Select POS, OLO, or KIOSK.
    6. Review the settings and Active/Inactive status.
    7. Save.
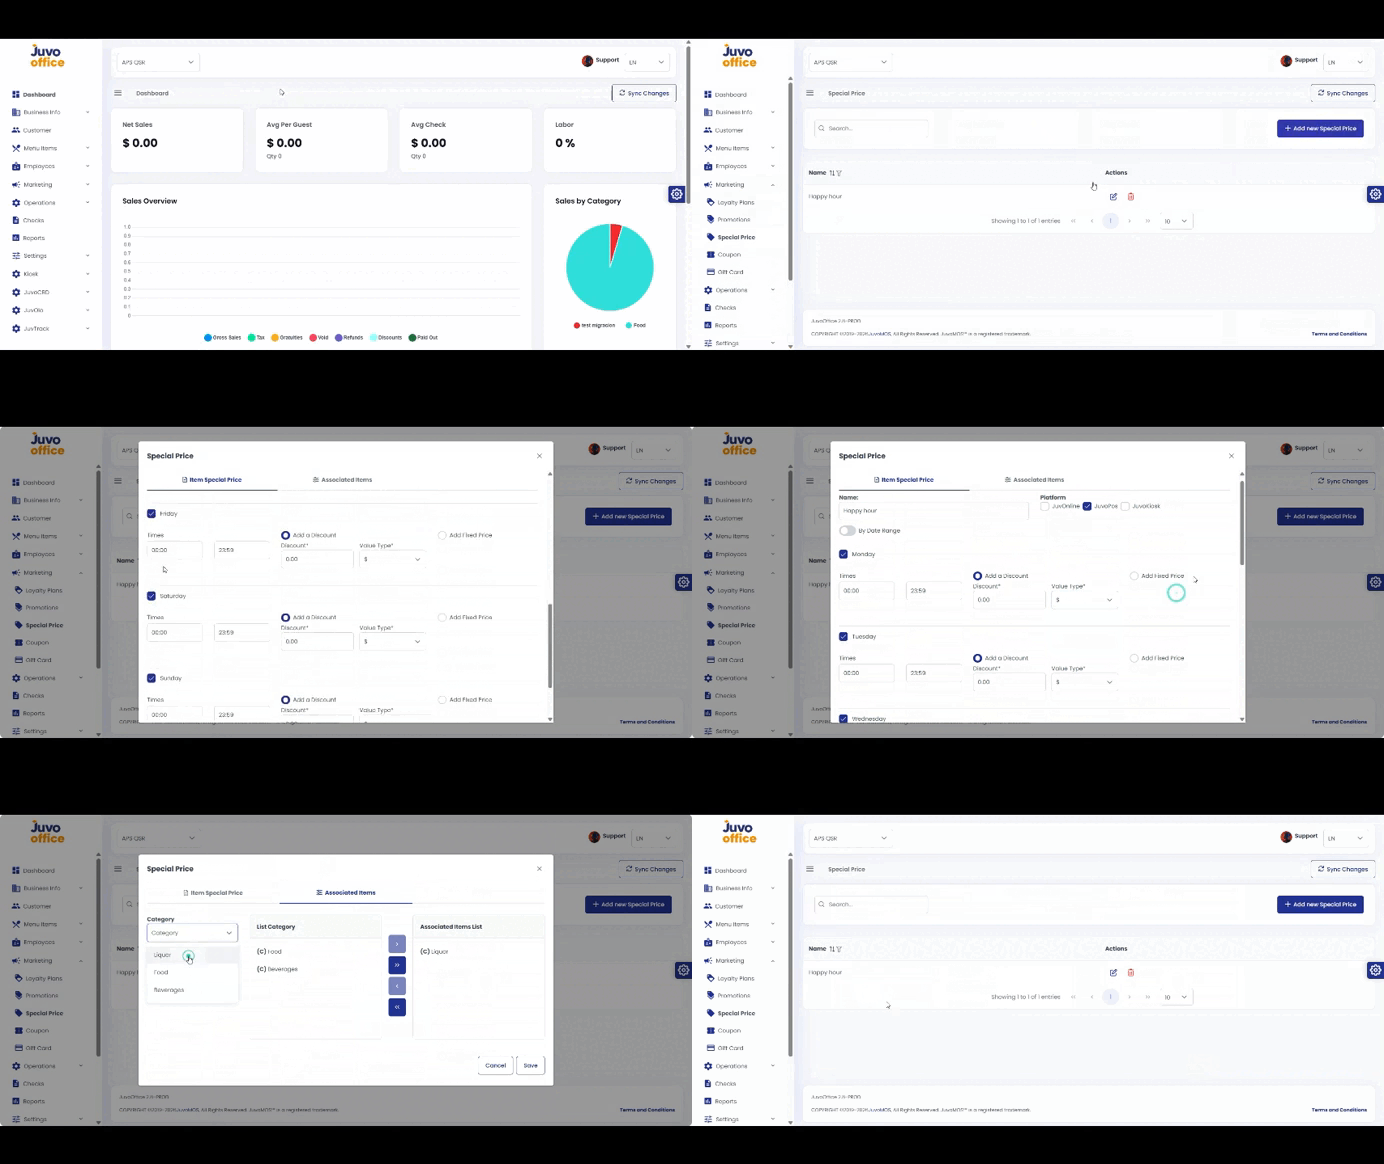
  • Marketing → Special Price

    Create scheduled special prices such as Happy Hour offers.
    1. Open Marketing → Special Price.
    2. Create a configuration and enter its name.
    3. Select the platforms.
    4. Set a date range or days of the week and a time range.
    5. Choose Amount, Percentage, or Fixed Price.
    6. Select categories, subcategories, or menu items.
    7. Review and click Save.
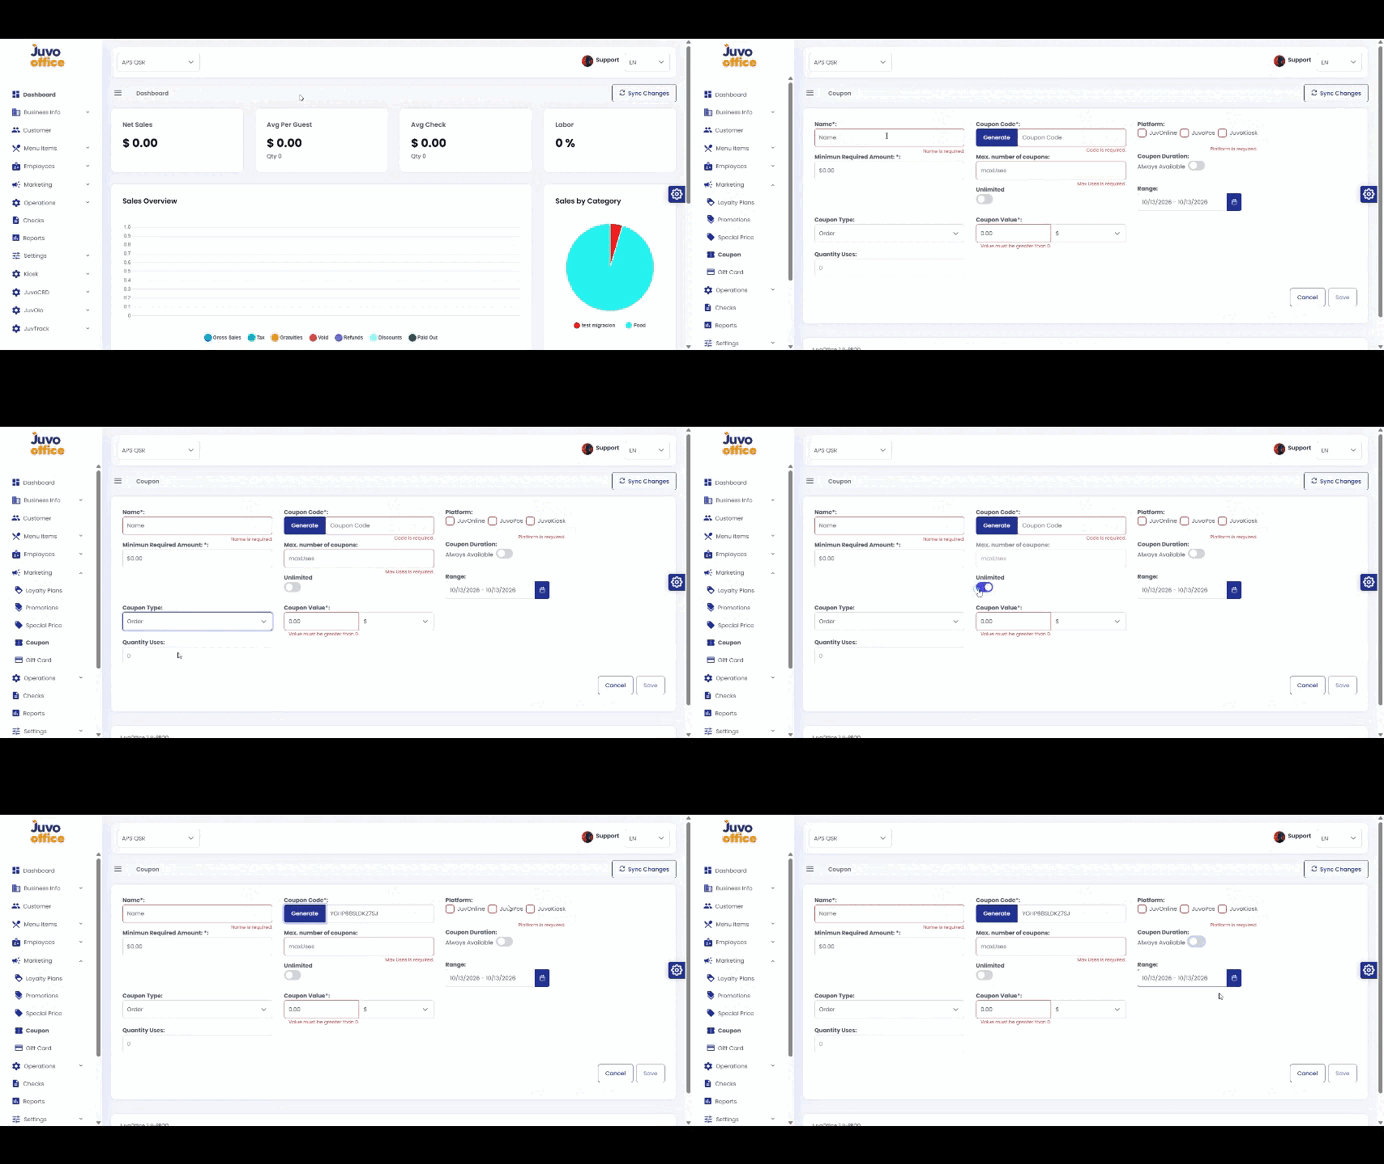
  • Marketing → Coupons

    Create coupons with discount, usage, and availability rules.
    1. Open Marketing → Coupons.
    2. Enter the coupon name and minimum requirement.
    3. Select the coupon type.
    4. Set quantity and maximum uses when applicable.
    5. Choose a fixed amount or percentage value.
    6. Select the available platforms.
    7. Choose Always Available or a date range.
    8. Review and click Save.
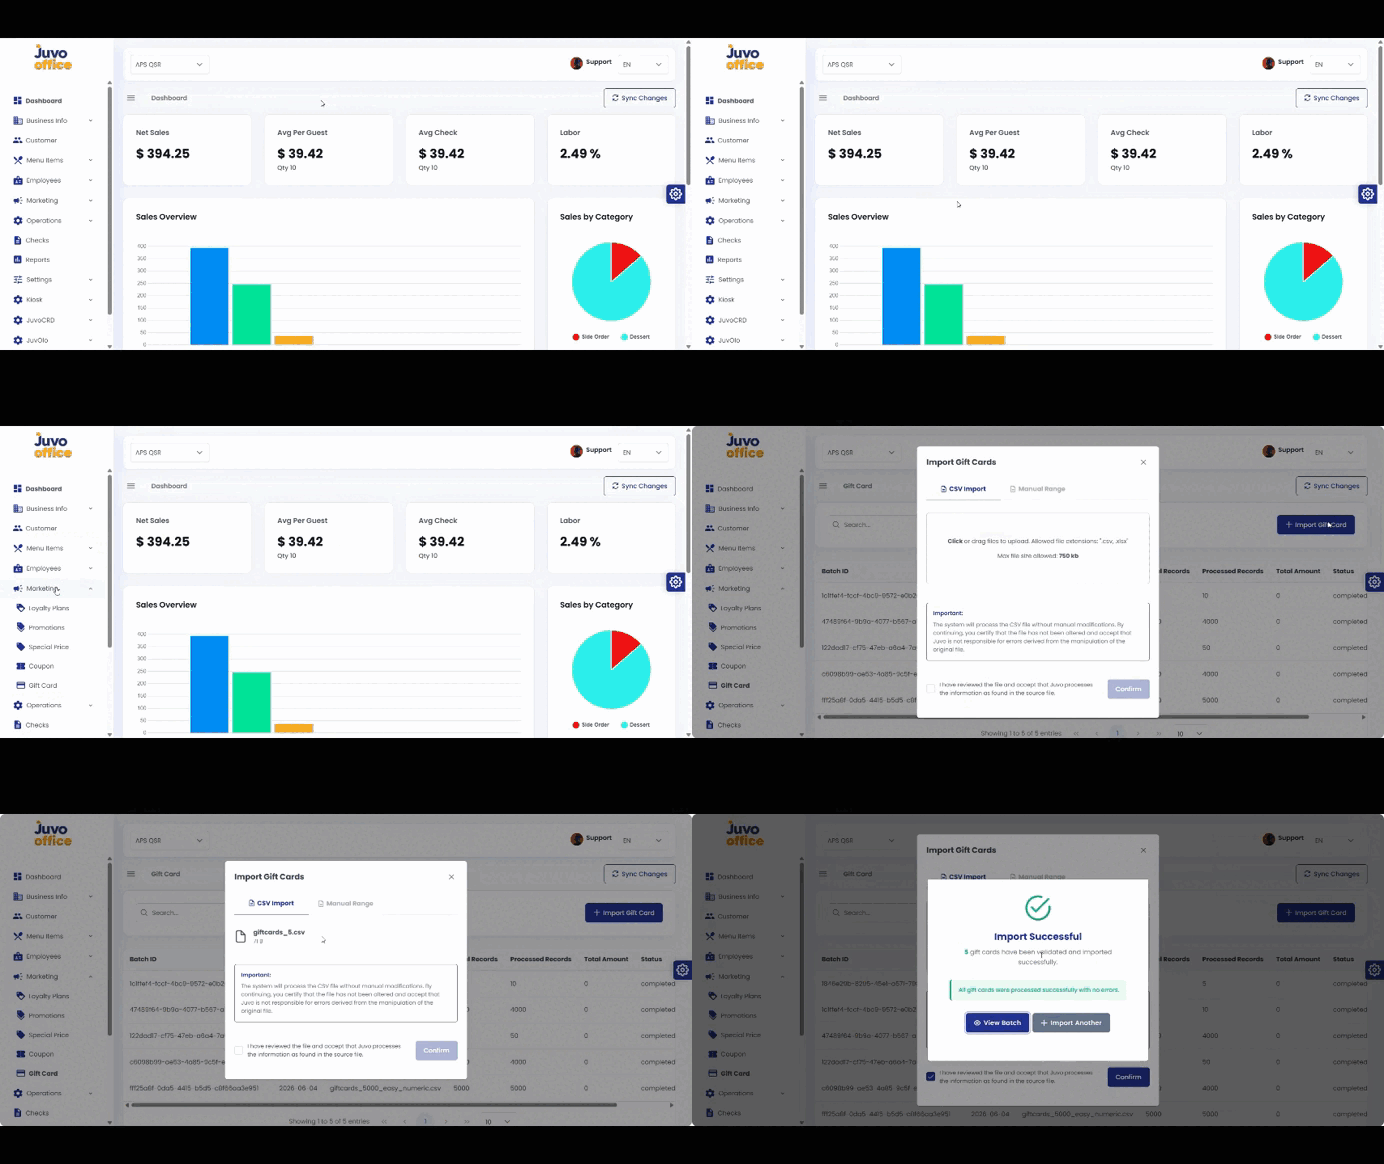
  • Marketing → Gift Cards

    Upload gift card information using a CSV file.
    1. Open Marketing → Gift Cards.
    2. Prepare a correctly formatted CSV with the required information, such as gift card numbers.
    3. Upload the CSV file.
    4. Verify the information before completing the process.
  • Operations → Delivery Zone

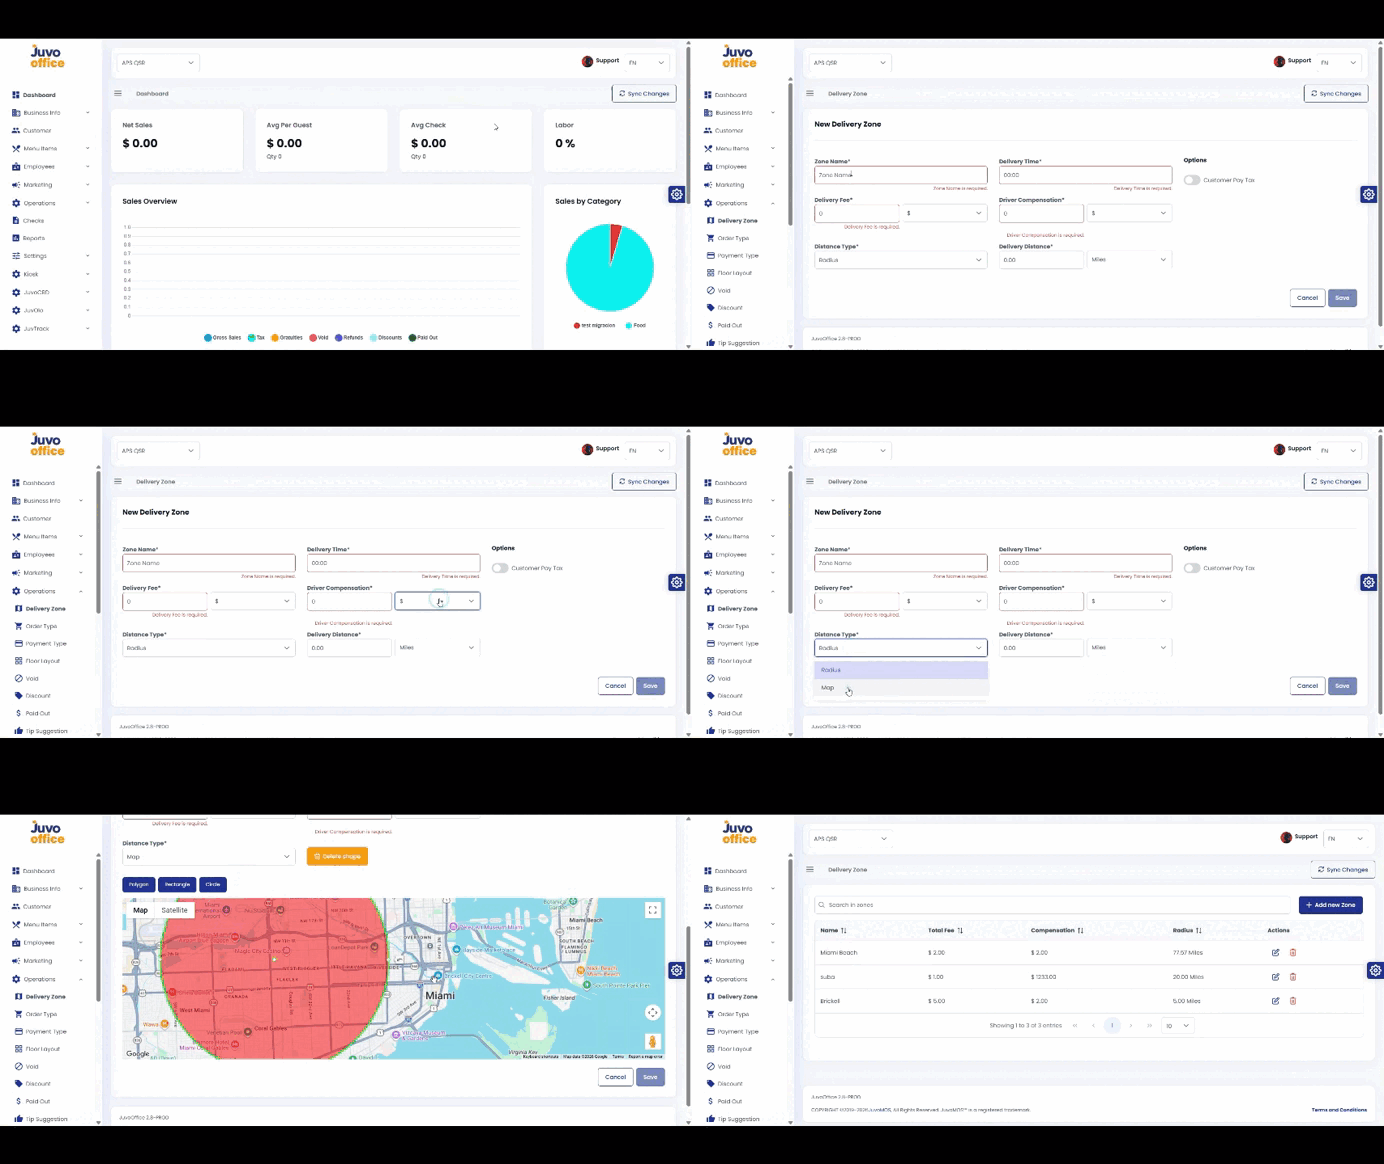
    Configure delivery areas, fees, driver compensation, and estimated delivery times.
    1. Open Operations → Delivery Zone.
    2. Enter a zone name.
    3. Set the zone fee as an amount or percentage.
    4. Configure driver compensation.
    5. Enter the approximate delivery time.
    6. Choose Miles or Kilometers.
    7. Draw the delivery boundaries on the map.
    8. Configure whether customers pay tax.
    9. Review and save.
  • Operations → Order Type

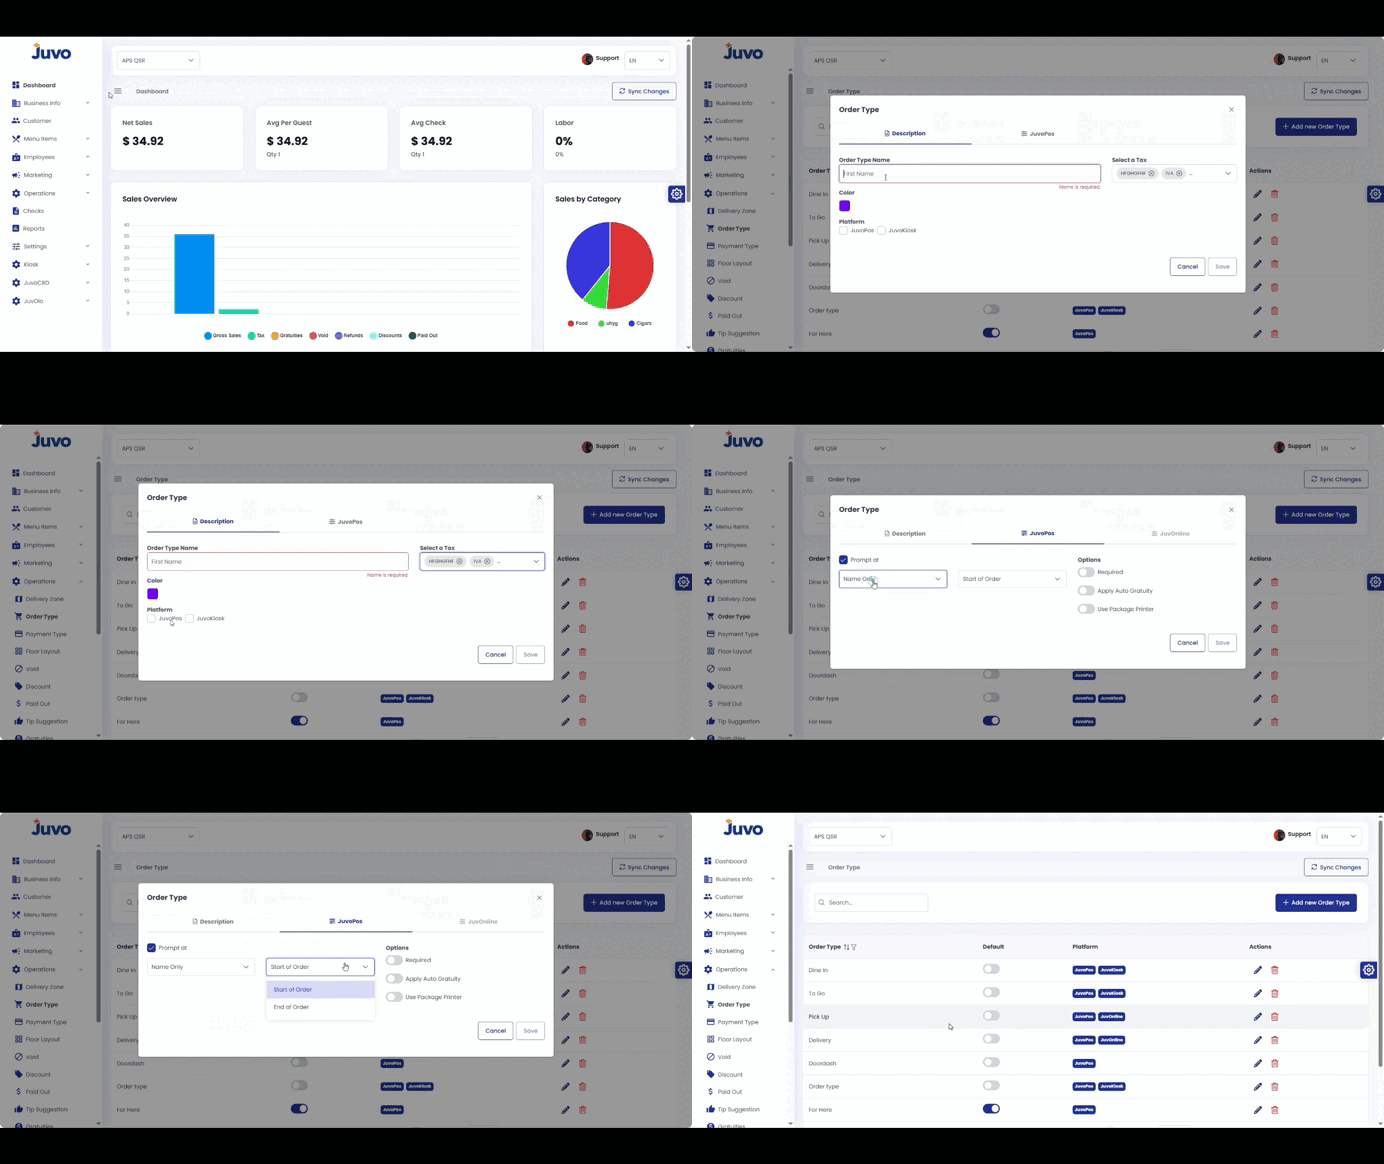
    Create order types such as Dine In, Takeout, or Delivery.
    1. Open Operations → Order Type.
    2. Click Add New Order Type.
    3. Enter the name.
    4. Select the tax configuration and color.
    5. Select the available platforms.
    6. Configure POS options such as Customer Lookup, Required, Auto Gratuity, and Package Printer.
    7. Review and save.
  • Operations → Payment Type

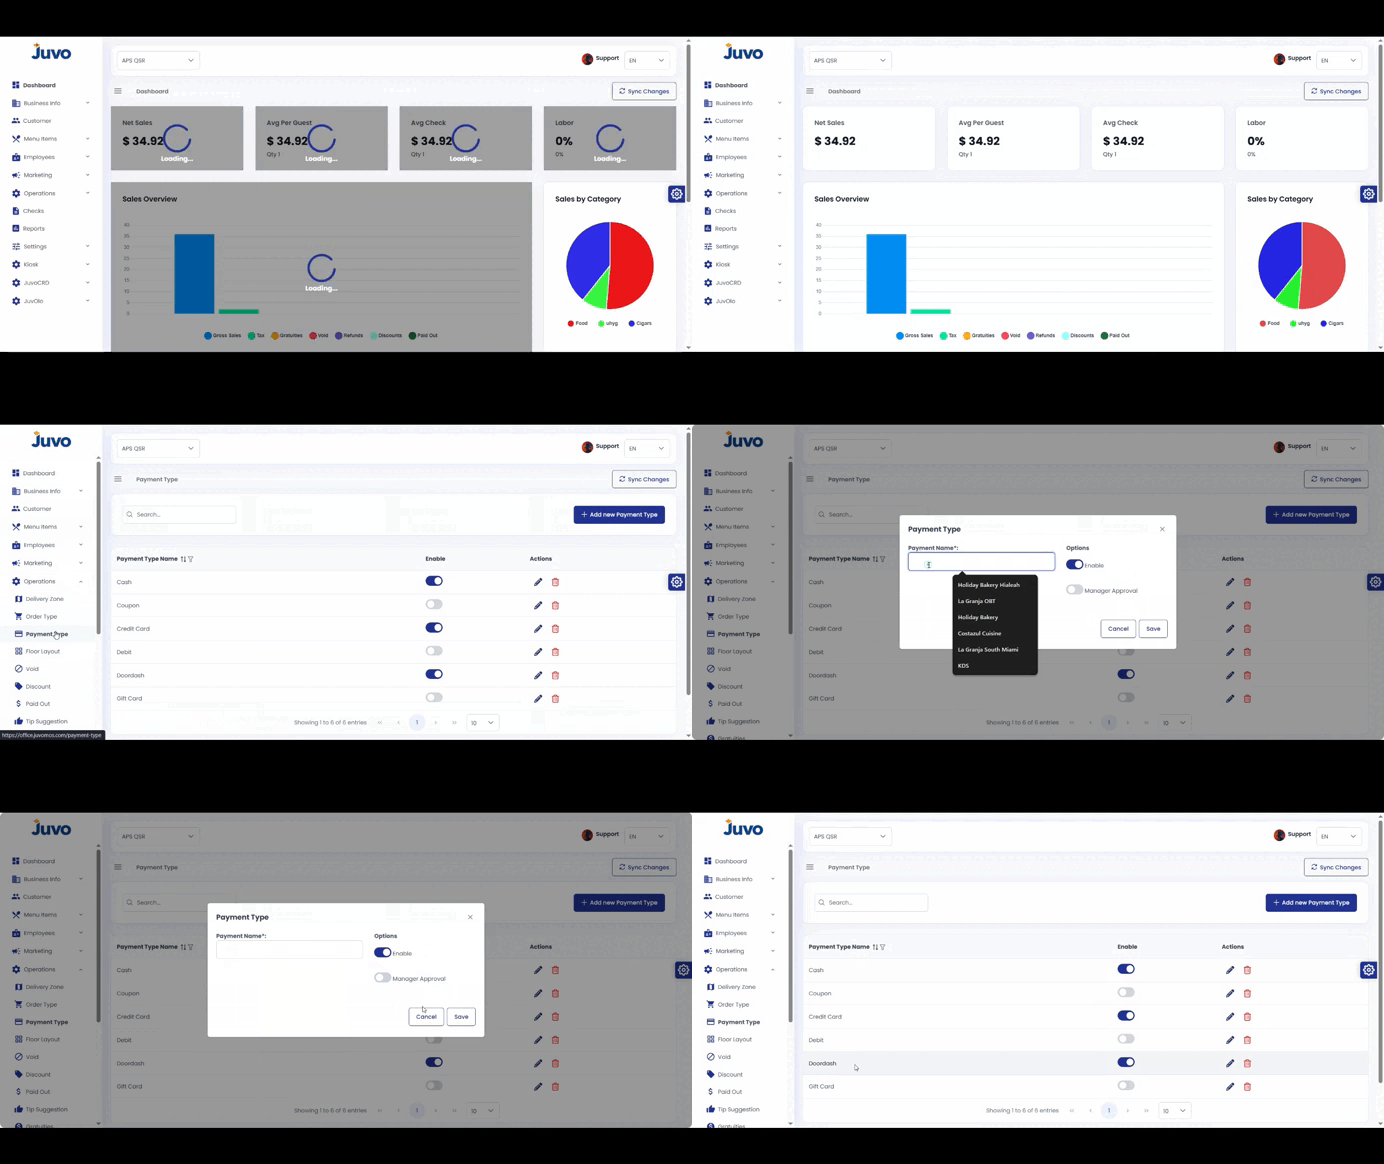
    Configure payment methods available in the POS.

    1. Open Operations → Payment Type.
    2. Click Add New Payment Type.
    3. Enter the name.
    4. Set Enabled and Manager Approval as needed.
    5. Review and save.
  • Operations → Order Type → Enable Positions

    Enable Positions for a specific order type.
    1. Open Operations → Order Type.
    2. Open an existing order type.
    3. Go to the Juvo POS tab.
    4. Find Options and enable Positions.
    5. Review and save if required.
  • Operations → Floor Layout

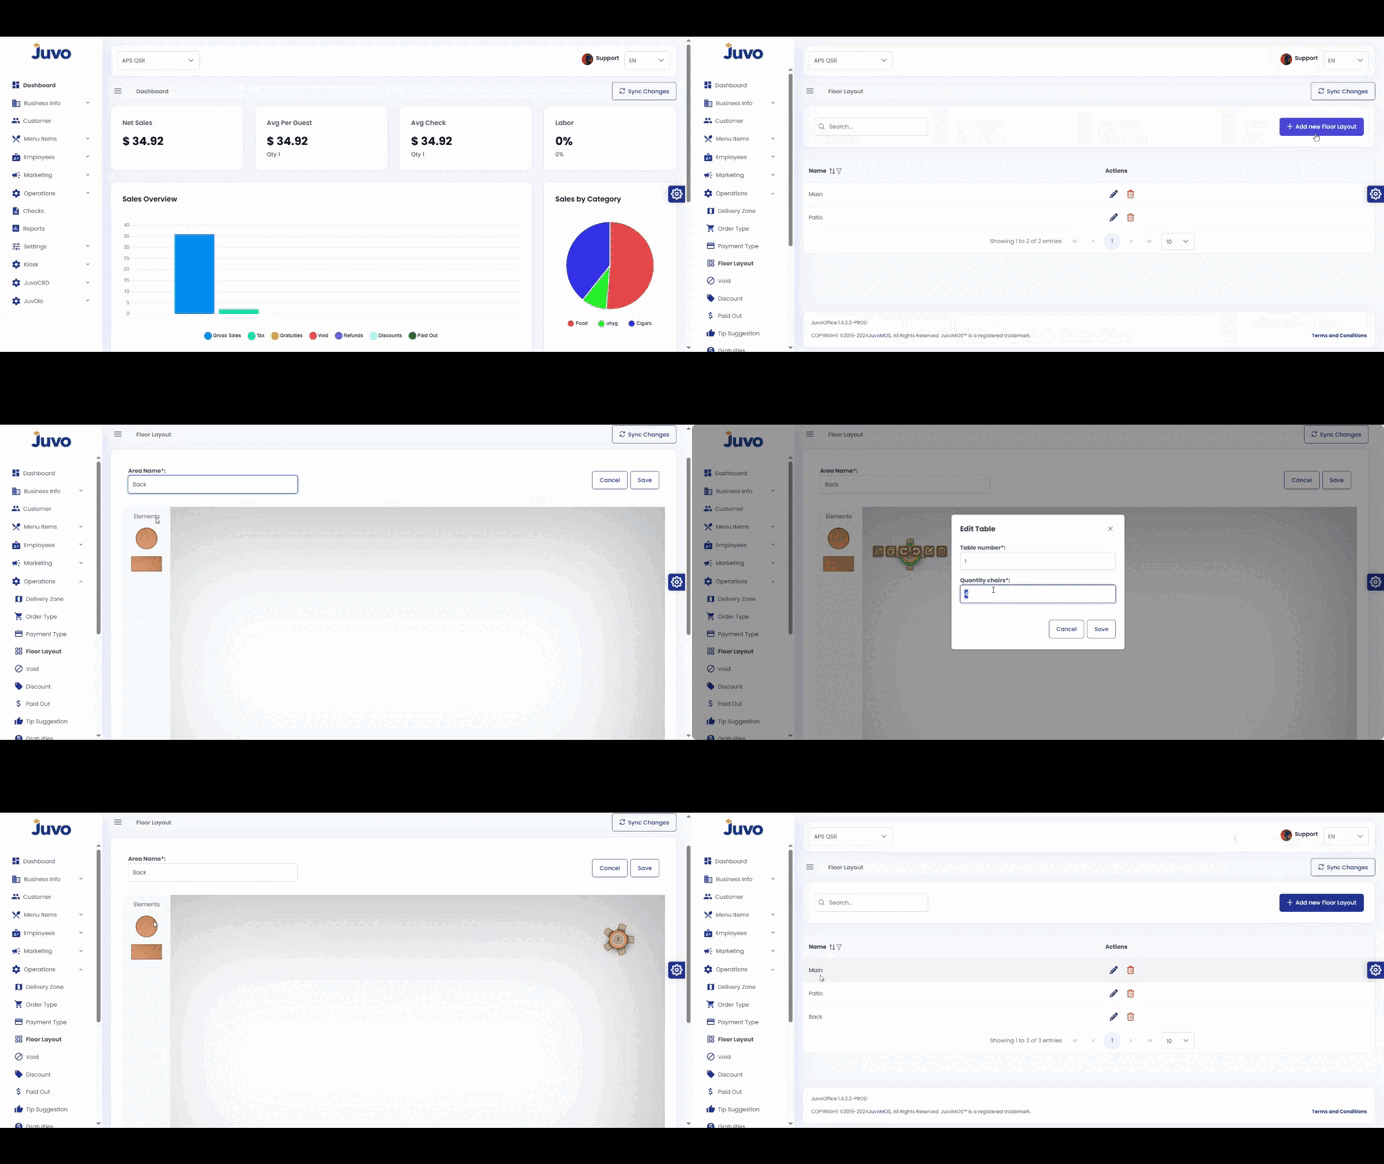
    Create a floor layout that matches the physical restaurant.
    1. Open Operations → Floor Layout.
    2. Click Add New Floor Layout.
    3. Enter a name.
    4. Add figures and edit tables and chairs.
    5. Drag figures into the correct positions.
    6. Review and save.
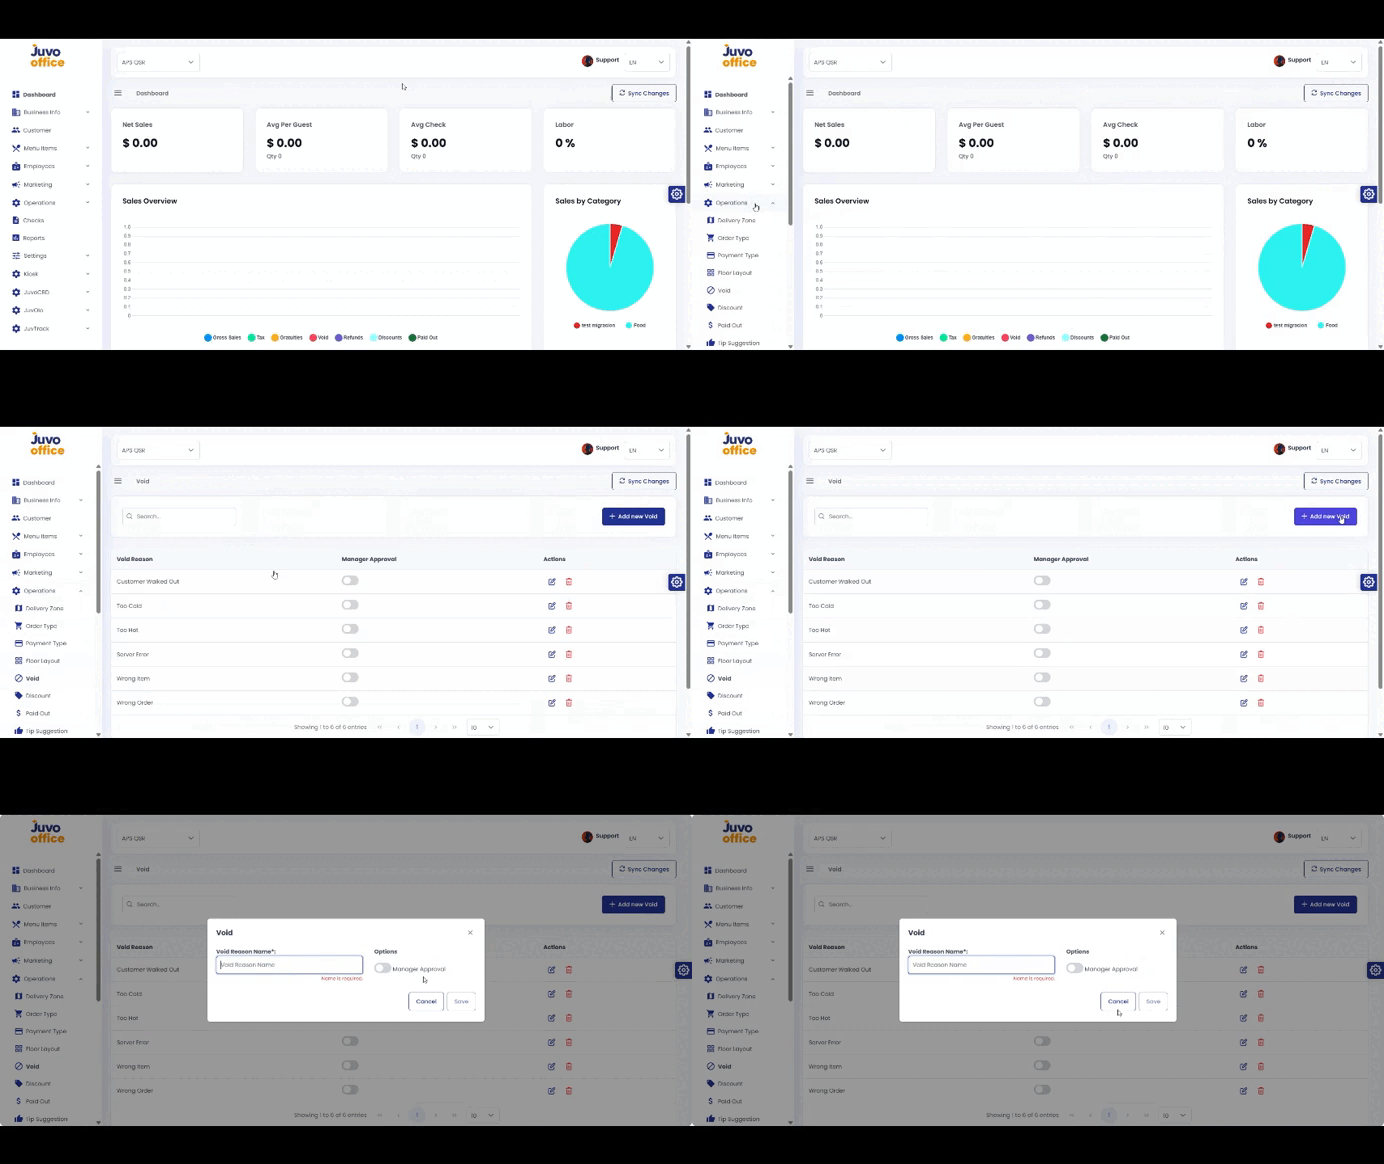
  • Operations → Void Reason

    Create reasons staff must select when voiding items or transactions.

    1. Open Operations → Void.
    2. Create a new void reason.
    3. Enter a clear name, such as Incorrect Order or Customer Changed Mind.
    4. Configure Manager Approval.
    5. Review and save.