Author: marcoantonio

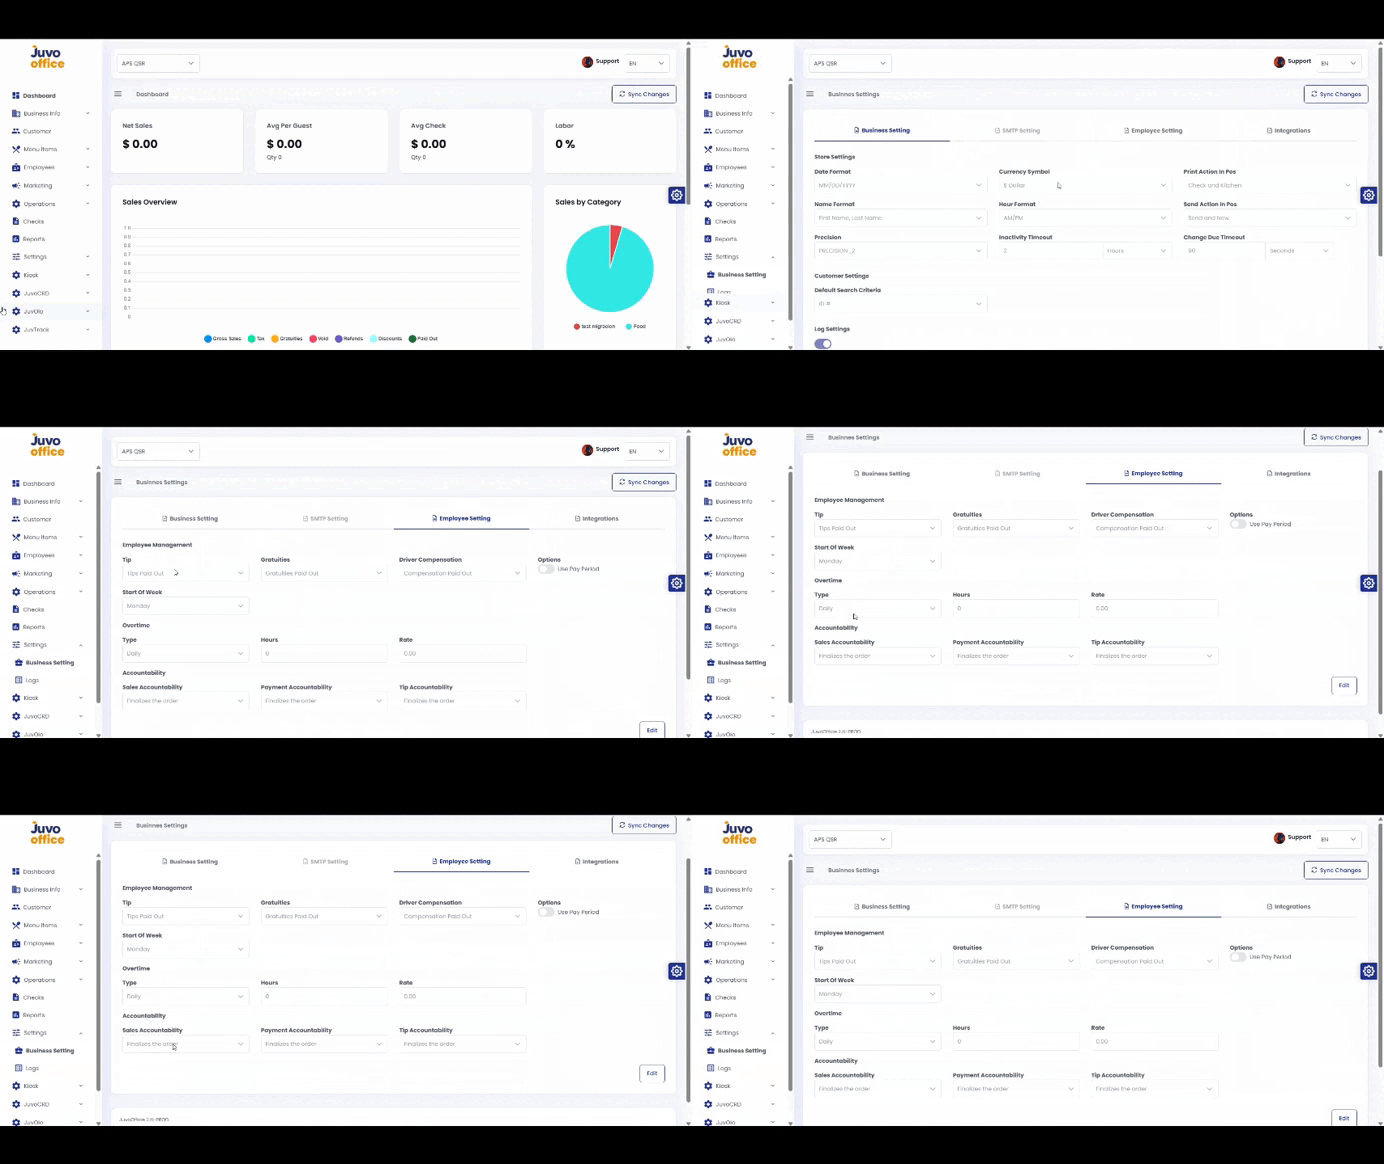
  • Settings → Employee Settings

    Configure employee-related preferences.
    1. Open Settings → Employee Settings.
    2. Review Tip Management, Compensation, Overtime, and other settings.
    3. Adjust the options according to store policies and requirements.
    4. Review and click Save when available.
  • Settings → Business Settings

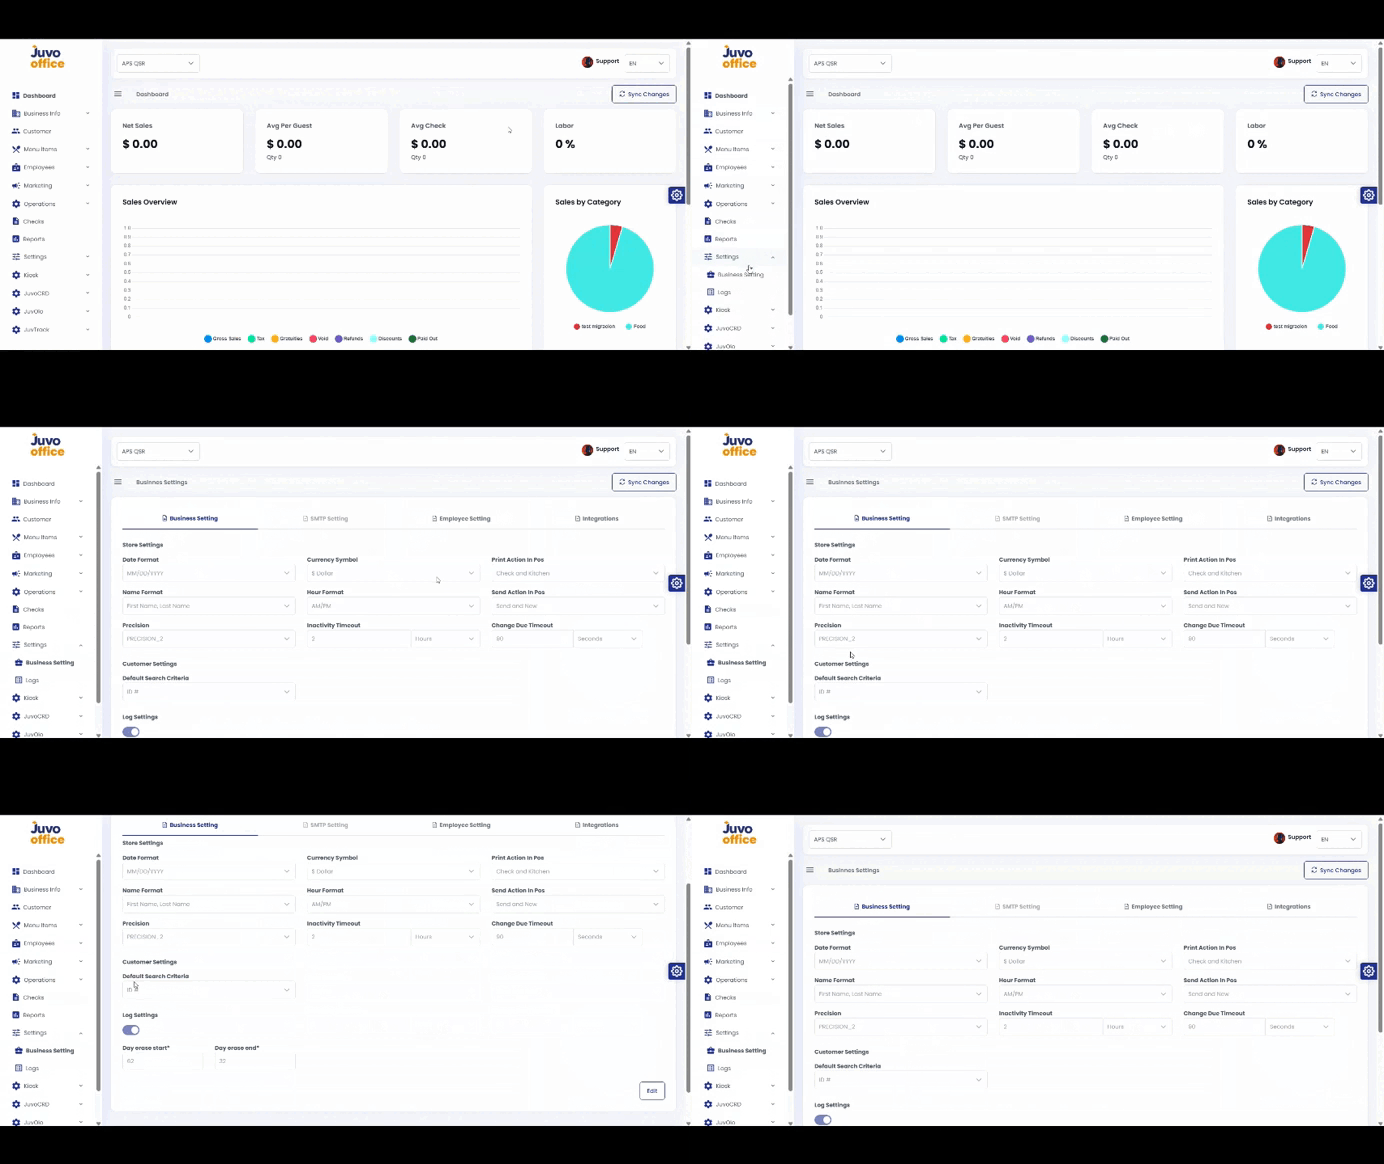
    Configure business preferences in Juvo Back Office.
    1. Open Settings → Business Settings.
    2. Review Date Format, Currency, and other preferences.
    3. Update the settings according to store requirements.
    4. Review and click Save when available.
  • Reports → View and Export Reports

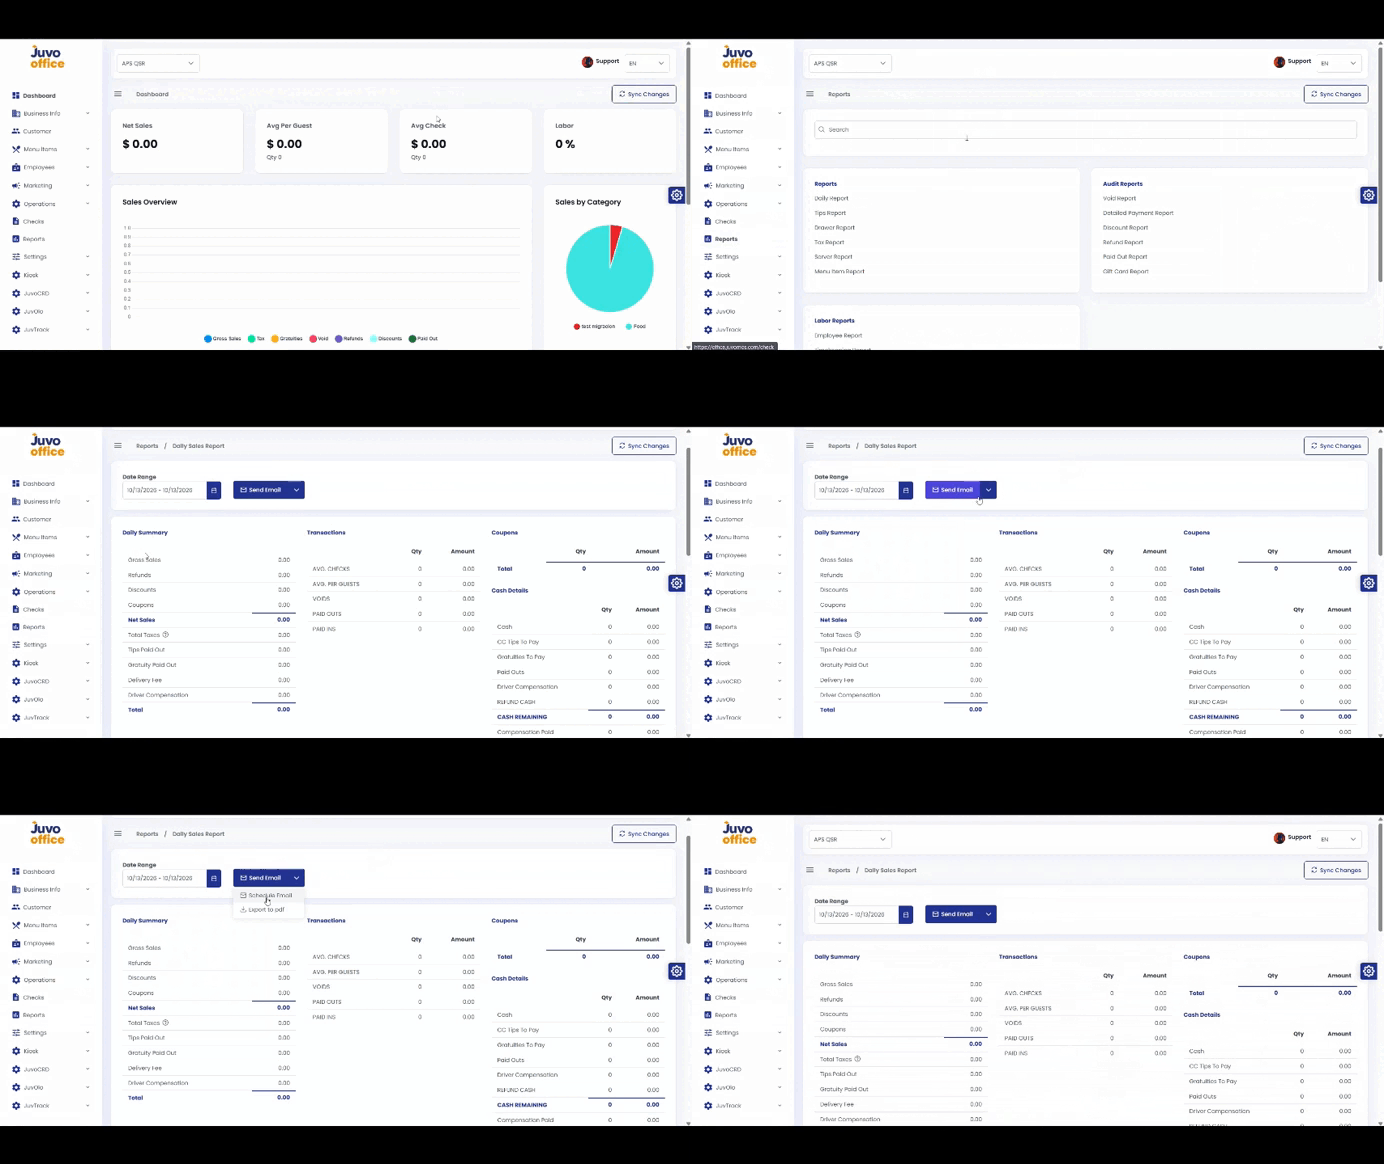
    View, email, schedule, or download Back Office reports.
    1. Open Reports.
    2. Select a report.
    3. Apply a Date Range.
    4. Use Send Email, Schedule Email, or Download PDF when available.
    5. Verify the date range and settings before exporting.
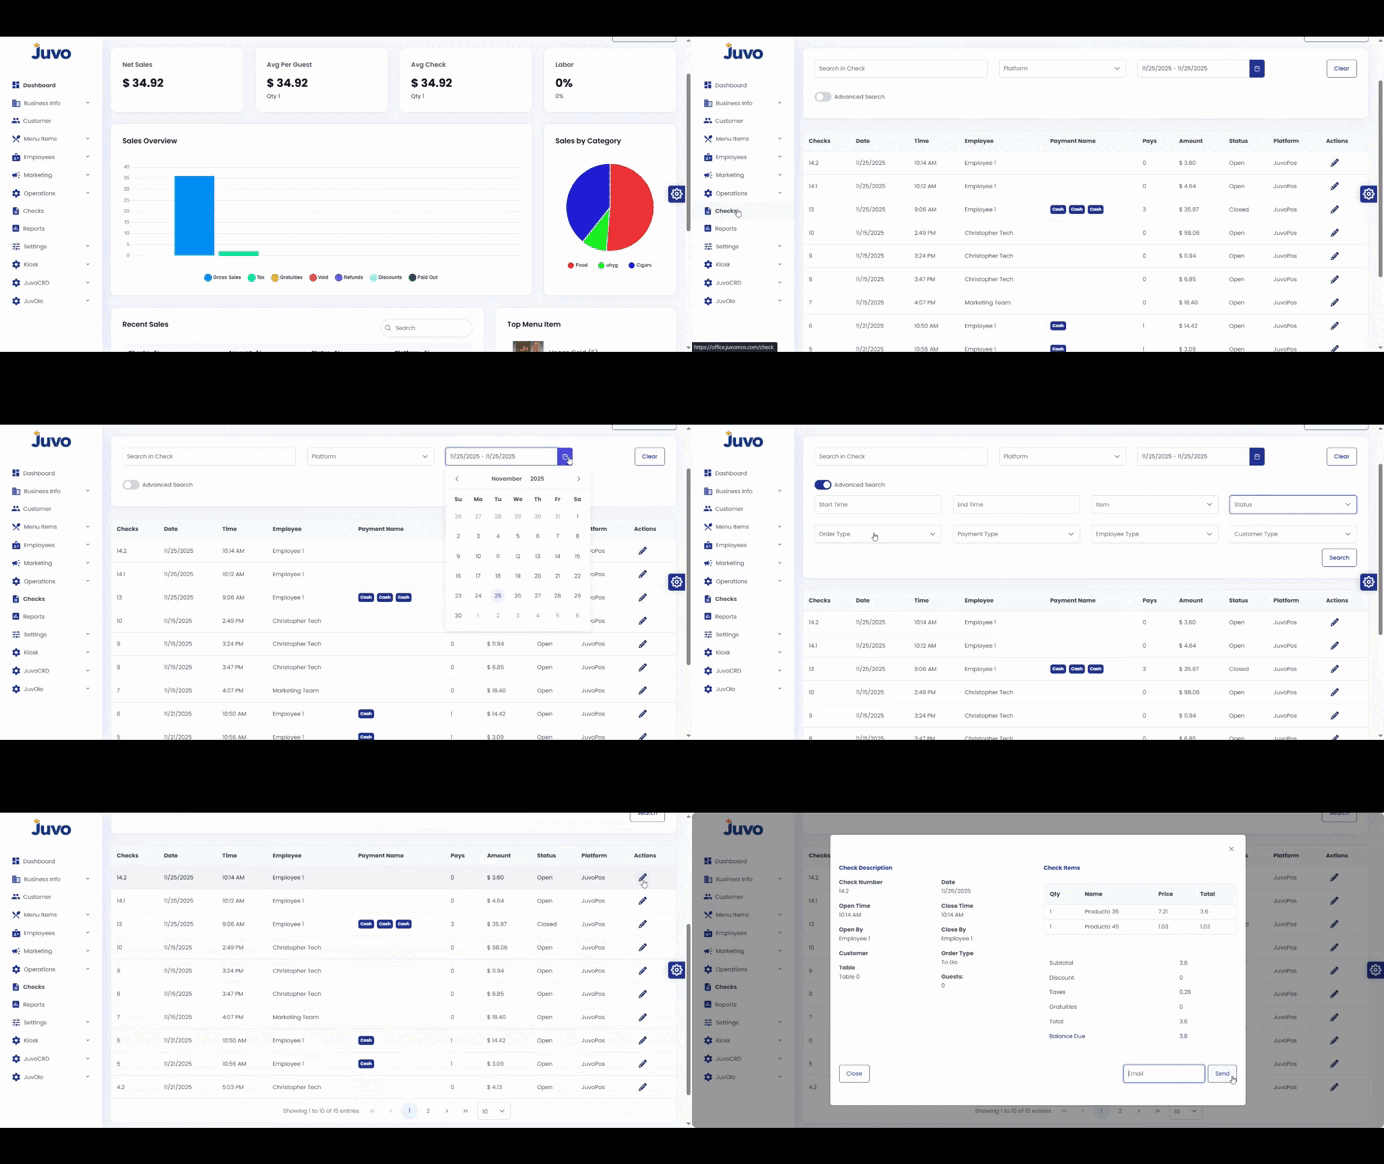
  • Checks → View All Checks

    Search and review checks in Juvo Back Office.
    1. Open Check in the left-hand menu.
    2. Scroll to the Check section.
    3. Use Date, Employee, or Order Type filters.
    4. Open a check to view details or send it by email.
    5. Use Advanced Filter for more specific searches.
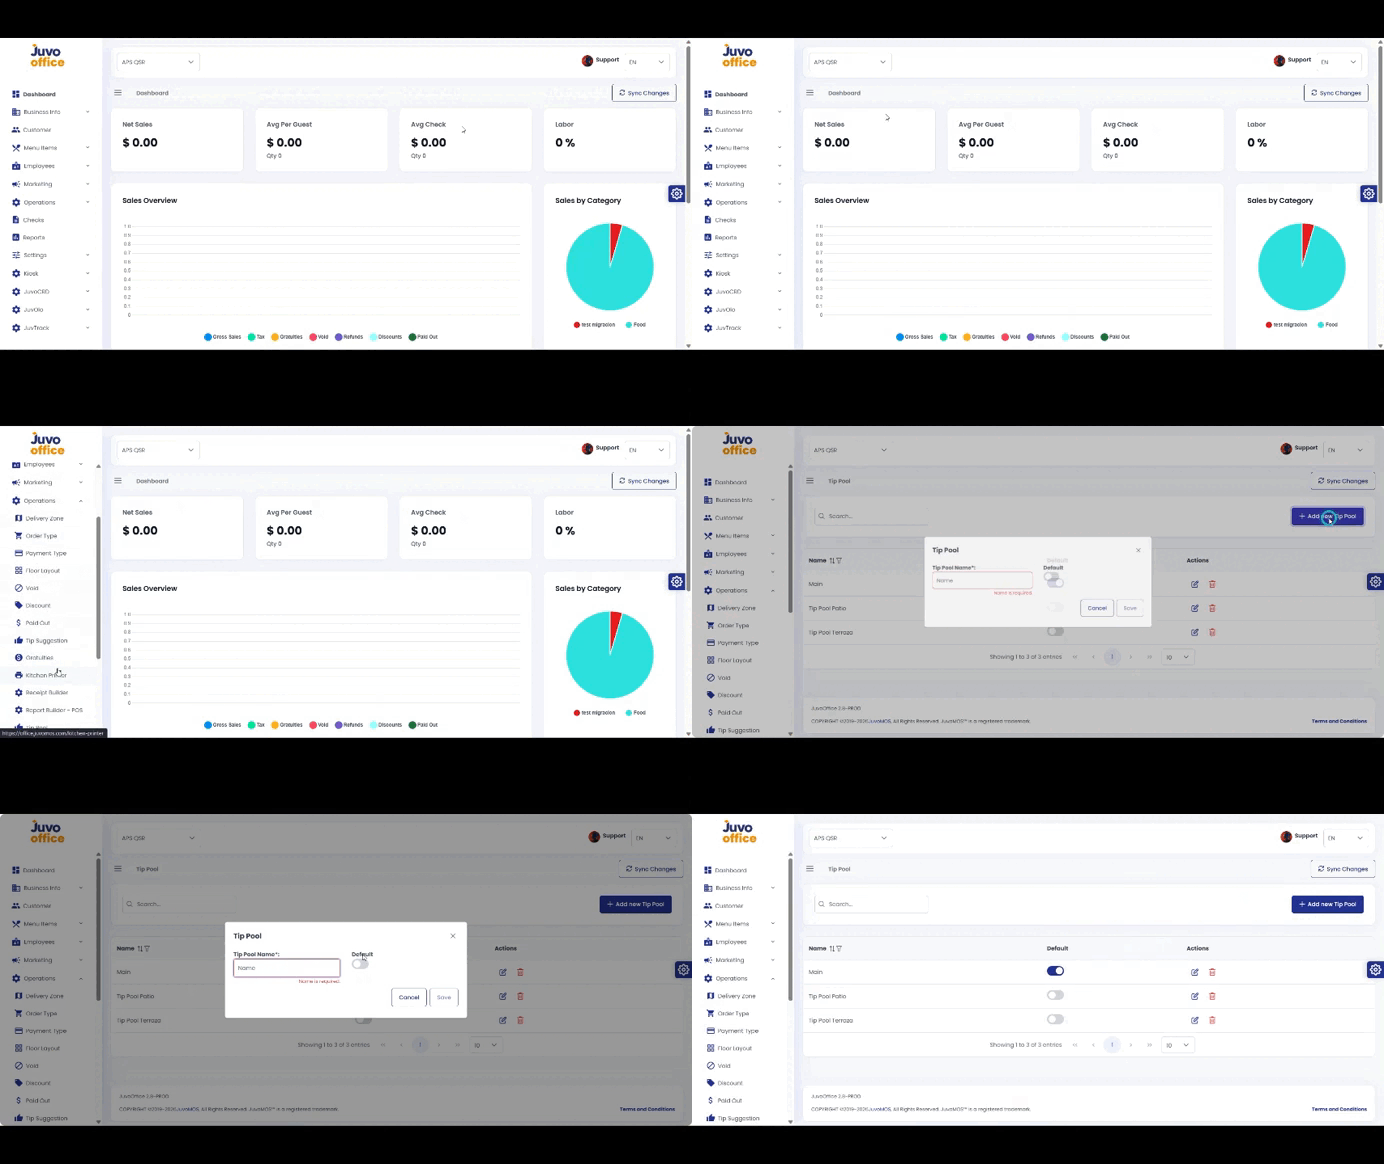
  • Operations → Tip Pool

    Create and configure a Tip Pool.

    1. Open Operations → Tip Pool.
    2. Enter the tip pool name.
    3. Enable Default Tip Pool if it should be the primary option.
    4. Review and save.
  • Menu Items → Availability

    Control when menu items appear on the POS.
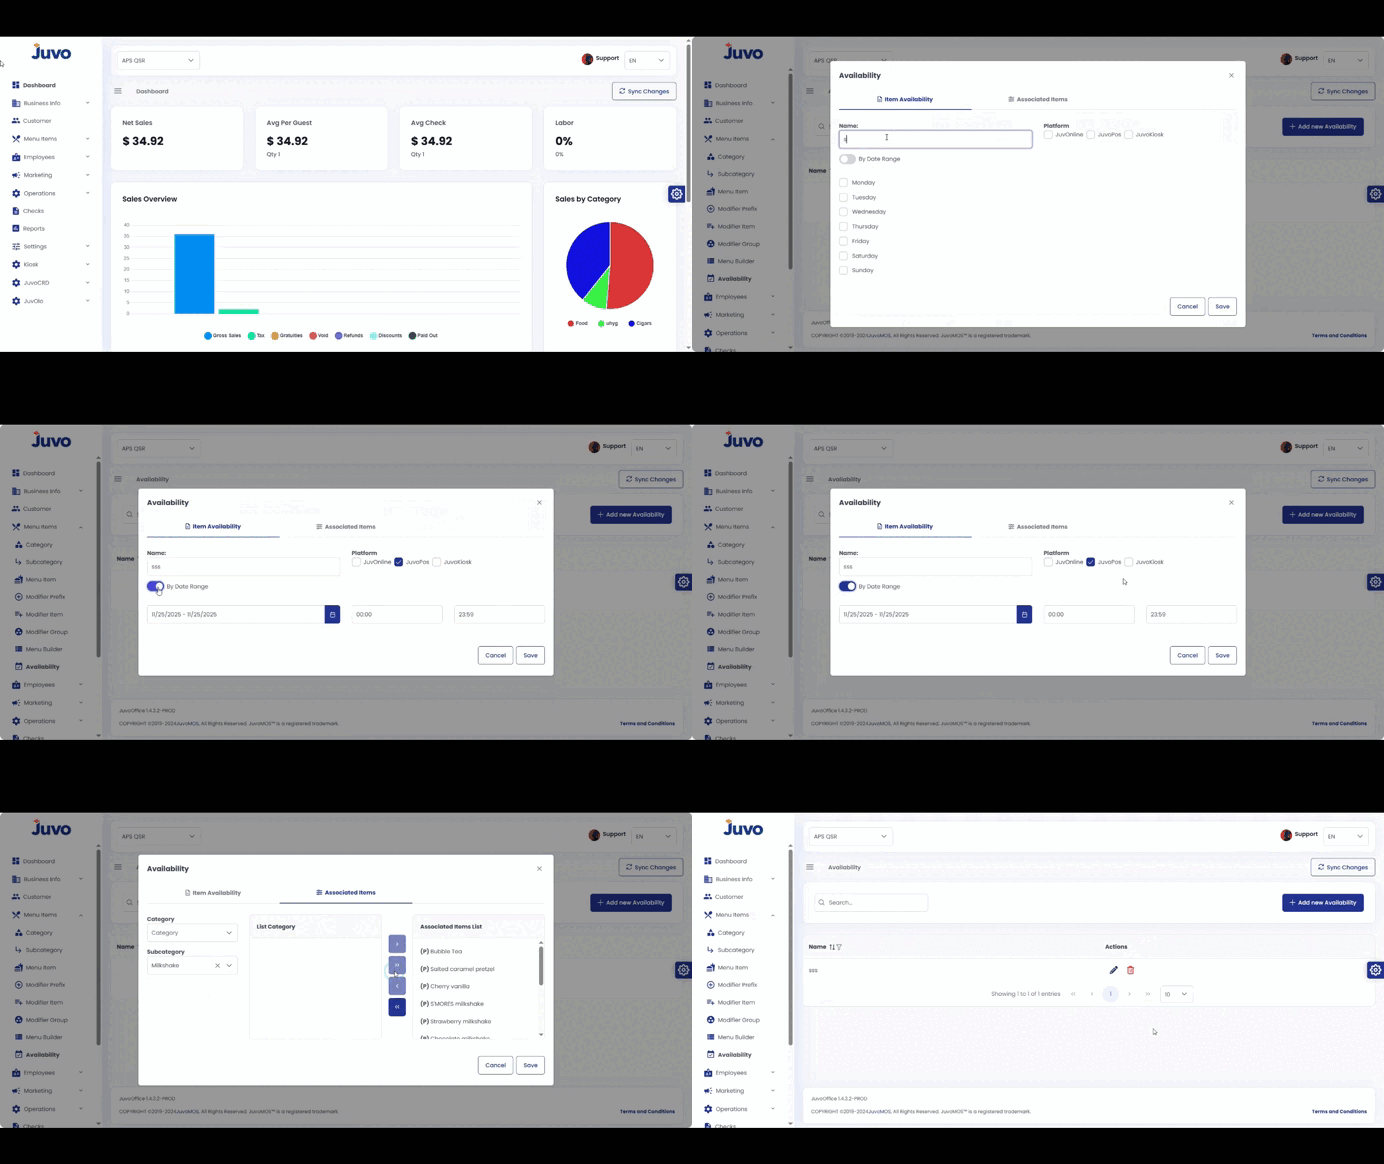
    1. Open Menu Items → Availability.
    2. Choose a menu item, category, or modifier group.
    3. Click Edit Availability or Add Schedule.
    4. Set days and time ranges.
    5. Optionally add seasonal date ranges.
    6. Click Save, then Publish or Push to Devices.
    7. Verify in Preview or on the POS.
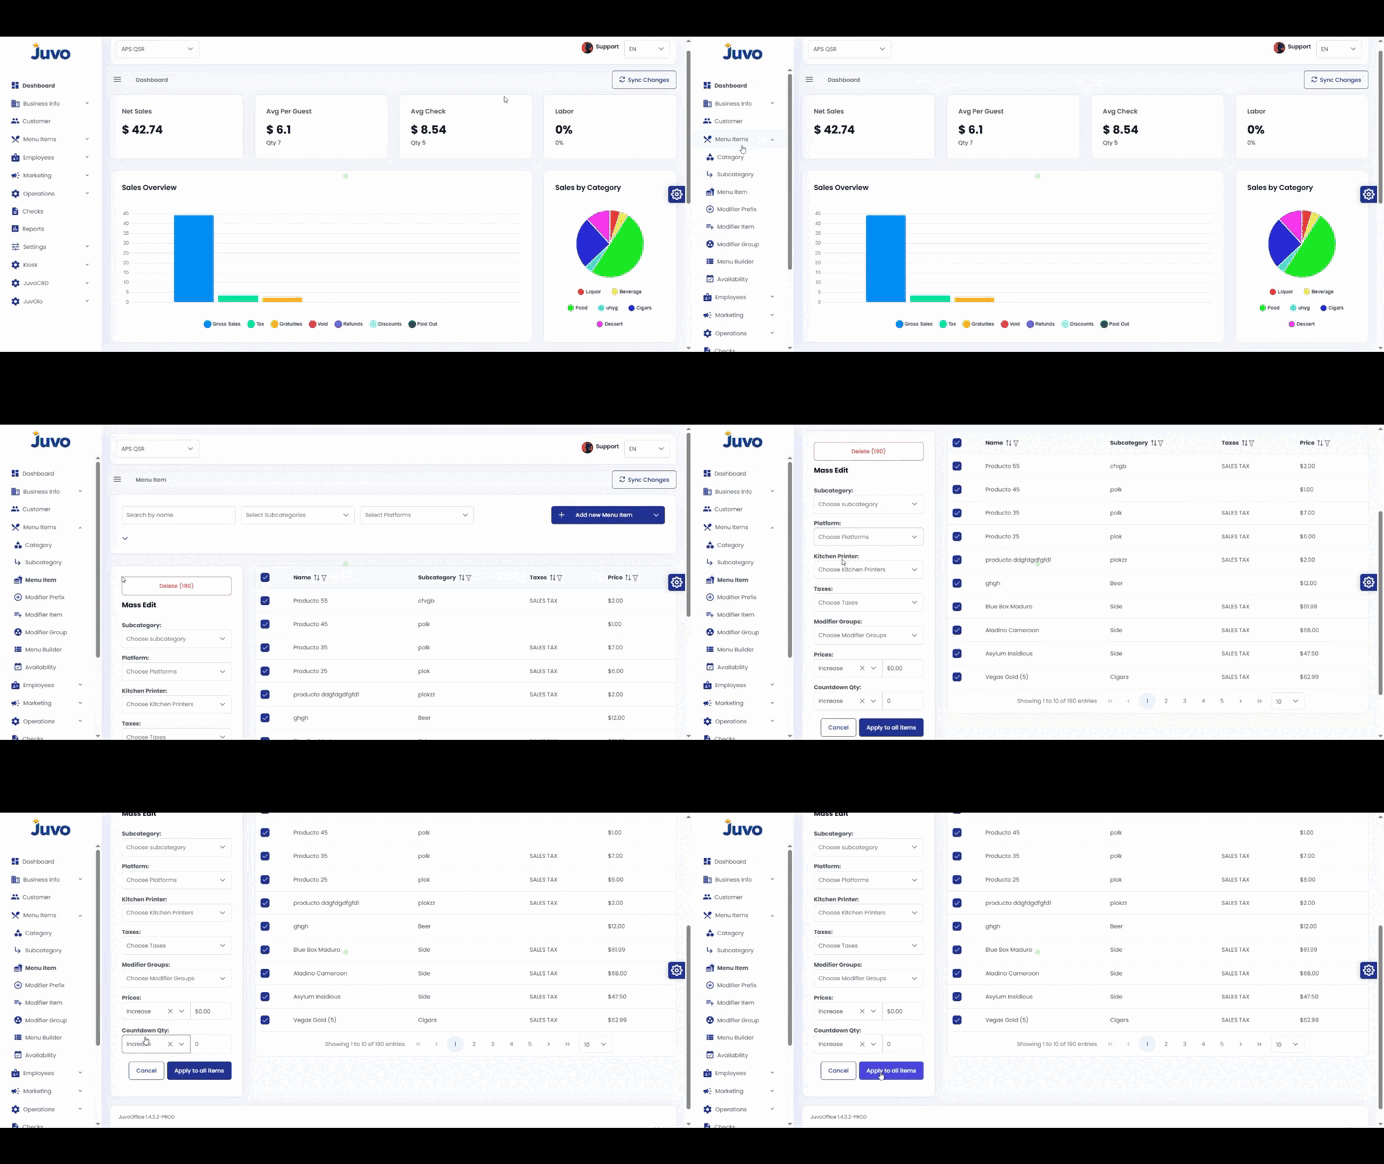
  • Menu Items → Mass Edit

    Edit multiple menu items efficiently.

    1. Open Menu Items.
    2. Locate the items to modify.
    3. Select the checkbox next to each item.
    4. Use the Mass Edit options.
    5. Review the selected items and apply or save the changes.

    Note: Double-check the selection before applying changes.
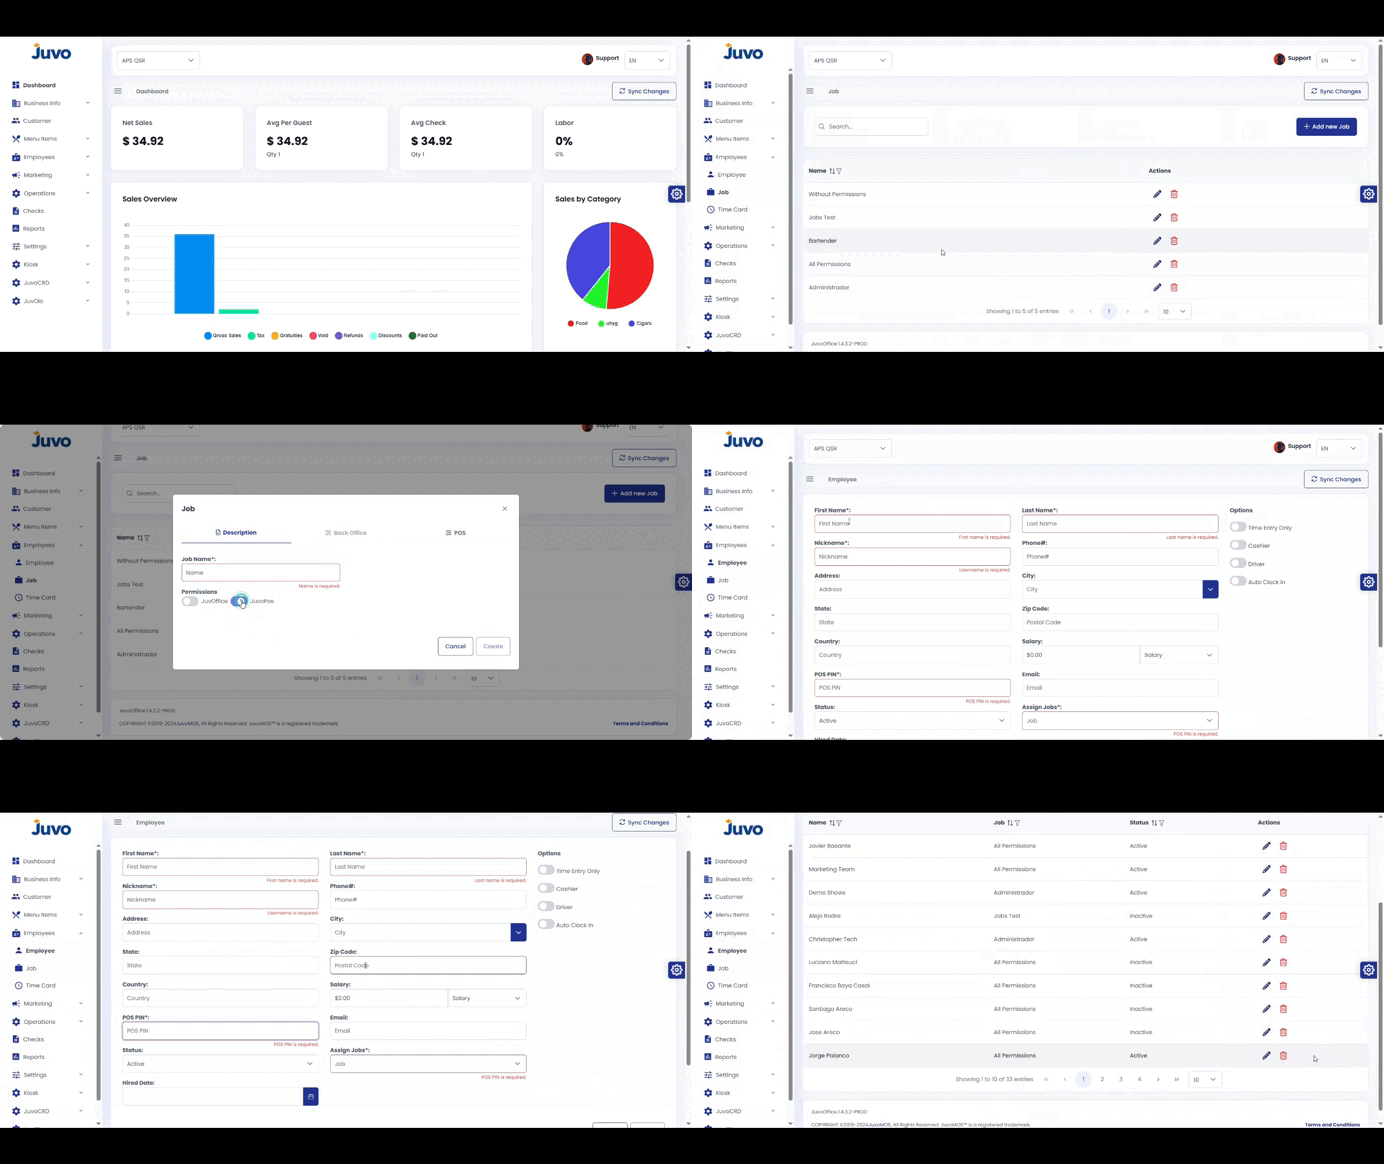
  • Employees

    Create employees and manage their roles and time records.
    1. Open Employees.
    2. Select Employee and click Add Employee.
    3. Enter contact information and a login PIN.
    4. Open Job/Roles to assign permissions.
    5. Use Time Cards to review, edit, or approve hours.
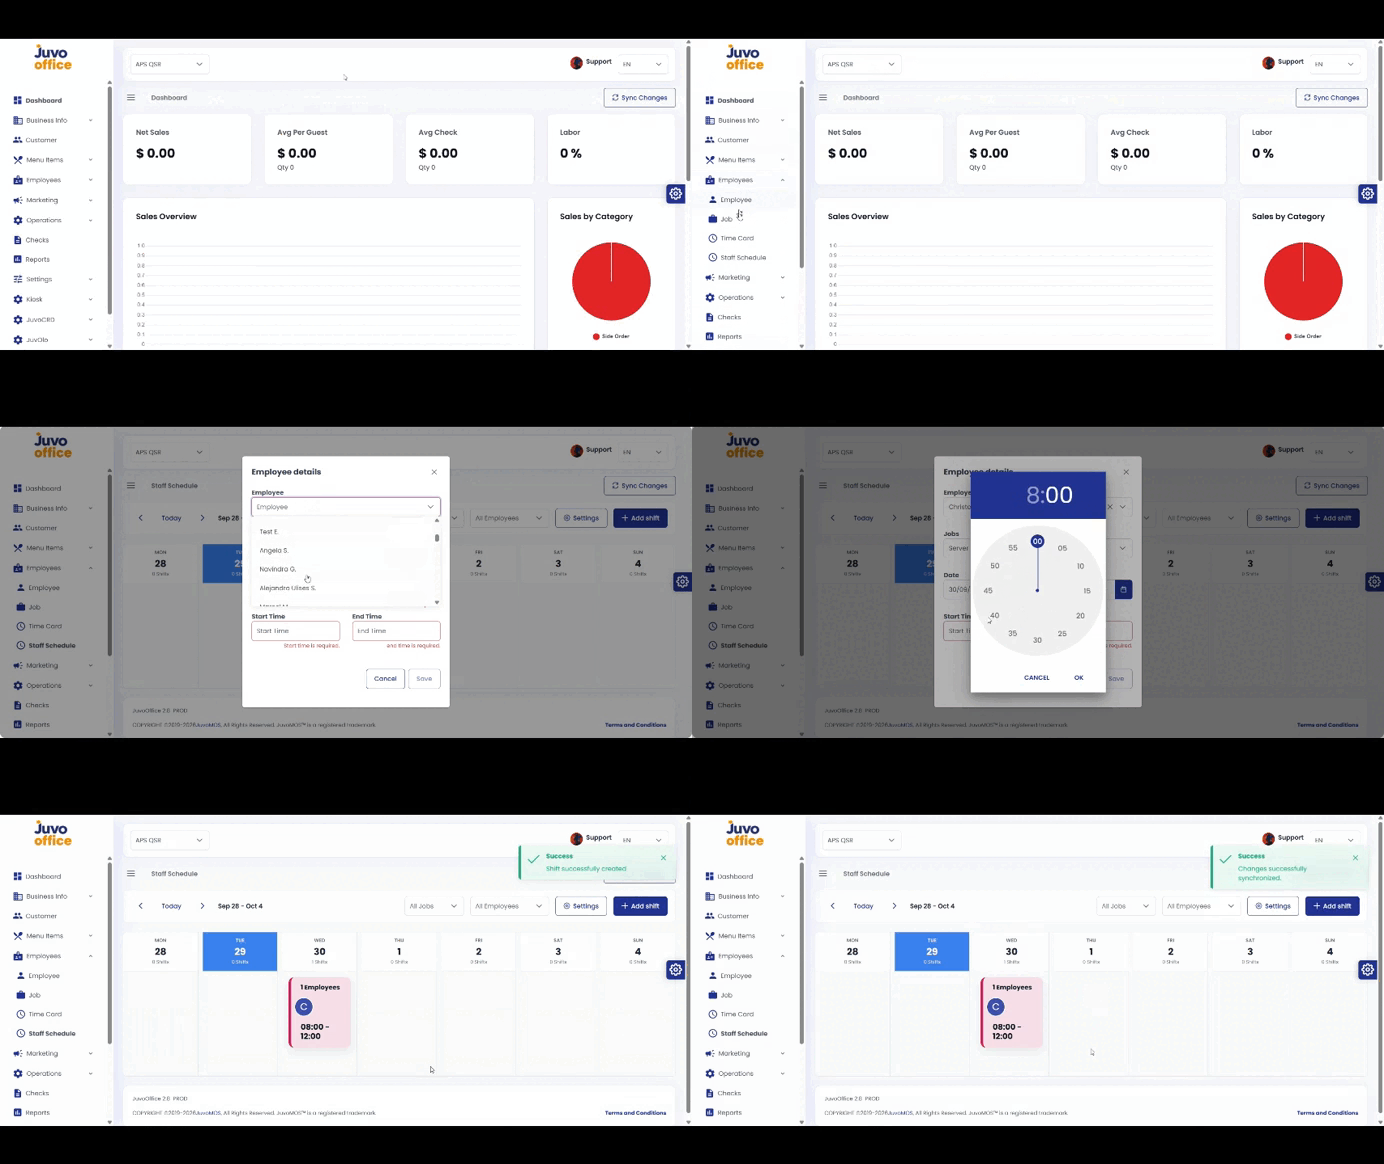
  • Staff Schedule – Add and View Employee Schedules

    Create employee schedules in Juvo Back Office so employees can view them on the POS Time Clock.
    1. Open Employees → Staff Schedule.
    2. Click Add Shift.
    3. Select the employee and review the automatically populated job.
    4. Choose the date, start time, and end time.
    5. Review and click Save.
    6. Sync the POS after creating or updating the schedule.
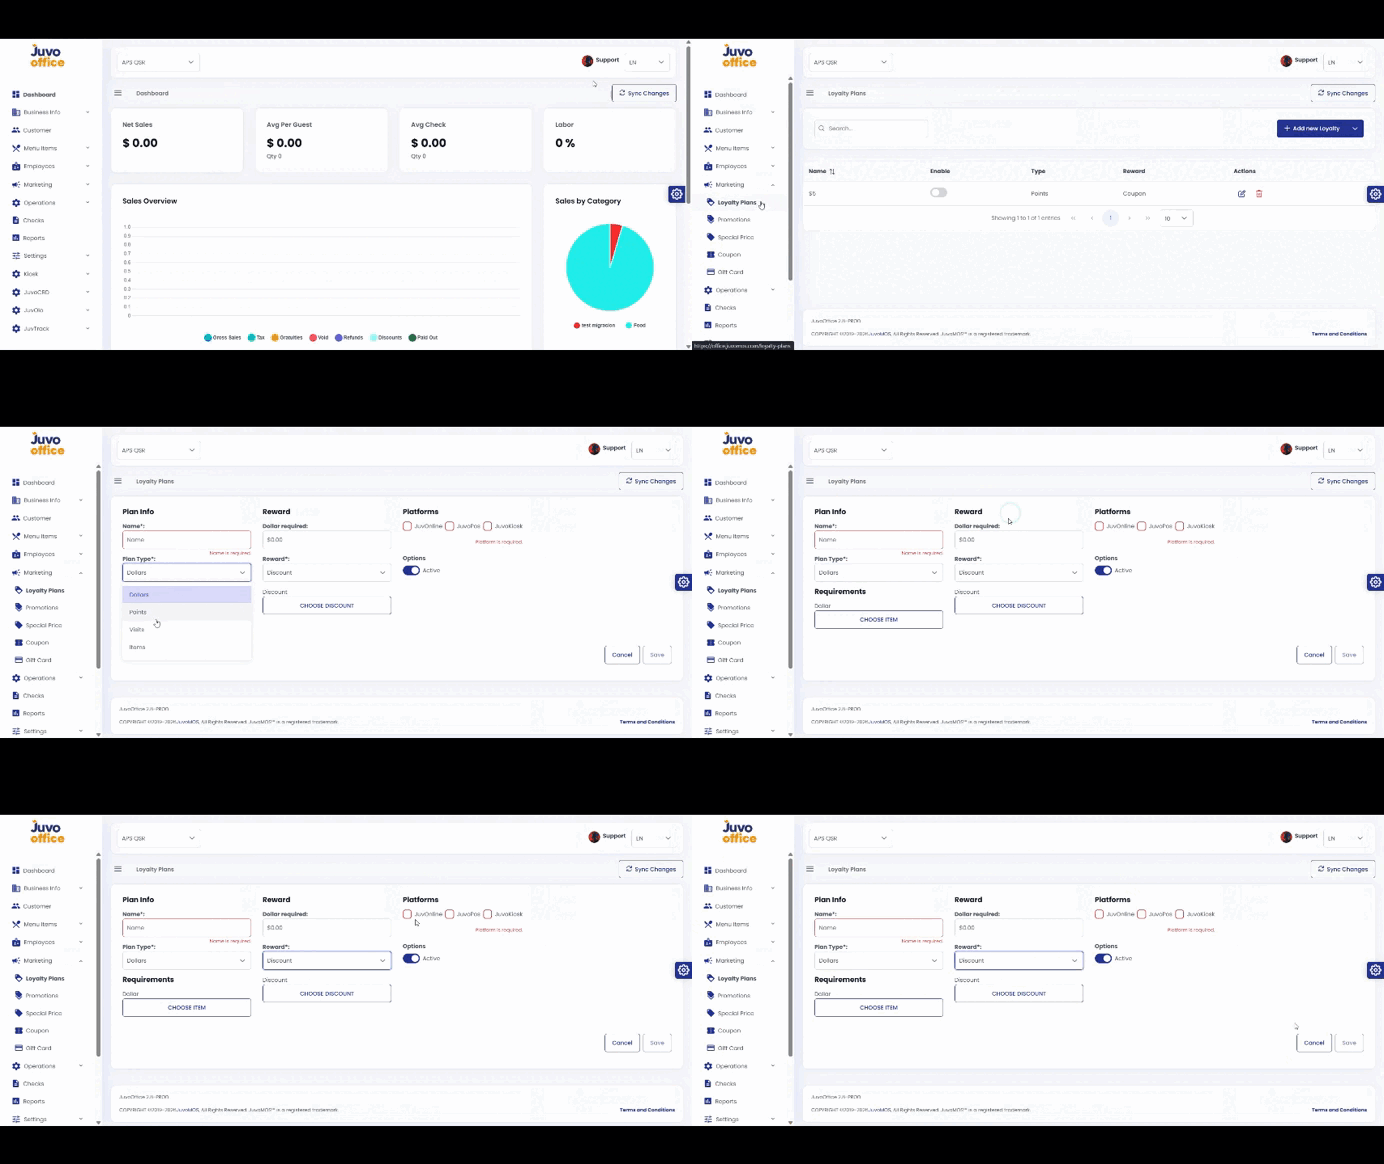
  • Marketing → Loyalty Plan

    Create a Loyalty Plan with rewards for customers.

    1. Open Marketing → Loyalty Plan.
    2. Enter the plan name.
    3. Select Dollars, Points, Visits, or Items.
    4. Configure the requirements and reward.
    5. Select POS, OLO, or KIOSK.
    6. Set the plan Active or Inactive.
    7. Review and save.