Tag: Training Guide

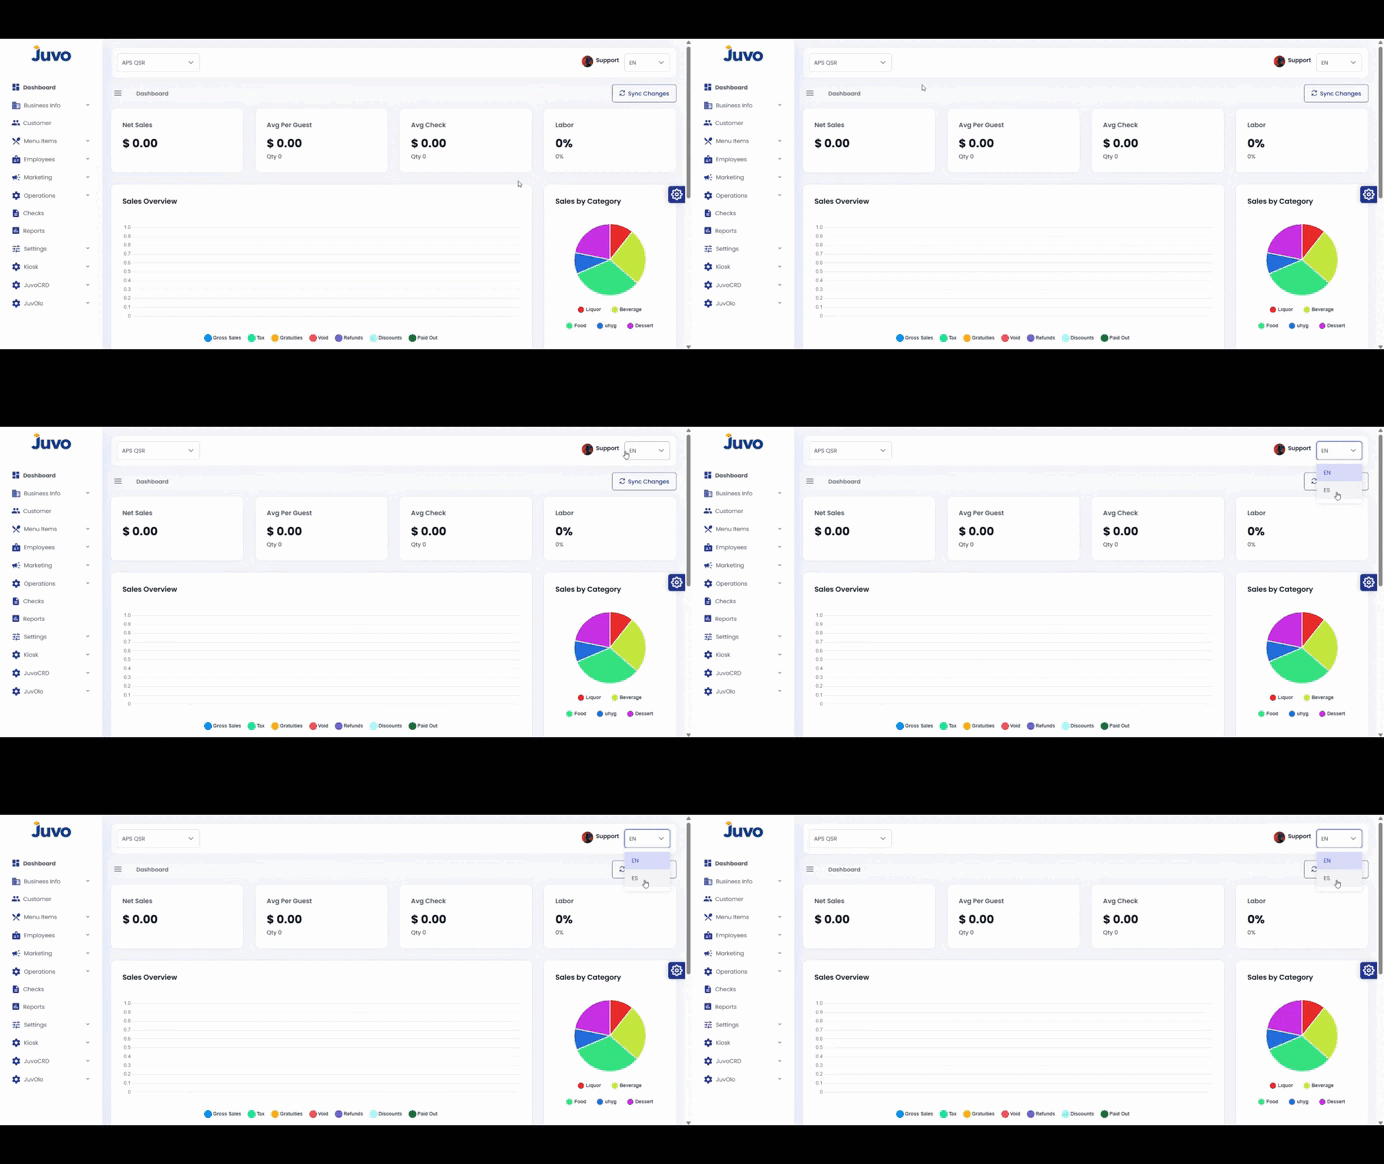
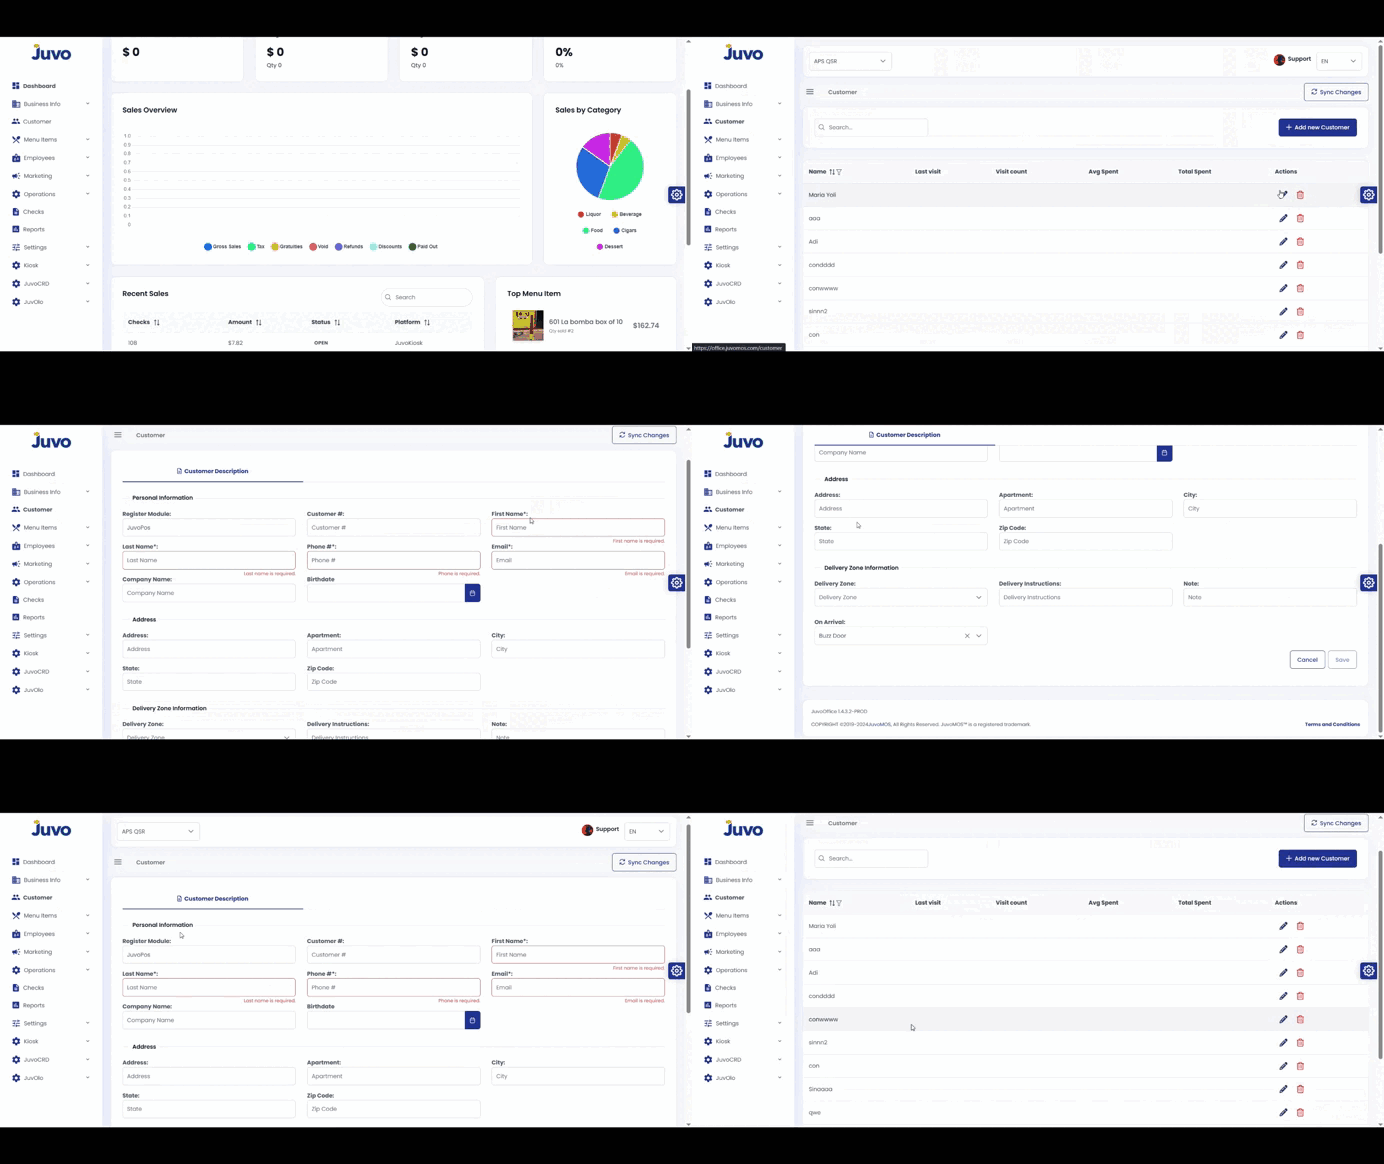
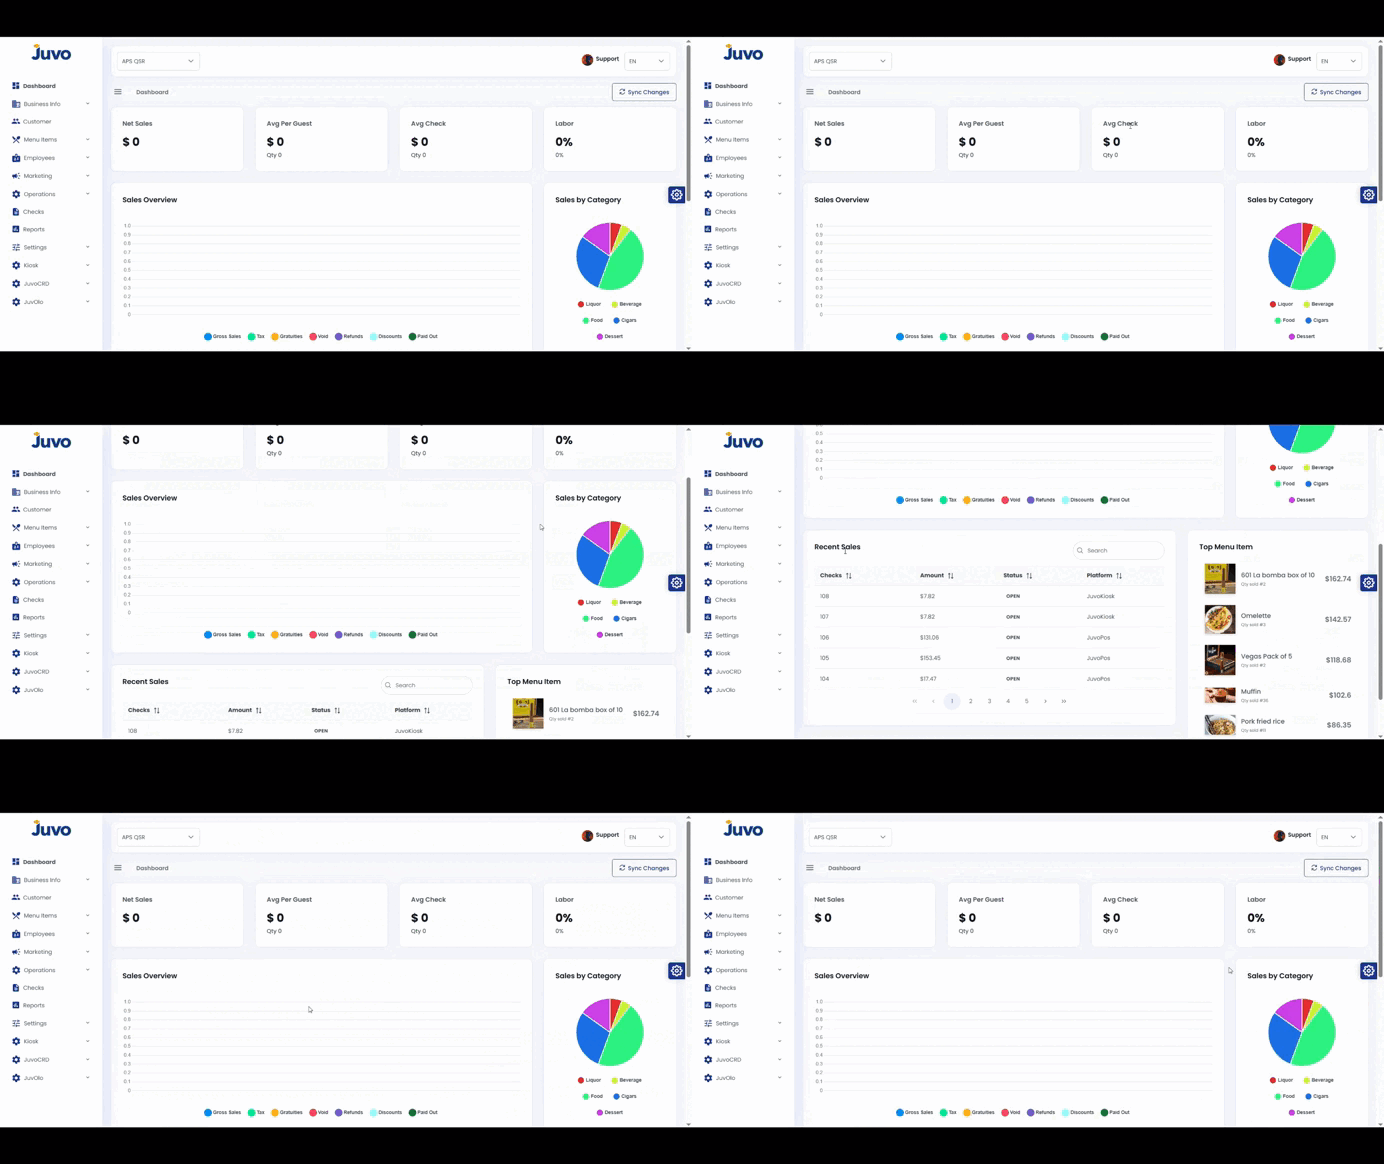
  • Dashboard → Overview

    Learn how to navigate the Juvo Back Office Dashboard and review key business indicators.

    1. Log in to Juvo Back Office.
    2. Click Dashboard in the left-hand menu.
    3. Review the key performance indicators and business information.
    4. Explore the available views and options.
    5. Use the Dashboard as a quick reference for daily store performance.

    Note: Focus on the indicators most relevant to your daily operations.
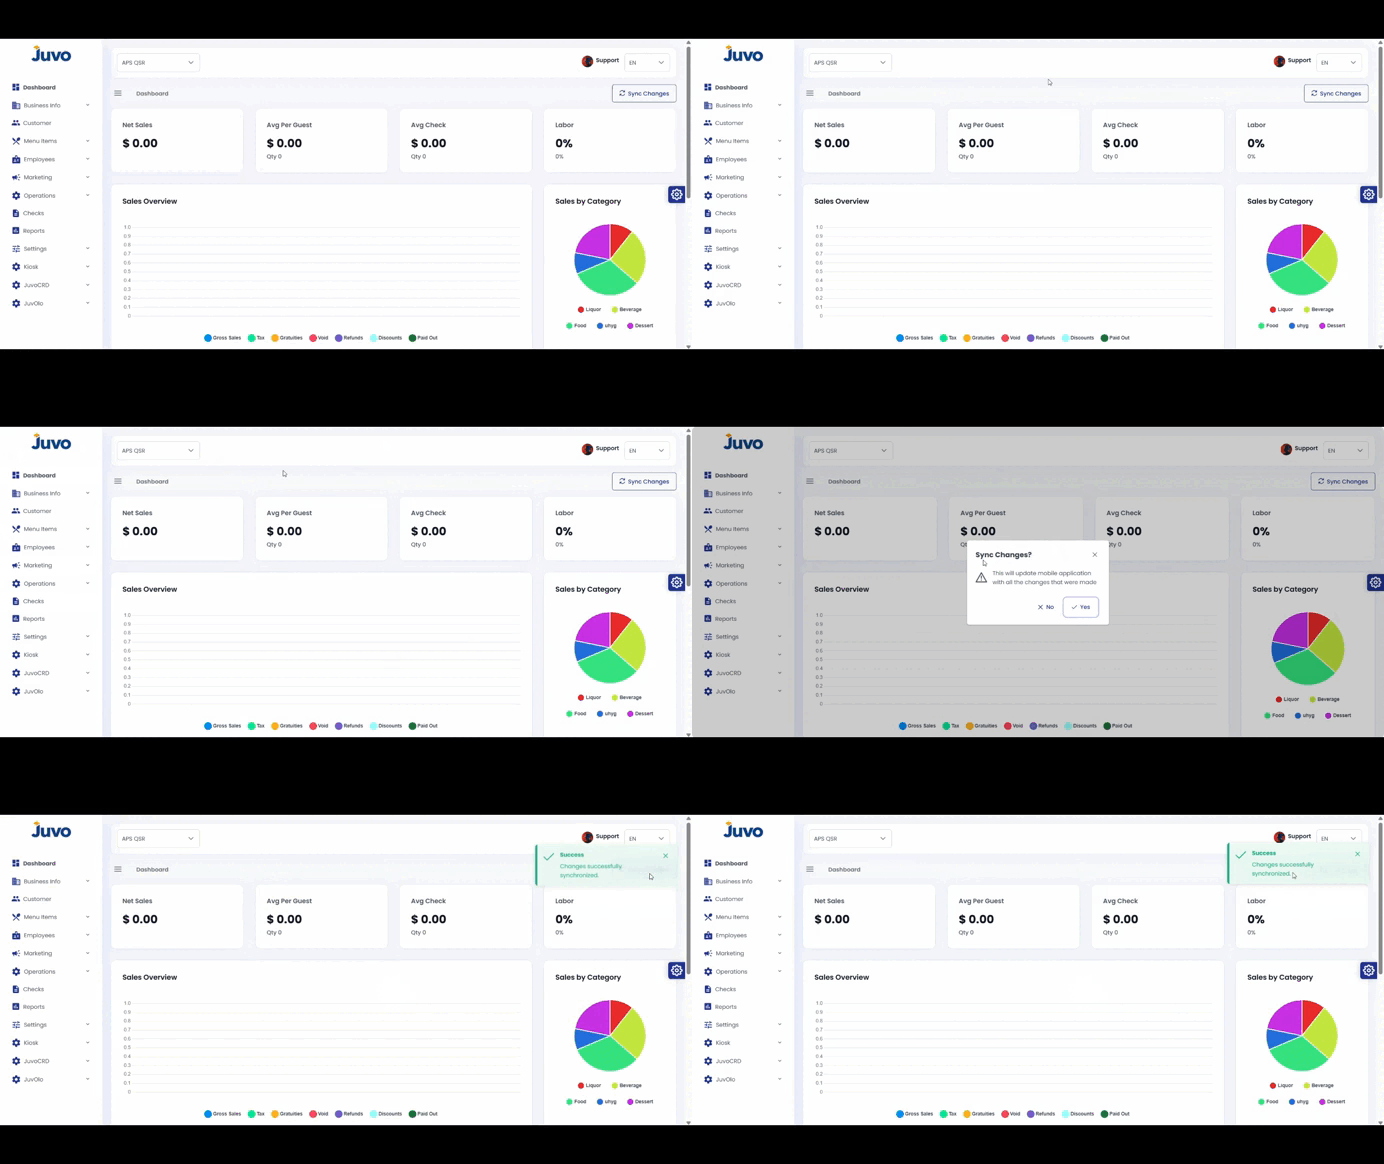
  • Juvo Back Office → Sync Changes

    Learn how to send updated Back Office information to the POS.

    1. Log in to Juvo Back Office.
    2. Go to the top-right corner near the User section.
    3. Click Sync Changes.
    4. Allow synchronization to complete.

    Note: Sync after making Back Office updates so the POS receives the latest information.

  • Juvo Back Office → Change Language

    Change the display language in Juvo Back Office.

    1. Log in to Juvo Back Office.
    2. Go to the top-right corner next to your profile.
    3. Click the language option.
    4. Select your preferred language.
    5. Verify that the interface changed.
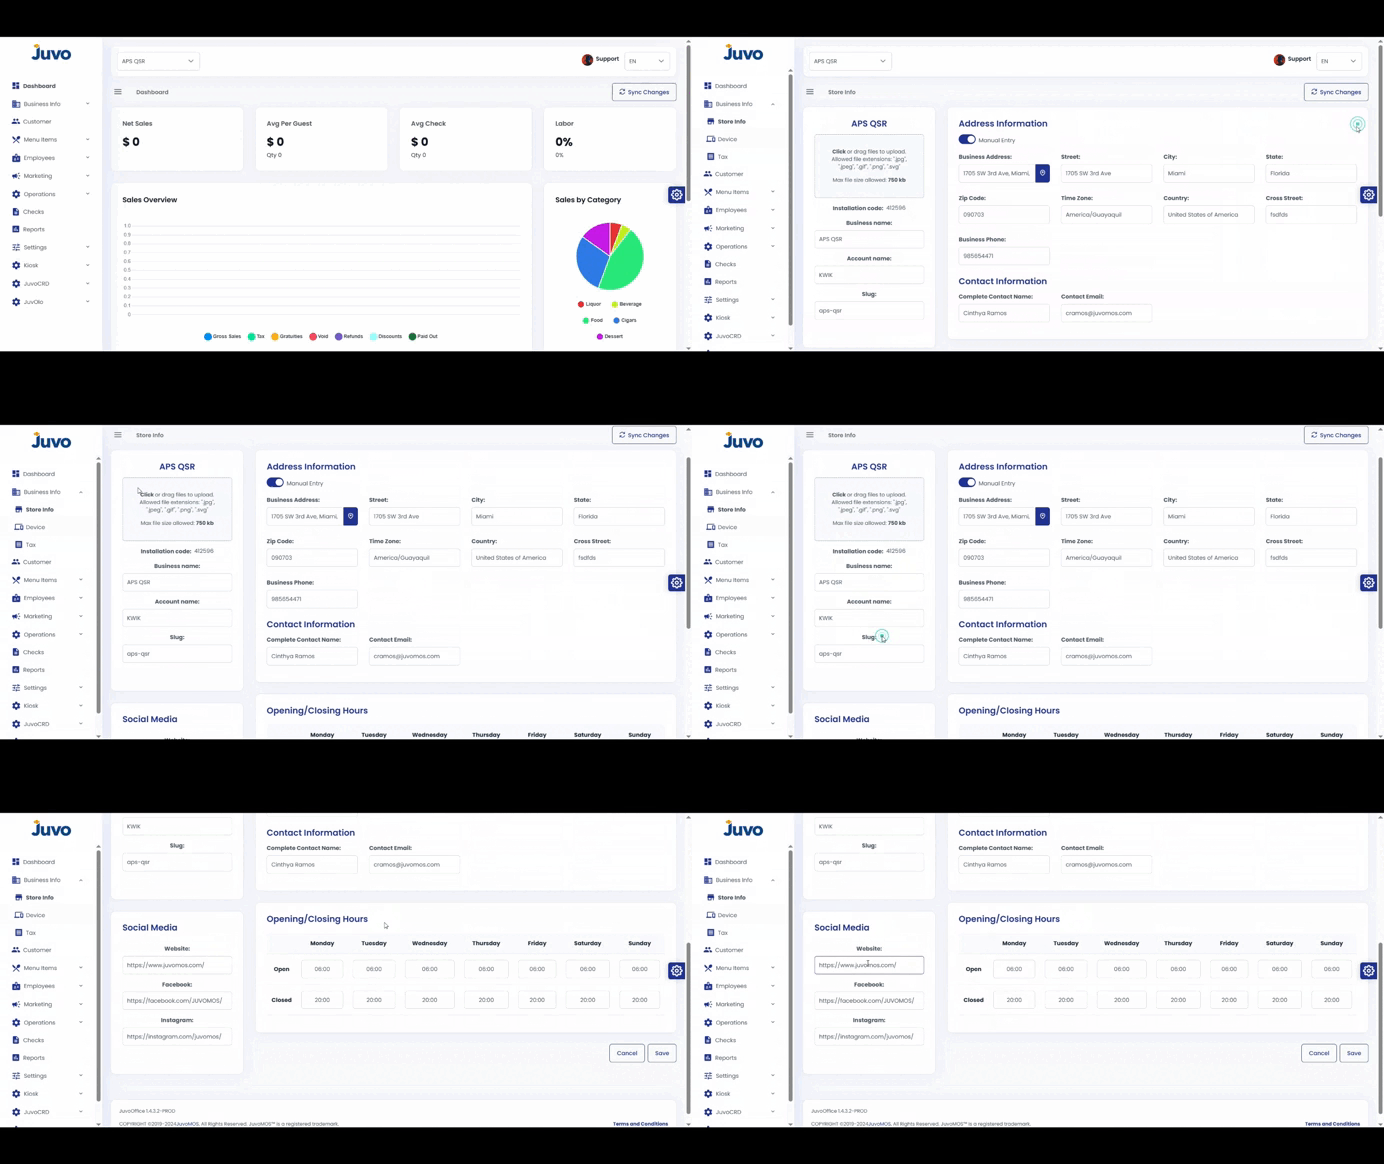
  • Business Info → Store Info

    View and update your store information in Juvo Back Office.

    1. Open Business Info.
    2. Select Store Info.
    3. Click Edit in the top-right corner.
    4. Update the name, address, phone, email, or other details.
    5. Review and click Save.

    Note: Confirm that the information is correct before saving.

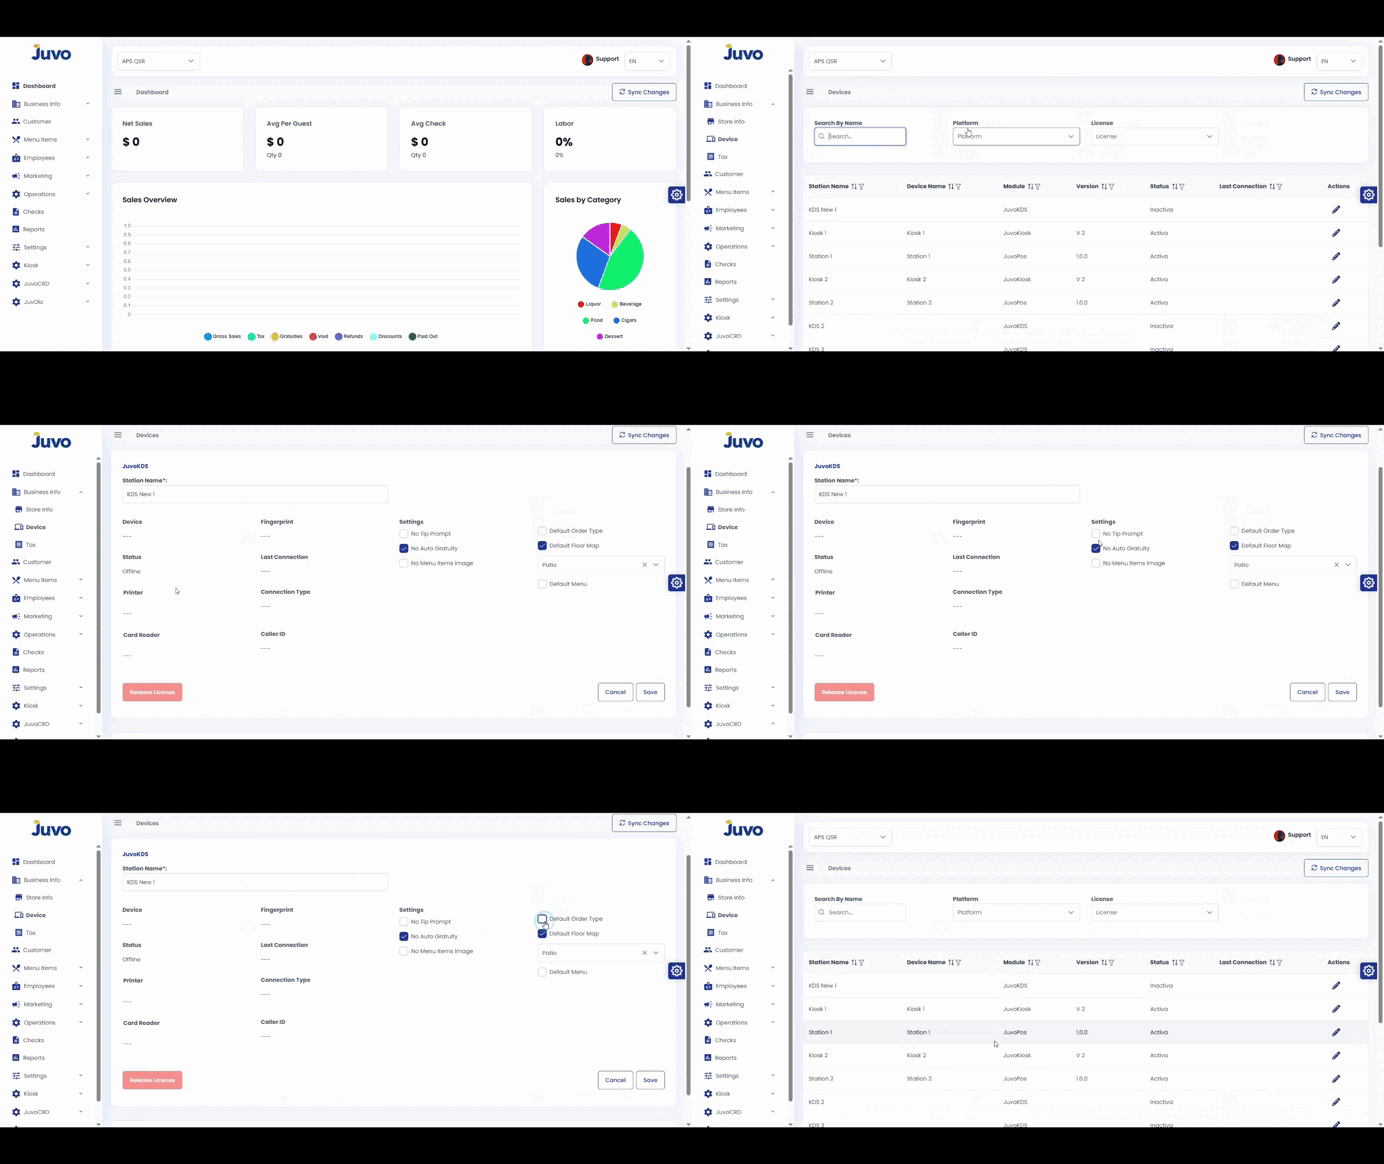
  • Business Info → Devices

    Manage registered devices in Juvo Back Office.

    1. Open Business Info.
    2. Select Devices.
    3. Filter if needed and select a device.
    4. Edit the device name, settings, release license, default status, or other available options.
    5. Click Save.
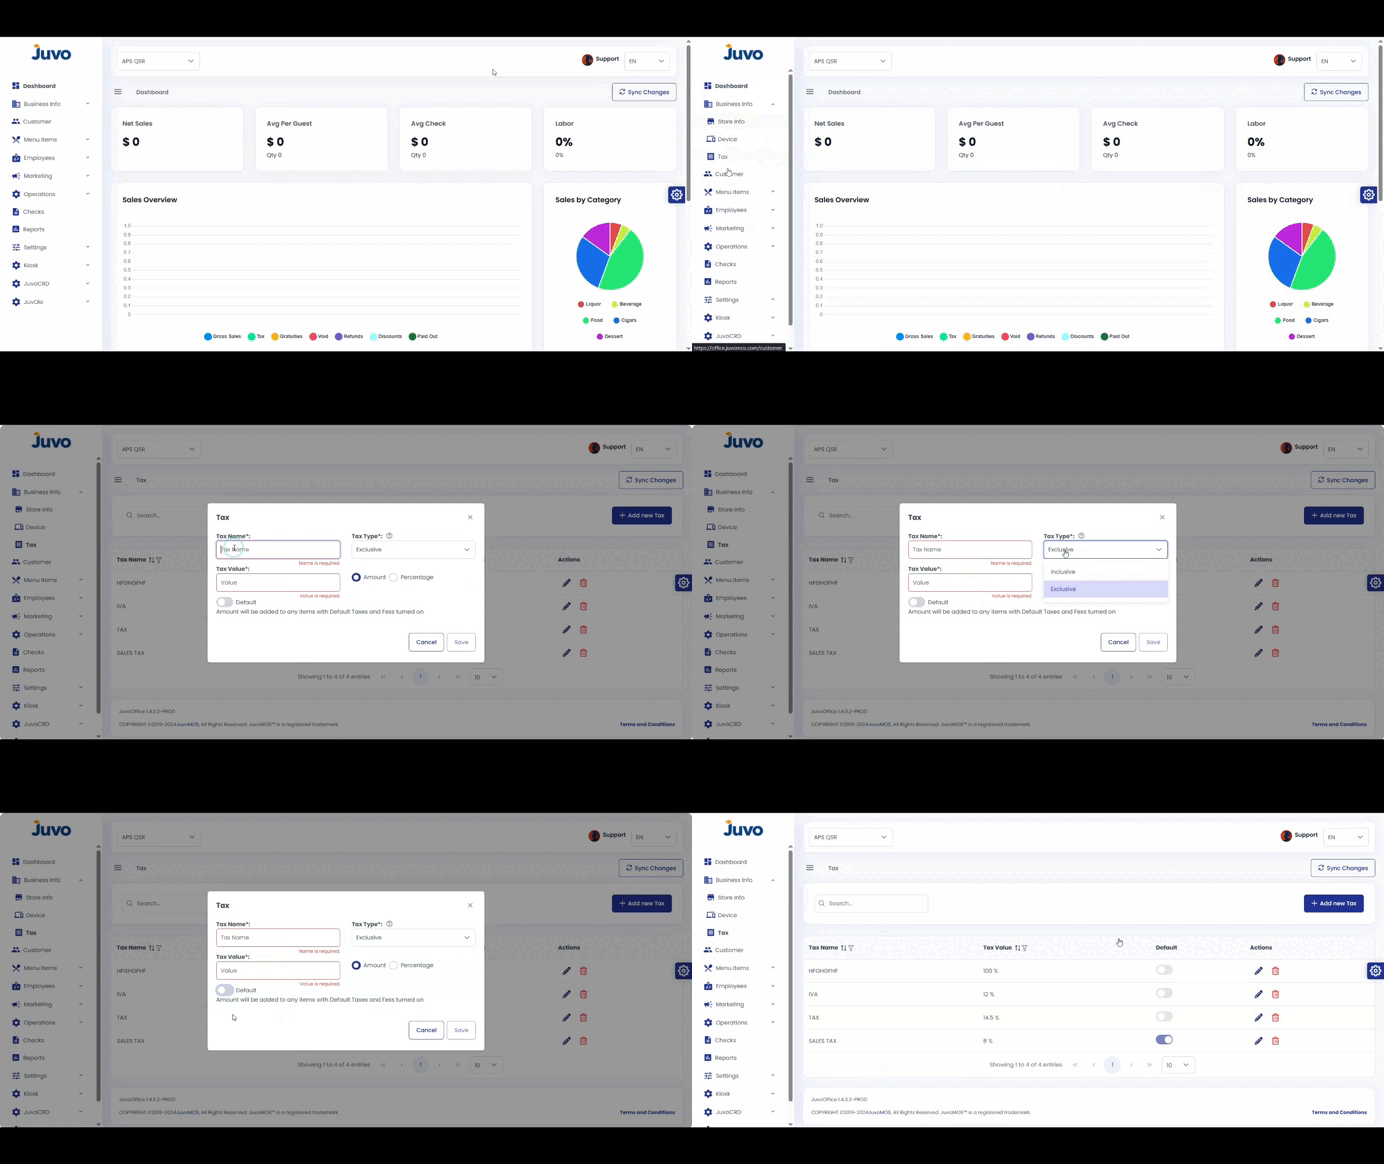
  • Business Info → Tax

    Create or update tax configurations.

    1. Go to Business Info → Tax.
    2. Click Add Tax or Edit.
    3. Enter the tax name and percentage or amount.
    4. Mark Default if it should apply to all newly created items.
    5. Click Save.
  • Customers

    Create and manage customer profiles.

    1. Open Customers.
    2. Click Add Customer.
    3. Enter the name, email, phone, address, and notes.
    4. Click Save.
    5. Use the search bar to find the customer later.
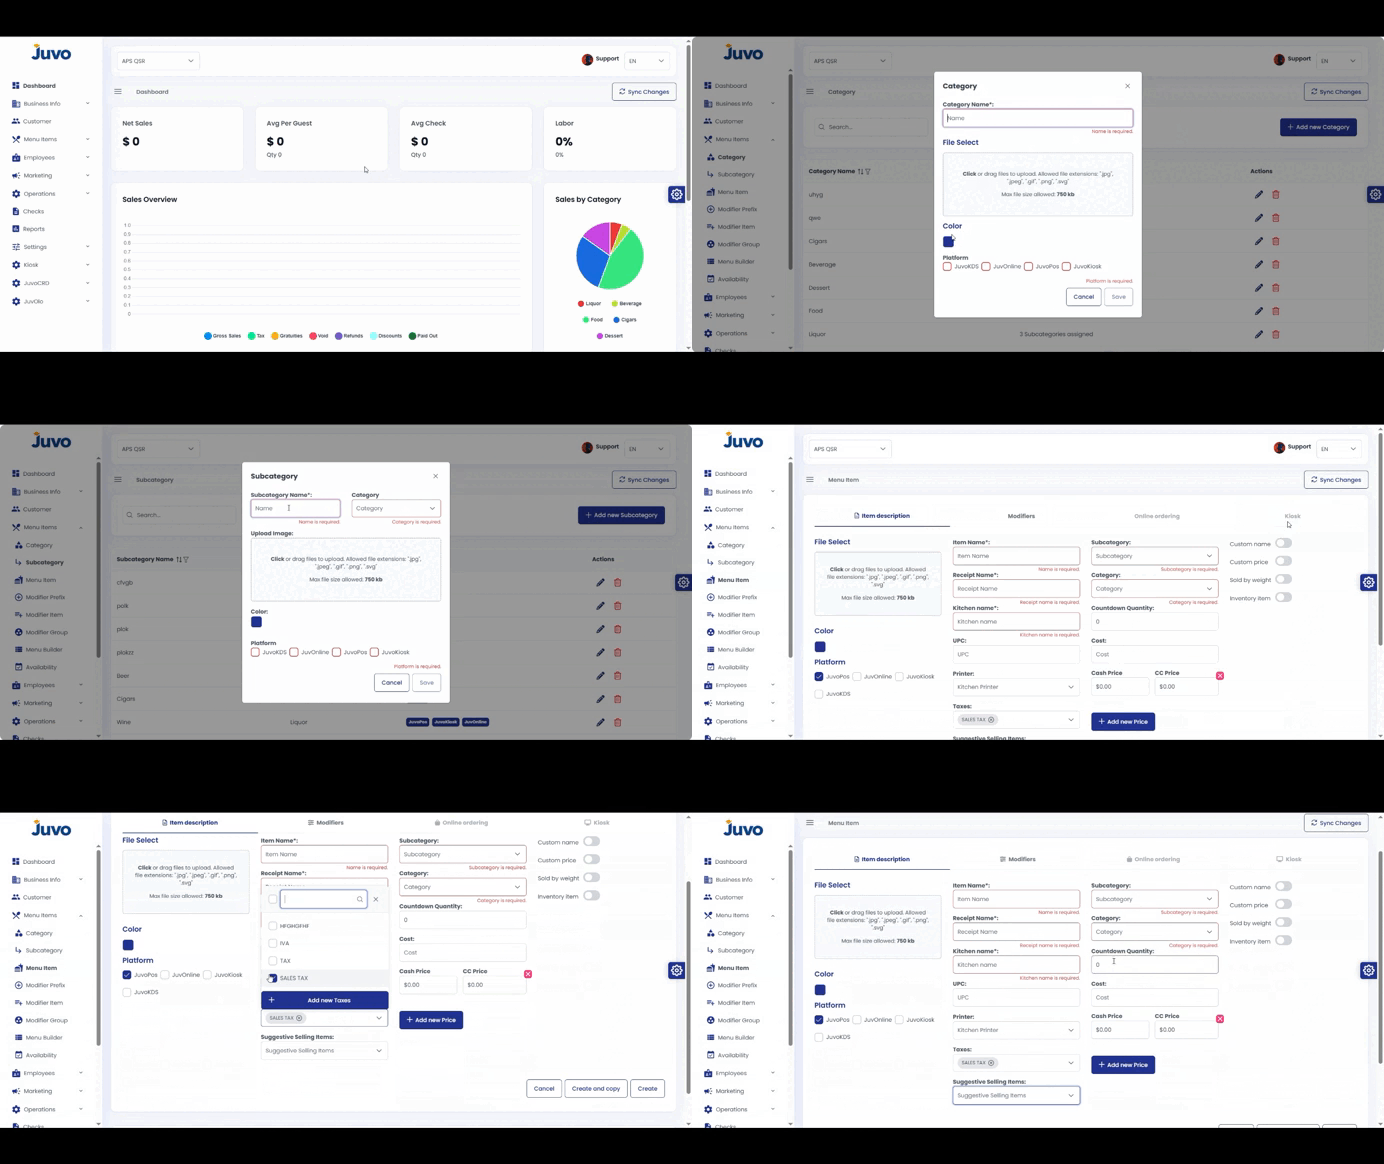
  • Menu Items → Add Category and Subcategory

    Create menu categories and subcategories.

    1. Open Menu Items and select Category or Sub Category.
    2. Click Add Category or Add Sub Category.
    3. Enter the name, such as Drinks or Food.
    4. Click Save.
    5. Repeat as needed.
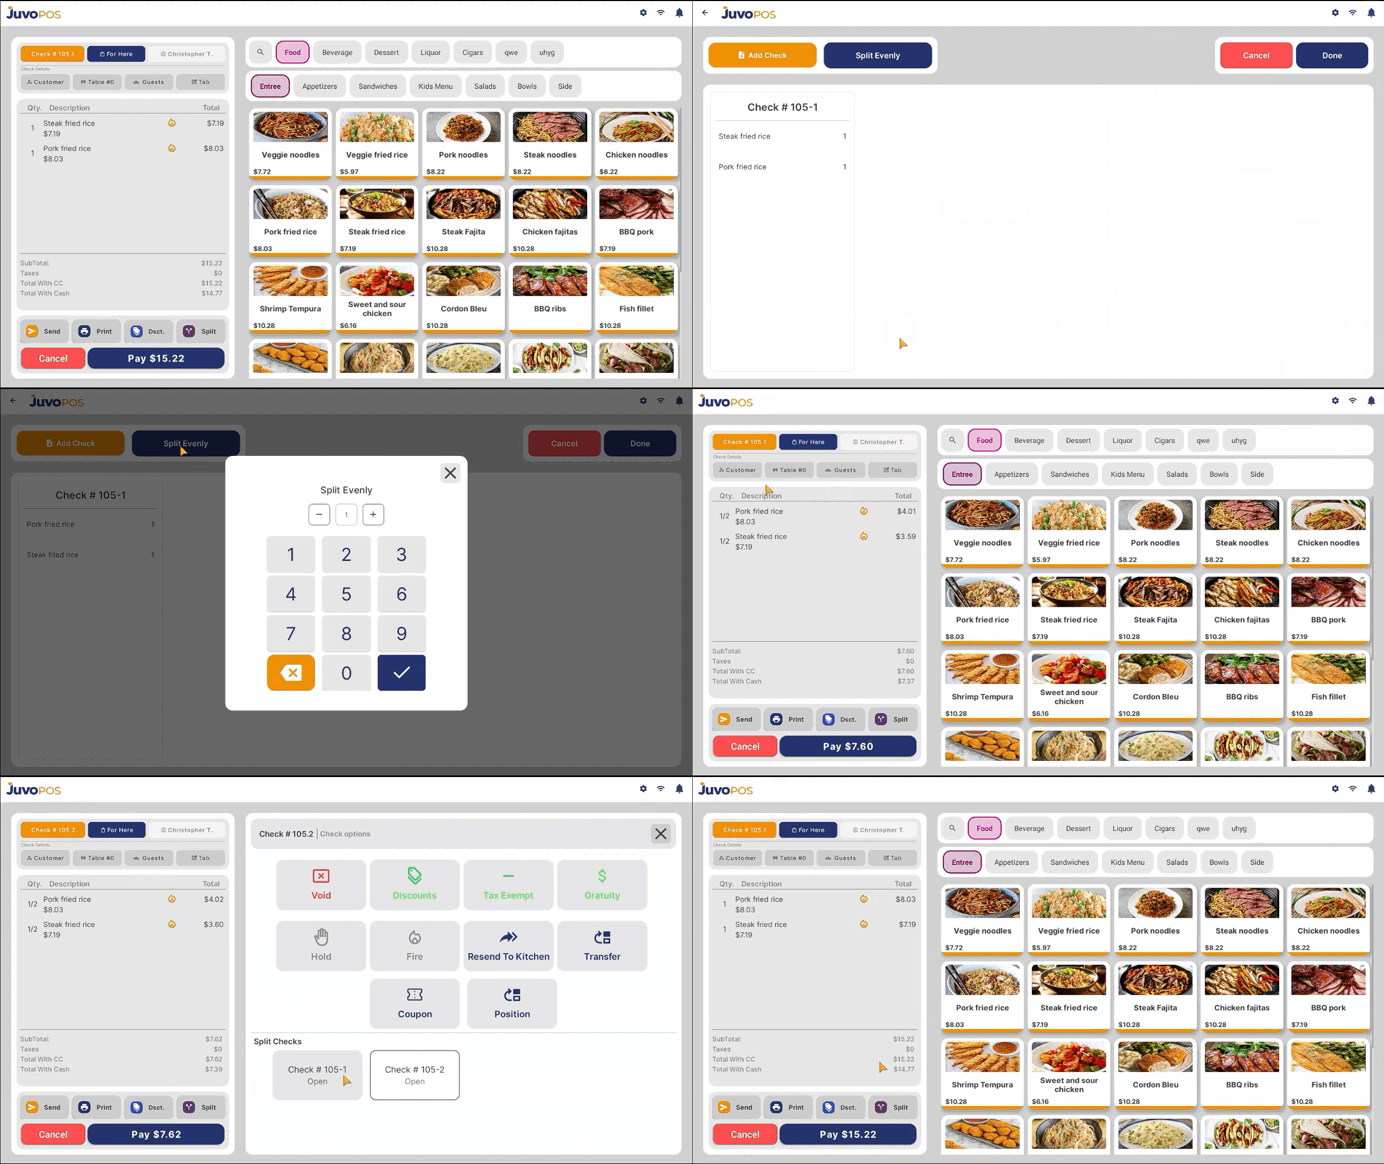
  • Splitting an Item in POS

    To split an item in the POS:

    1. Select the item you want to split.
    2. Tap the Split button.
    3. Press and hold the item until the split option appears.
    4. Enter the number of splits you want.
    5. The item will now be split into the selected number of portions.

    If you want to move items to other checks:

    1. Tap Add Check to create another check.
    2. Drag and drop the items to the desired check.
    3. You can verify that the items were split correctly by switching between the different checks.

    The items are now successfully split between the checks.

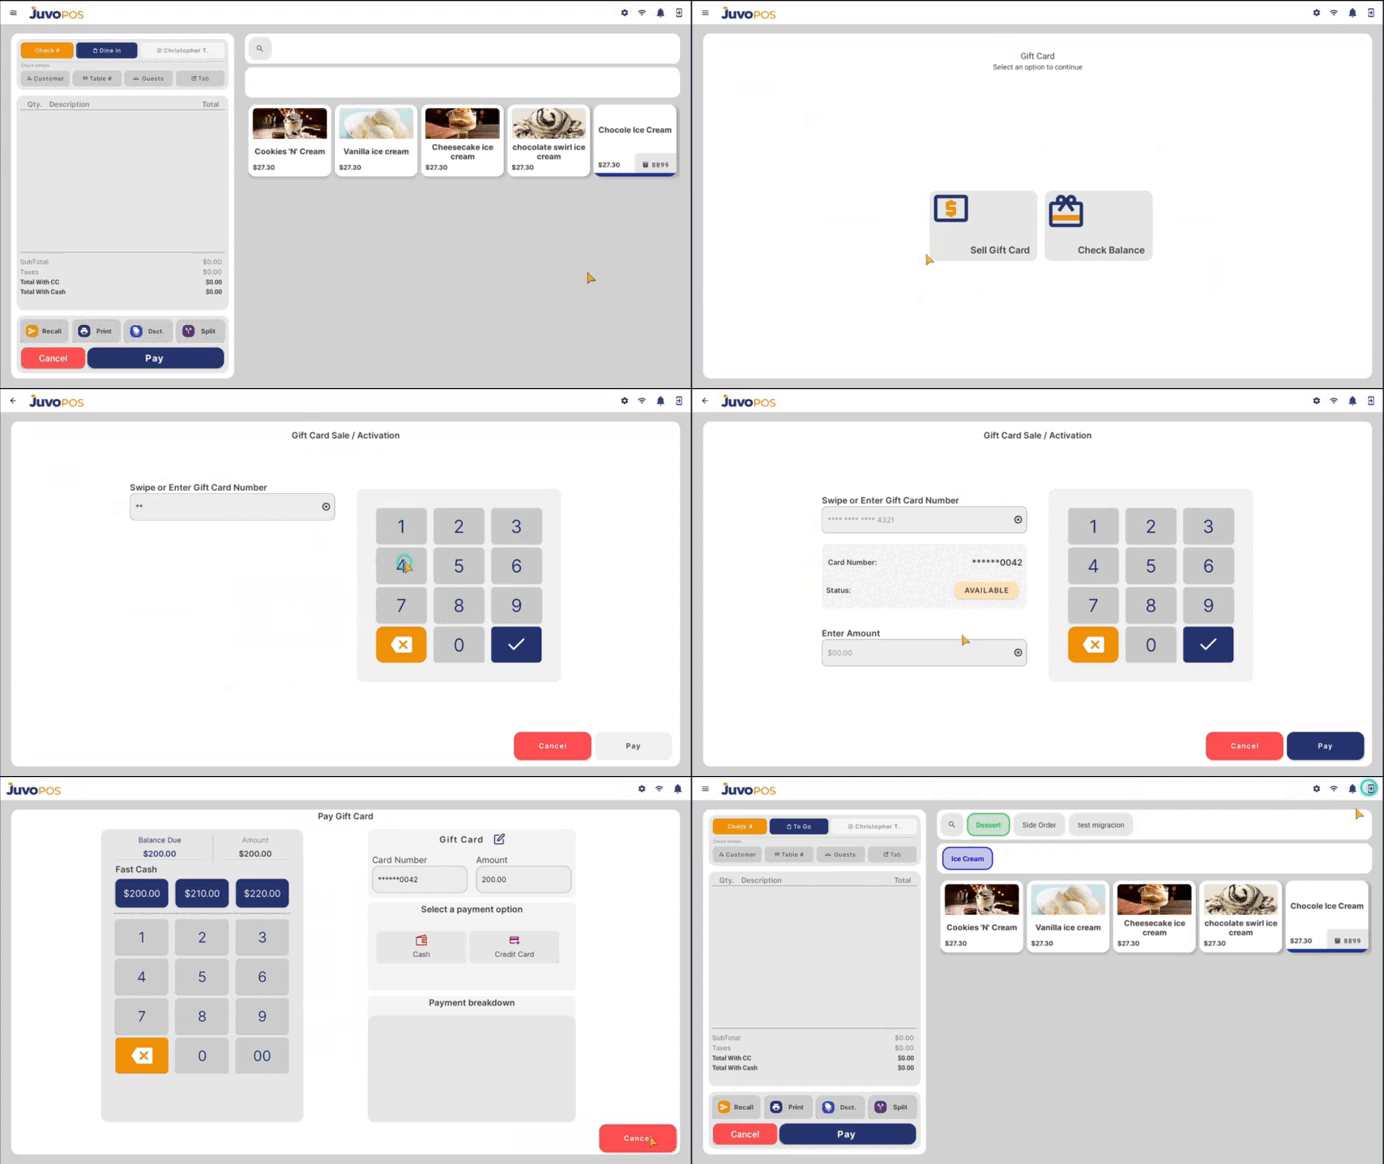
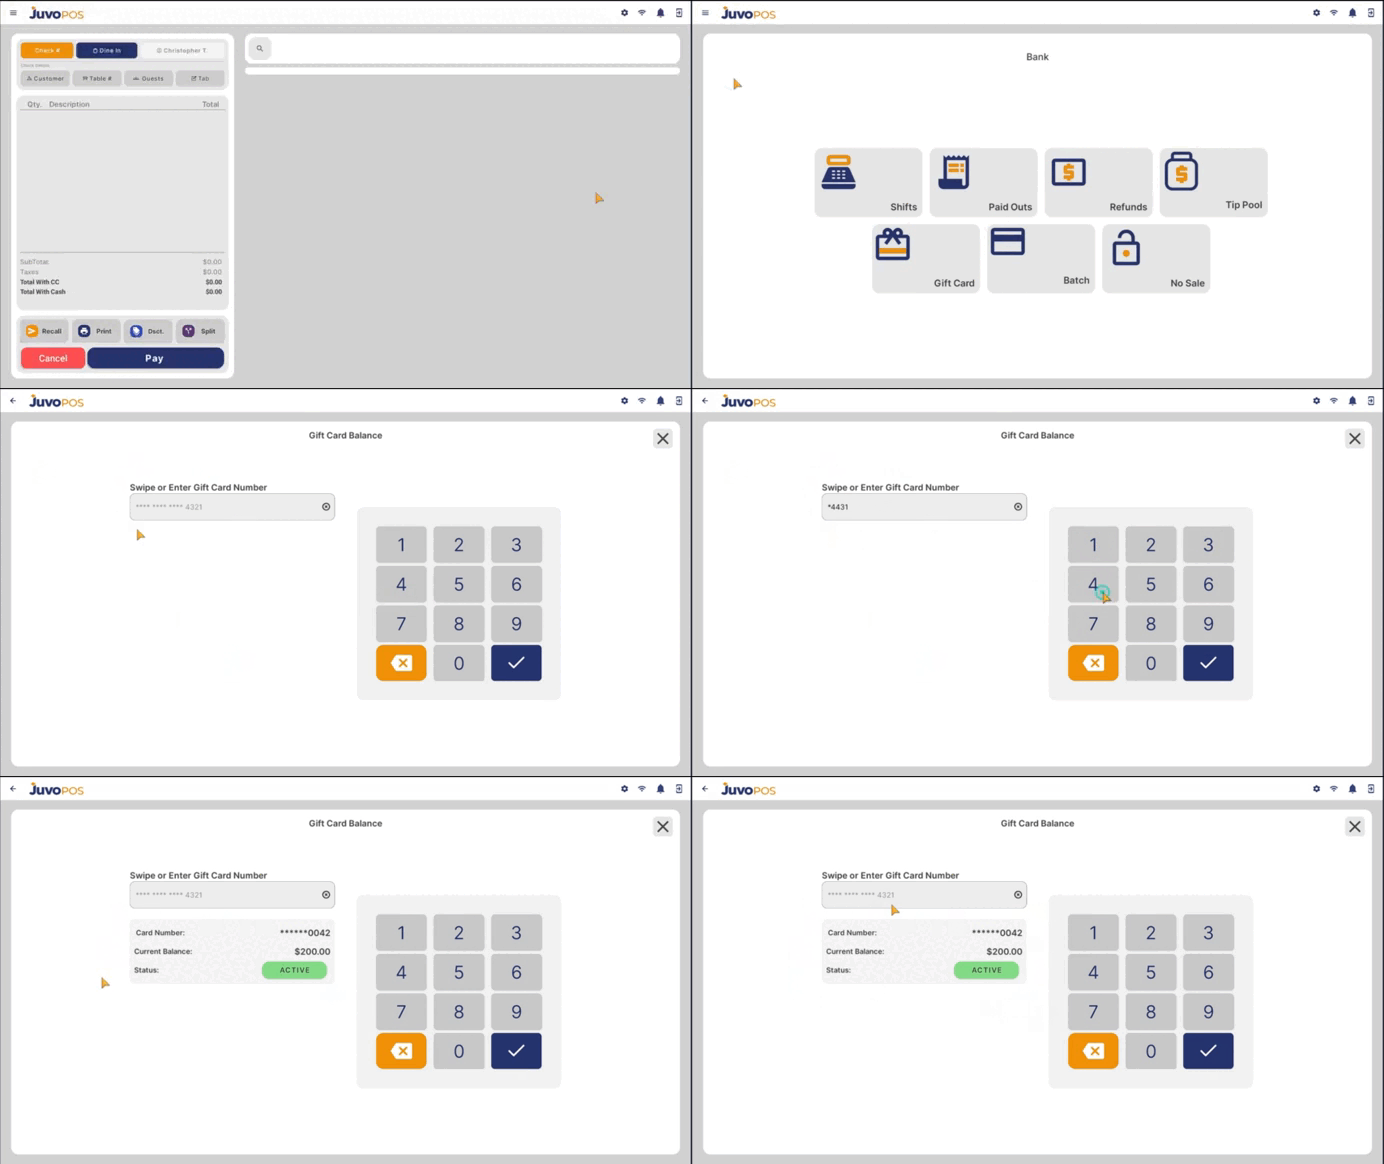
  • Gift Card – Juvo POS

    After the gift cards have been successfully uploaded in the Back Office, use the POS to activate or sell a gift card or check its balance.

    1 Activate or Sell a Gift Card

    1. Go to the POS.
    2. Open the Functions Menu.
    3. Select BANK.
    4. Select Gift Cards.
    5. Enter the number of a gift card that was previously uploaded in the Back Office.
    6. Select the gift card you want to activate or sell.
    7. Follow the POS prompts to complete the transaction.
    8. Complete the sale according to the normal POS process.

    Navigation: Functions Menu → BANK → Gift Cards

    2 Check Gift Card Balance

    1. Open the POS Functions Menu.
    2. Select BANK.
    3. Select Gift Cards.
    4. Enter the gift card number.
    5. Select the option to check the balance.
    6. Review the balance displayed by the system.