Tag: Training Guide

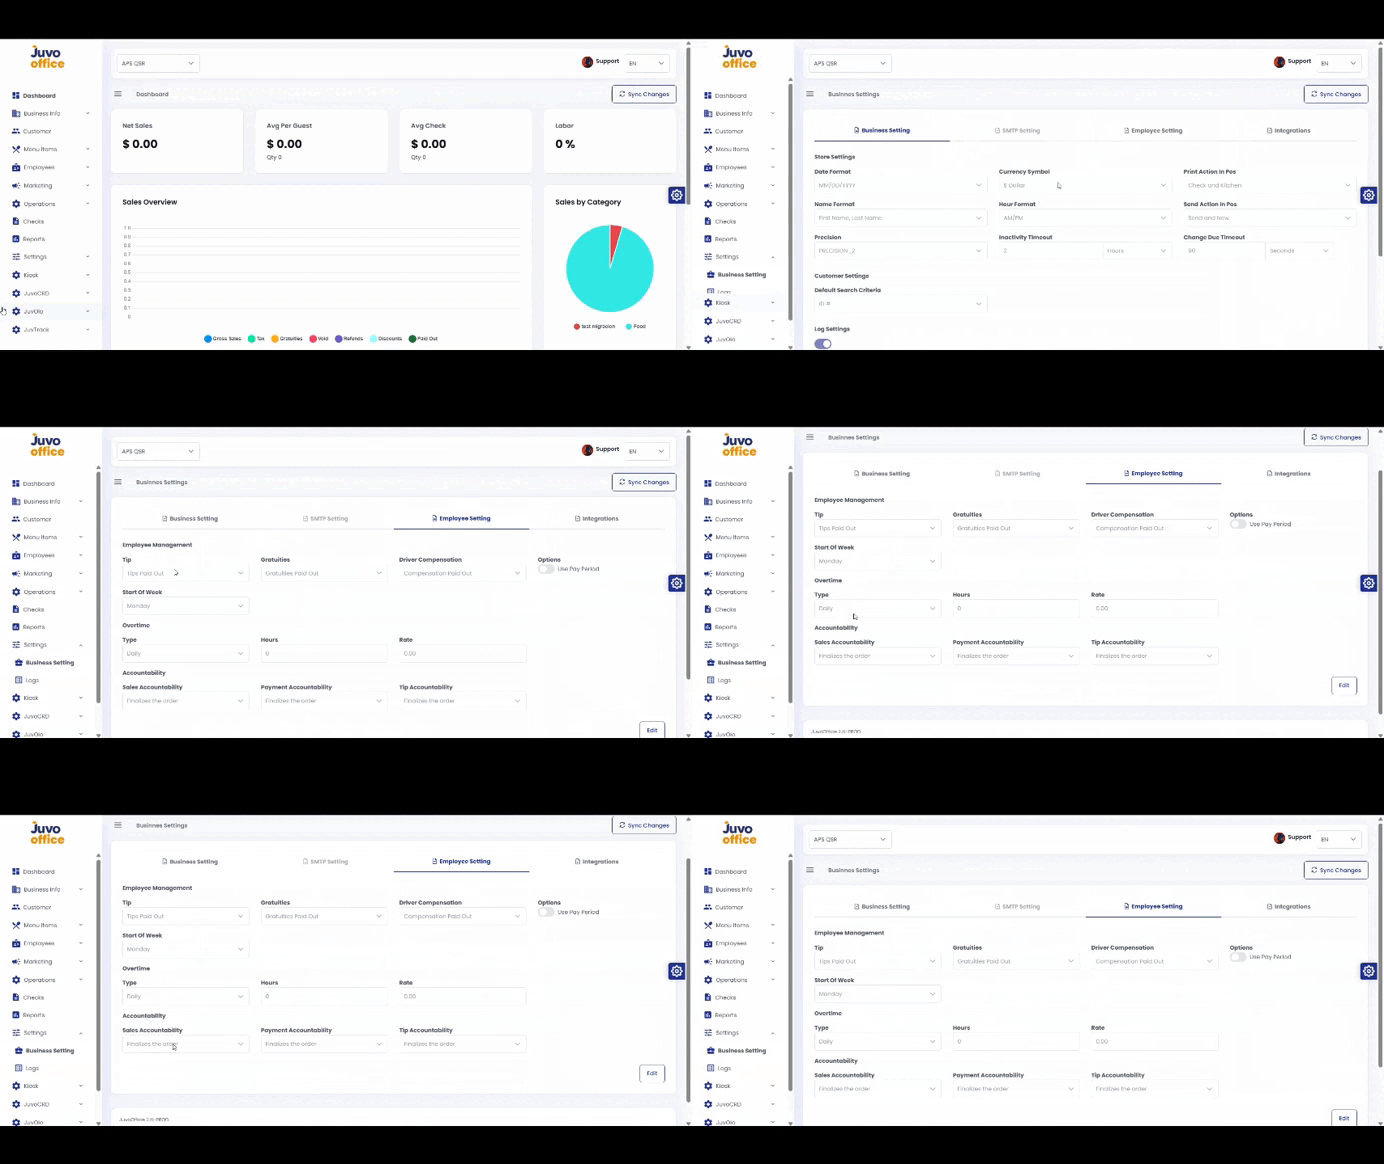
  • Settings → Employee Settings

    Configure employee-related preferences.
    1. Open Settings → Employee Settings.
    2. Review Tip Management, Compensation, Overtime, and other settings.
    3. Adjust the options according to store policies and requirements.
    4. Review and click Save when available.
  • Settings → Business Settings

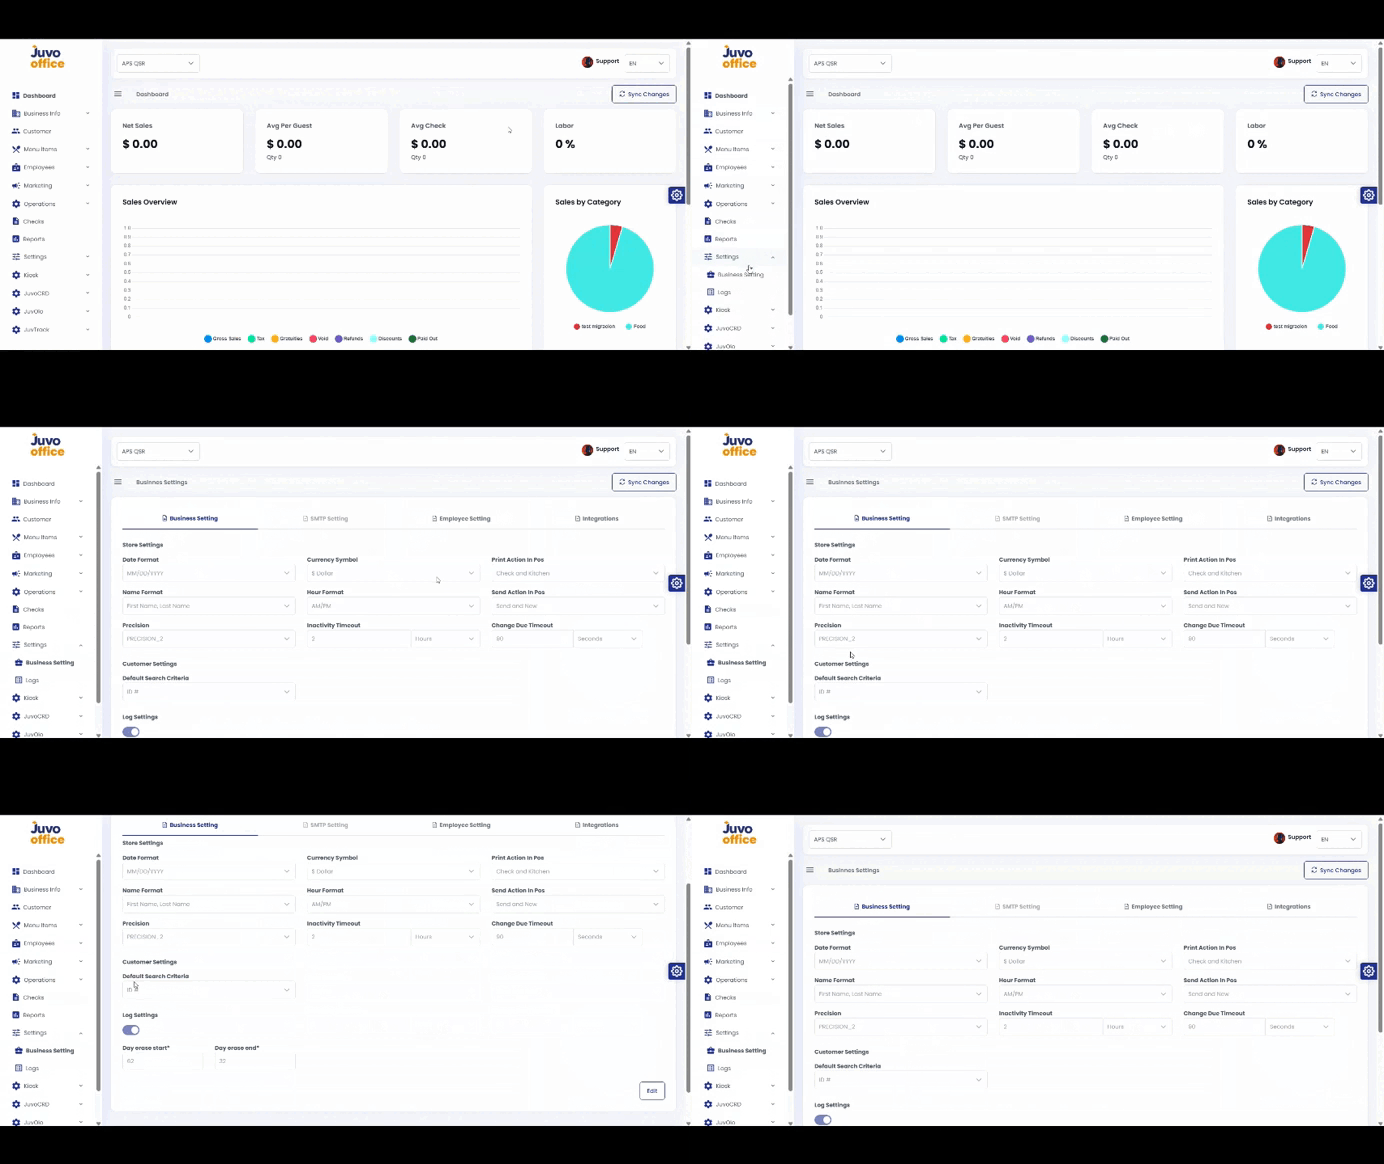
    Configure business preferences in Juvo Back Office.
    1. Open Settings → Business Settings.
    2. Review Date Format, Currency, and other preferences.
    3. Update the settings according to store requirements.
    4. Review and click Save when available.
  • Reports → View and Export Reports

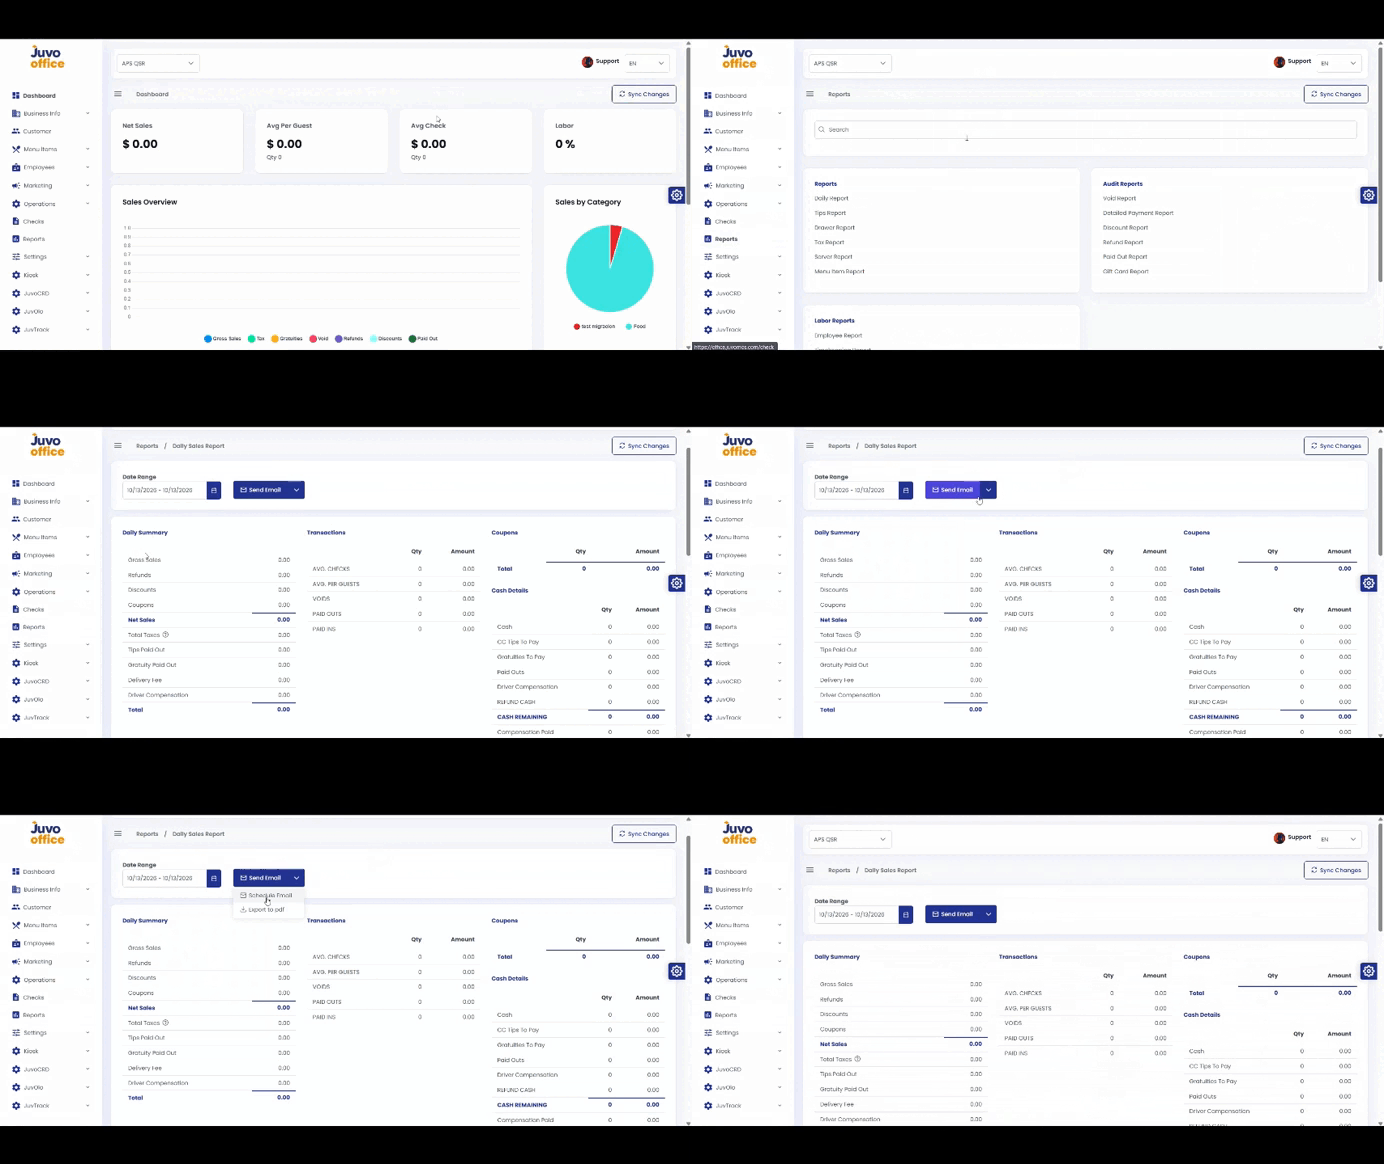
    View, email, schedule, or download Back Office reports.
    1. Open Reports.
    2. Select a report.
    3. Apply a Date Range.
    4. Use Send Email, Schedule Email, or Download PDF when available.
    5. Verify the date range and settings before exporting.
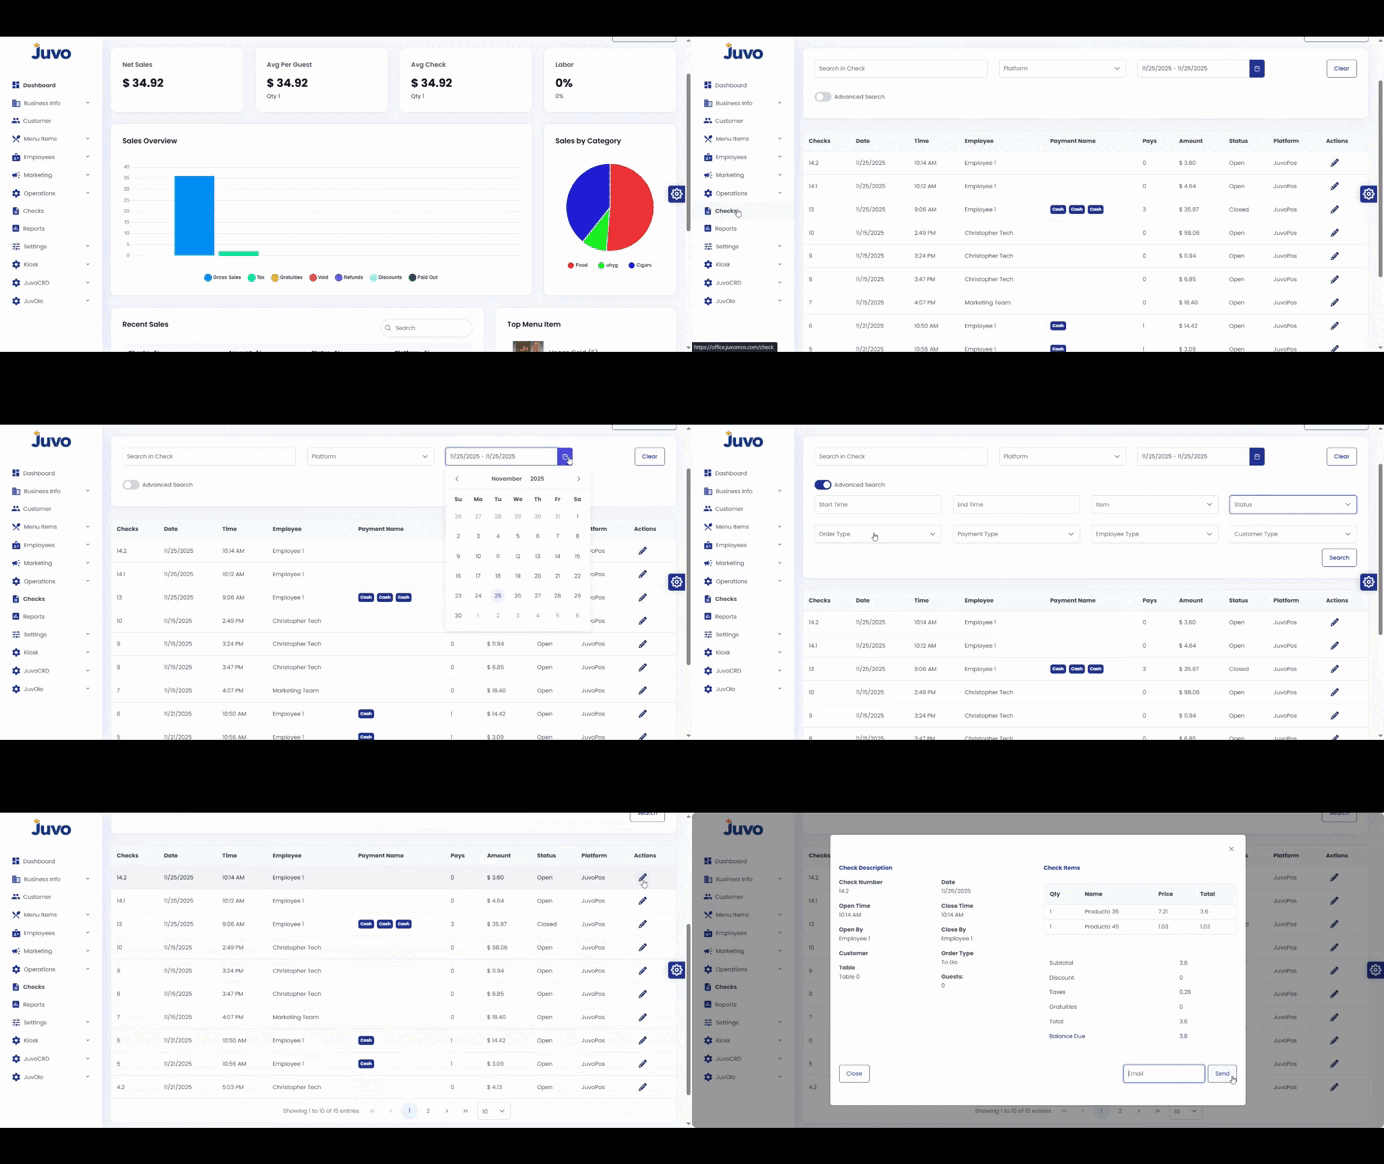
  • Checks → View All Checks

    Search and review checks in Juvo Back Office.
    1. Open Check in the left-hand menu.
    2. Scroll to the Check section.
    3. Use Date, Employee, or Order Type filters.
    4. Open a check to view details or send it by email.
    5. Use Advanced Filter for more specific searches.
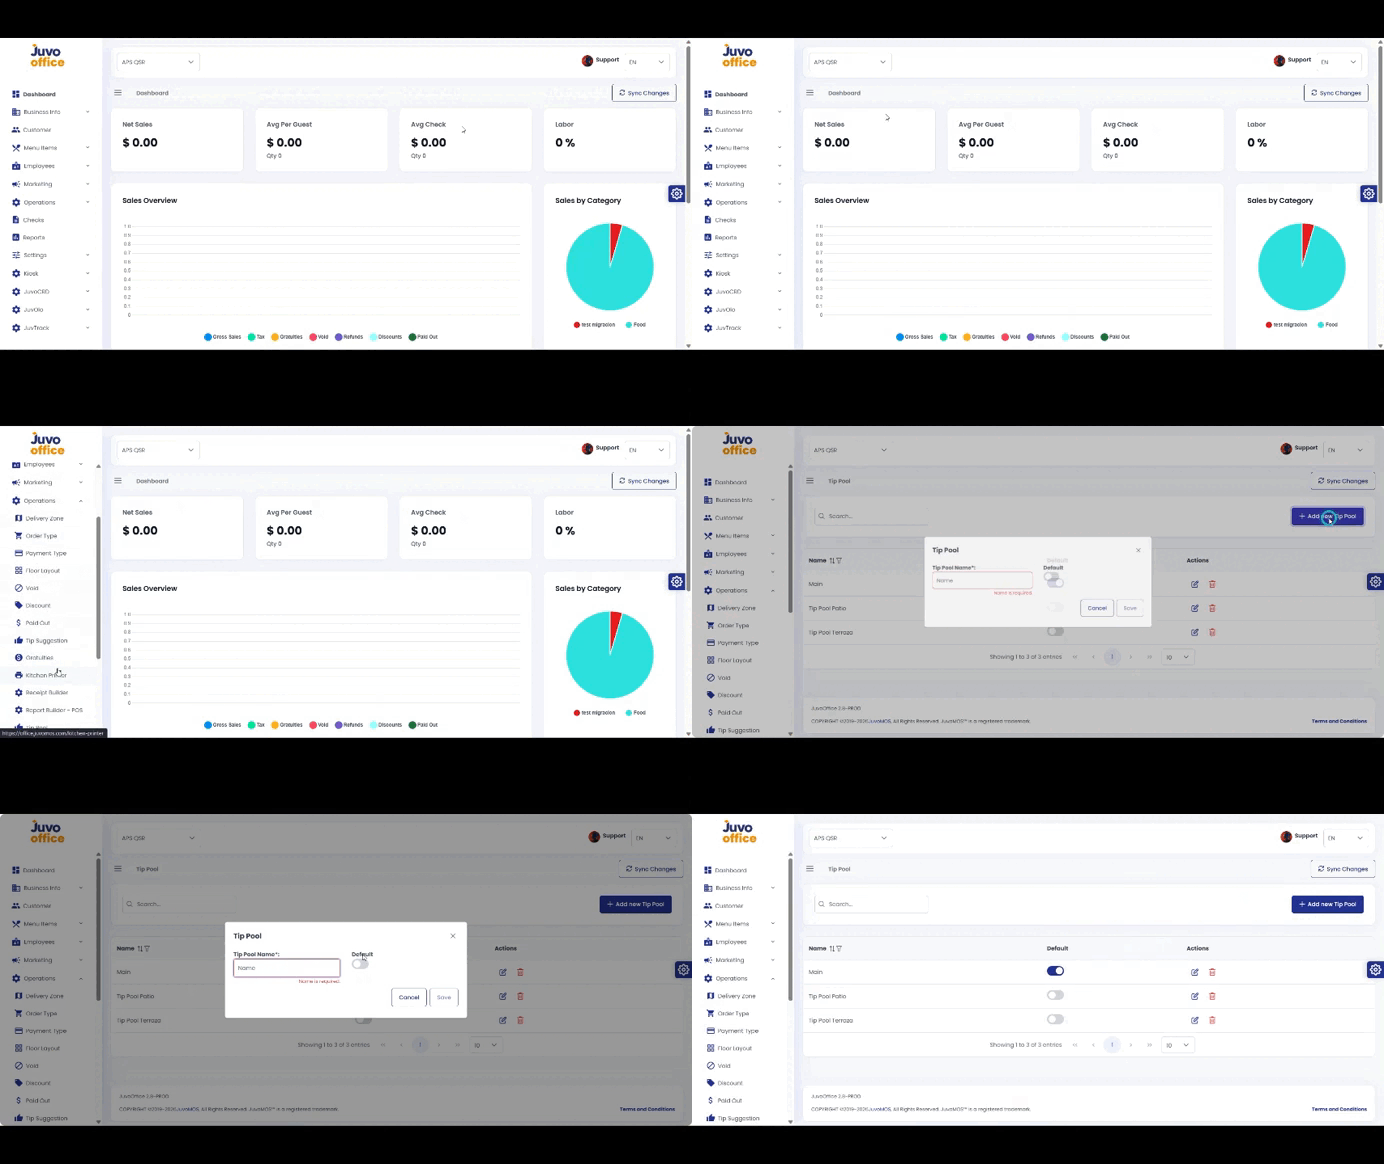
  • Operations → Tip Pool

    Create and configure a Tip Pool.

    1. Open Operations → Tip Pool.
    2. Enter the tip pool name.
    3. Enable Default Tip Pool if it should be the primary option.
    4. Review and save.
  • Operations → Delivery Zone

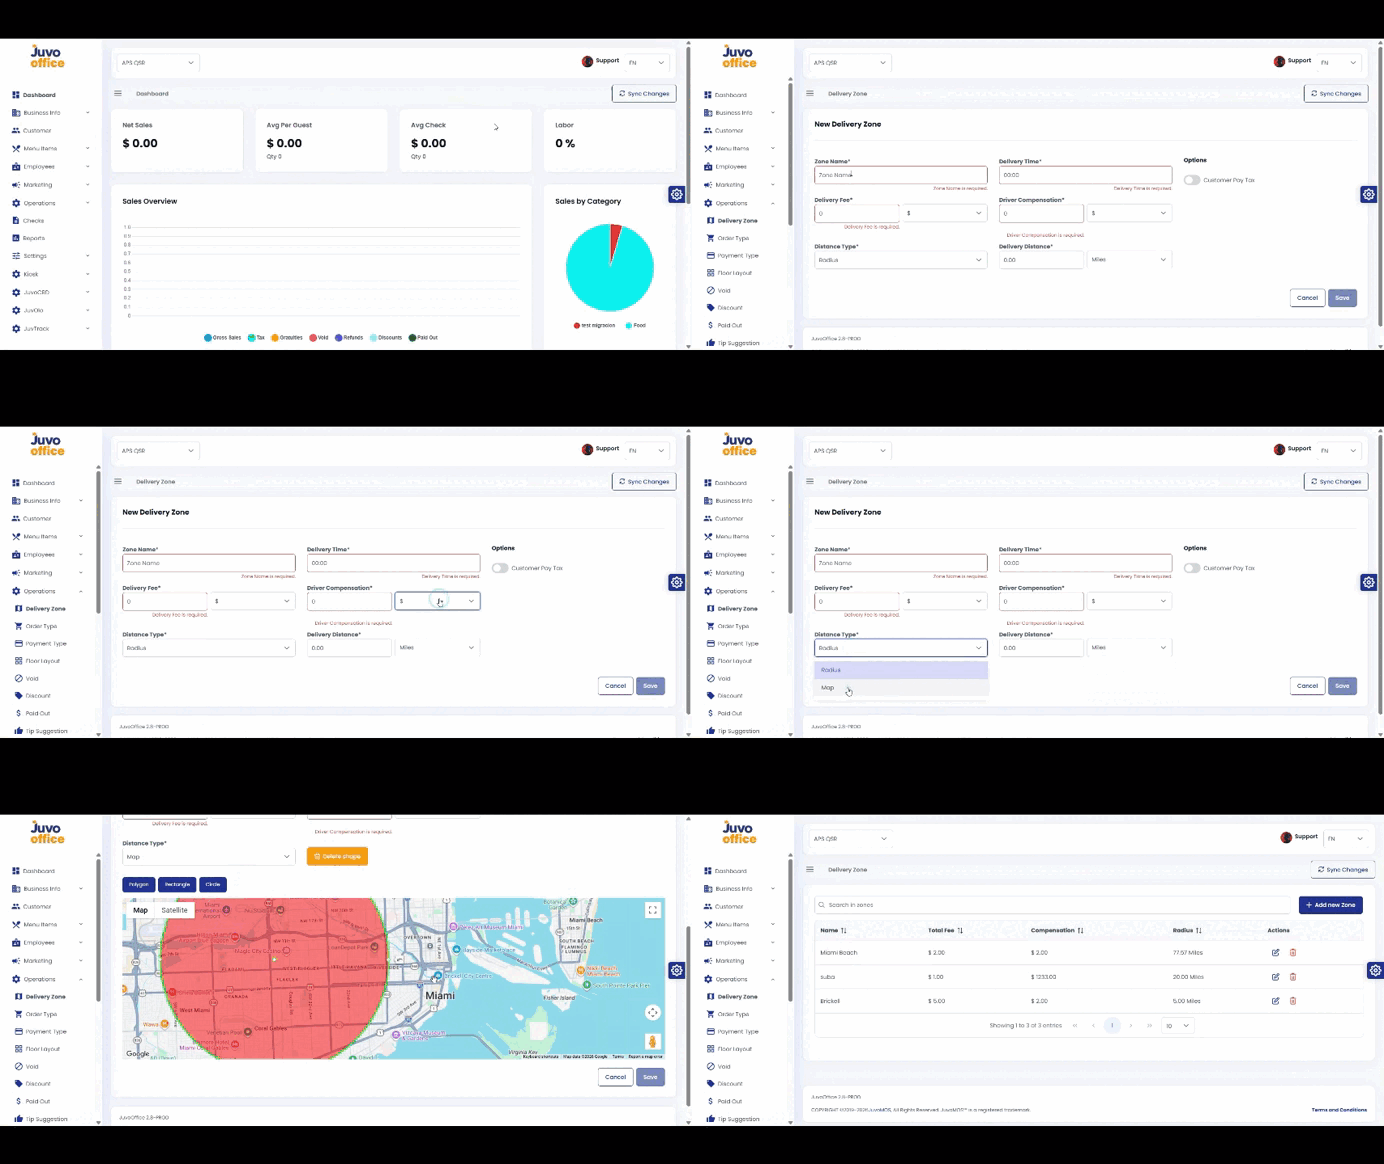
    Configure delivery areas, fees, driver compensation, and estimated delivery times.
    1. Open Operations → Delivery Zone.
    2. Enter a zone name.
    3. Set the zone fee as an amount or percentage.
    4. Configure driver compensation.
    5. Enter the approximate delivery time.
    6. Choose Miles or Kilometers.
    7. Draw the delivery boundaries on the map.
    8. Configure whether customers pay tax.
    9. Review and save.
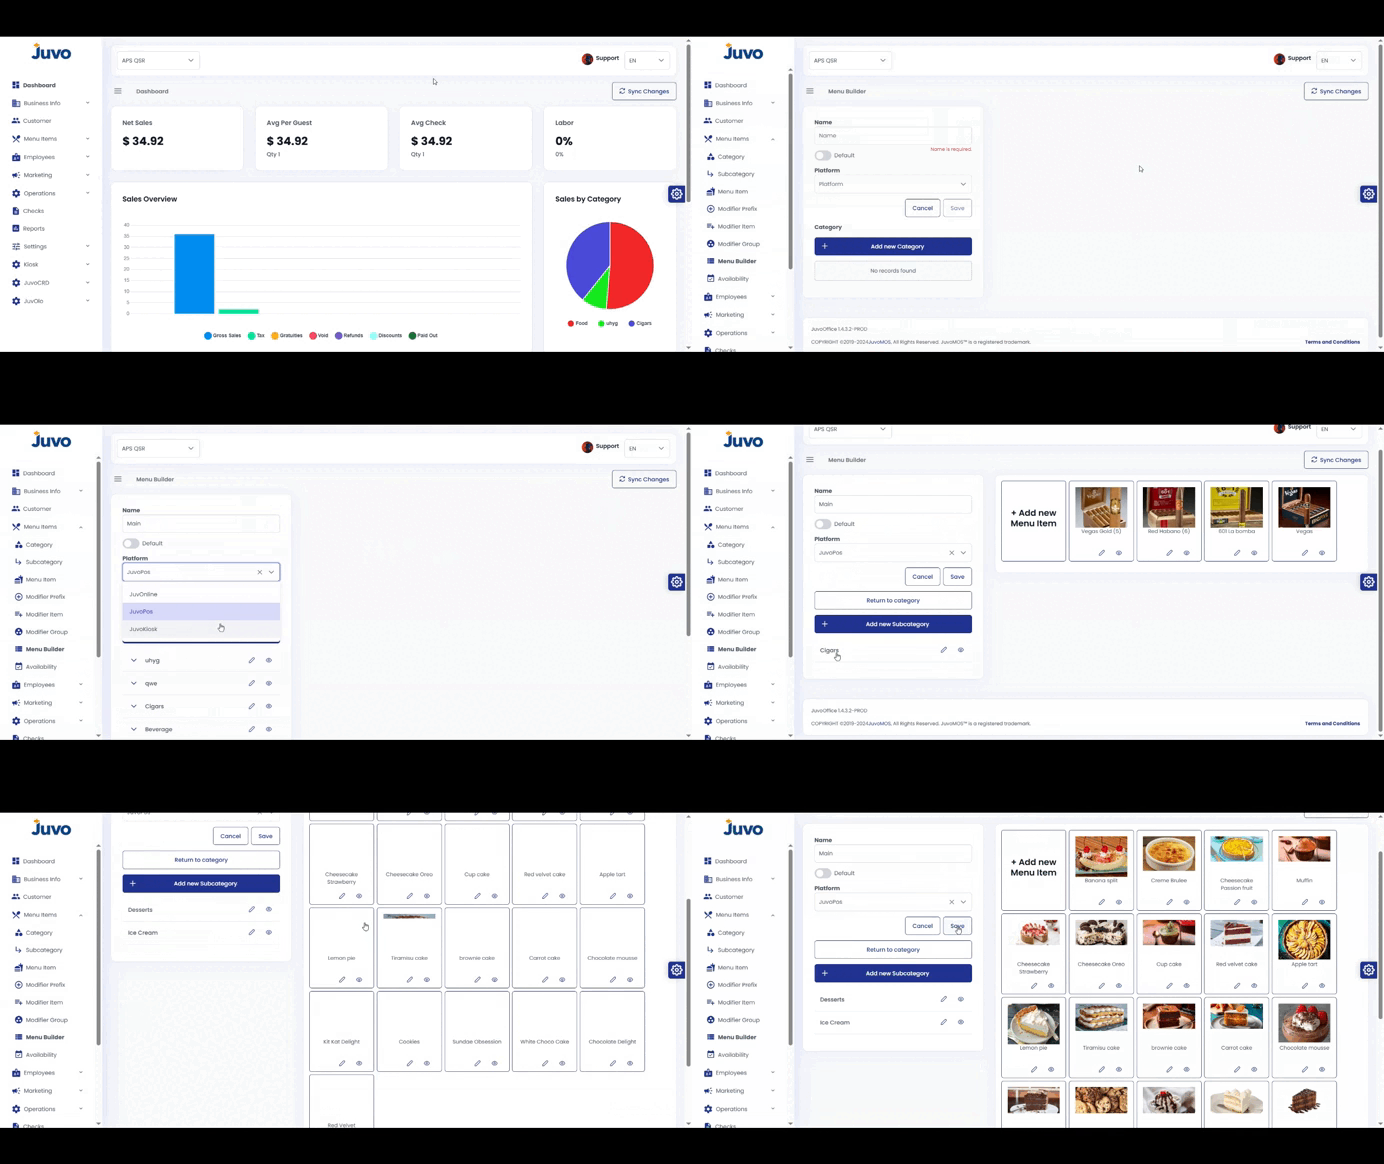
  • Menu Items → Menu Builder

    Customize the menu layout used by staff on POS and Kiosk.
    1. Open Menu Items → Menu Builder.
    2. Select an existing layout or create a new one.
    3. Use drag and drop to arrange categories, sections, and item buttons.
    4. Create categories, subcategories, or items when needed.
    5. Edit individual items and select whether the menu is Default.
    6. Click Save, then Publish or Push to Devices.
    7. Test the layout on one device before rolling it out.
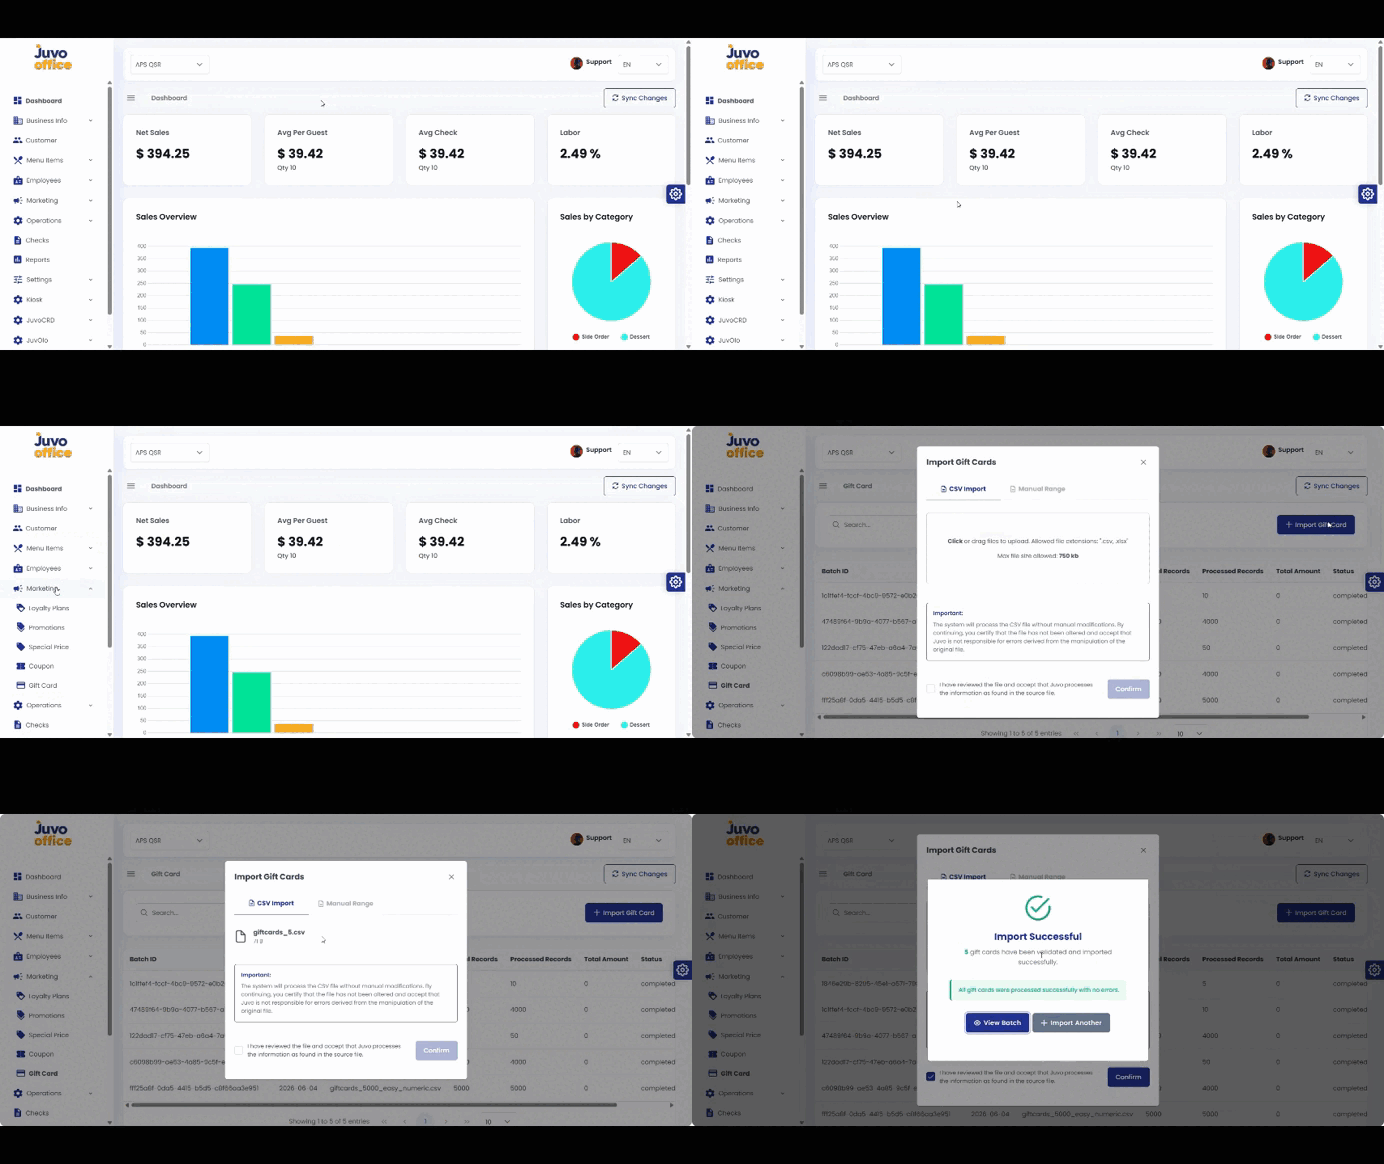
  • Marketing → Gift Cards

    Upload gift card information using a CSV file.
    1. Open Marketing → Gift Cards.
    2. Prepare a correctly formatted CSV with the required information, such as gift card numbers.
    3. Upload the CSV file.
    4. Verify the information before completing the process.
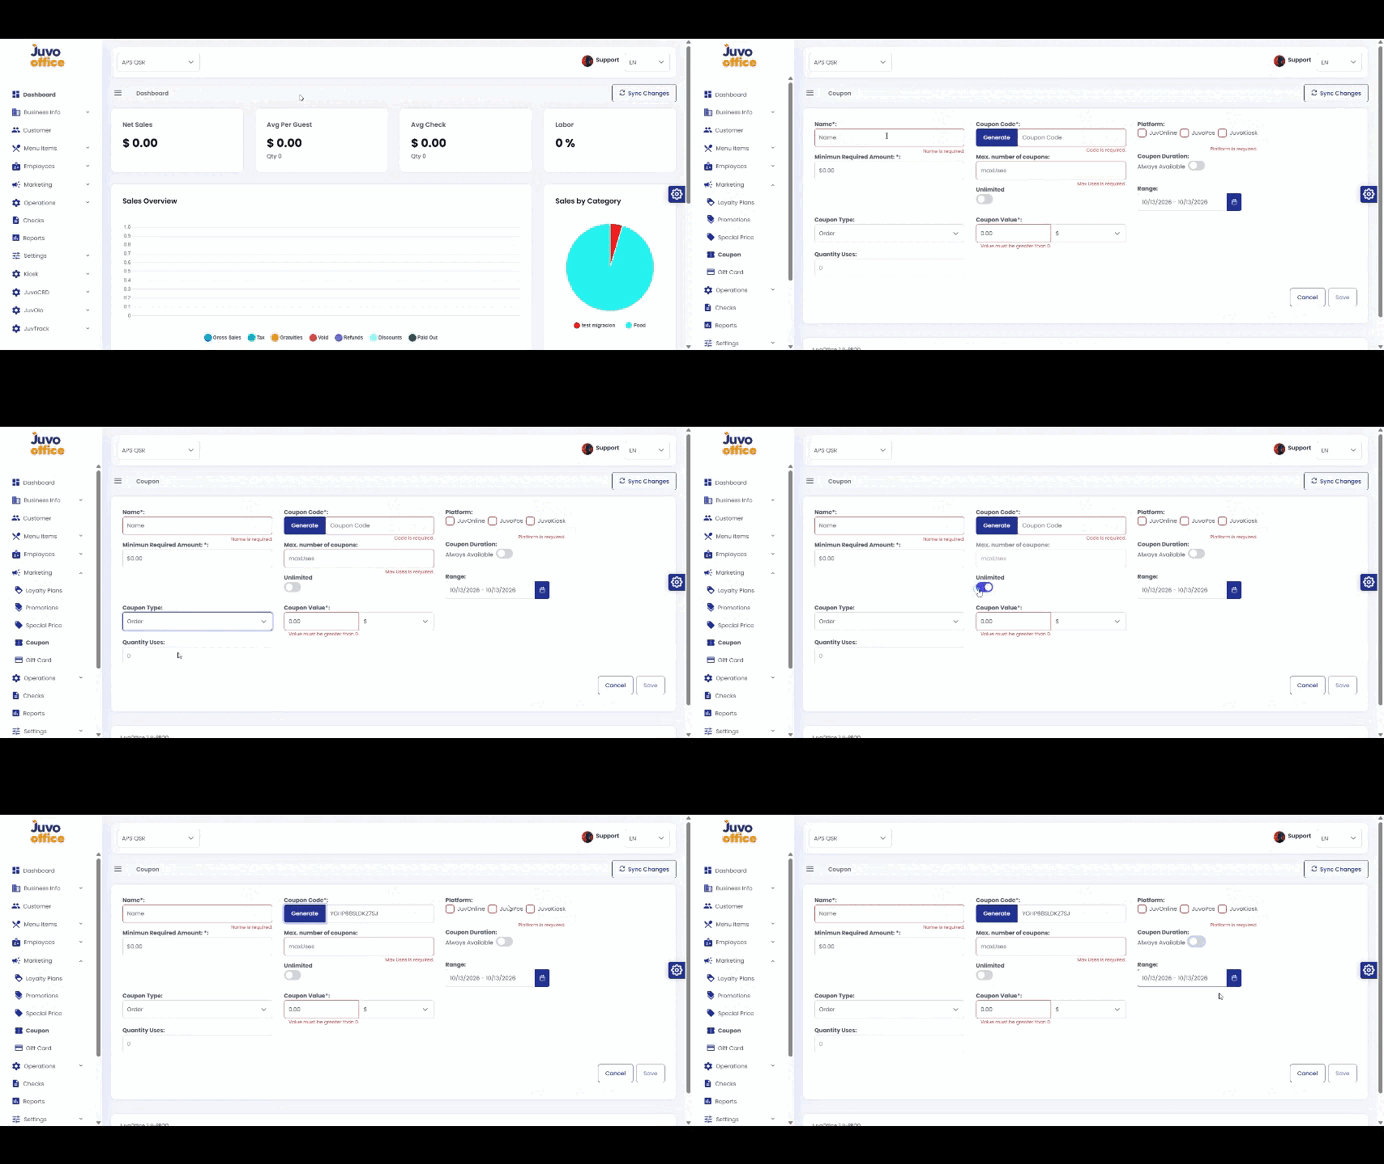
  • Marketing → Coupons

    Create coupons with discount, usage, and availability rules.
    1. Open Marketing → Coupons.
    2. Enter the coupon name and minimum requirement.
    3. Select the coupon type.
    4. Set quantity and maximum uses when applicable.
    5. Choose a fixed amount or percentage value.
    6. Select the available platforms.
    7. Choose Always Available or a date range.
    8. Review and click Save.
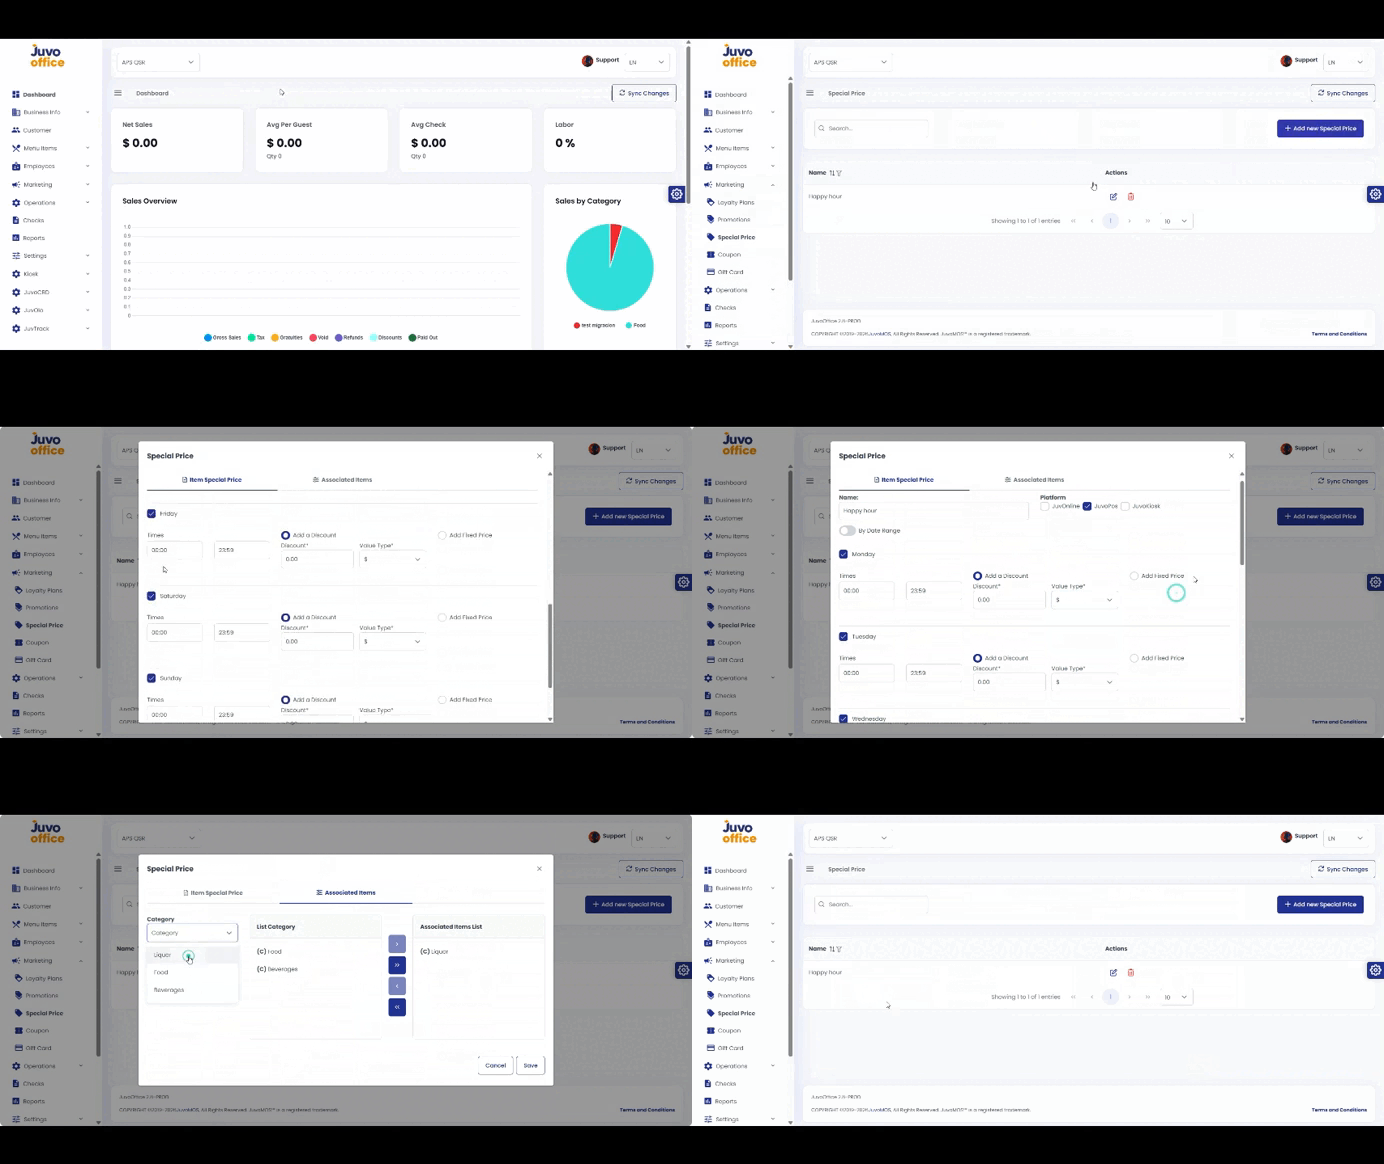
  • Marketing → Special Price

    Create scheduled special prices such as Happy Hour offers.

    1. Open Marketing → Special Price.
    2. Create a configuration and enter its name.
    3. Select the platforms.
    4. Set a date range or days of the week and a time range.
    5. Choose Amount, Percentage, or Fixed Price.
    6. Select categories, subcategories, or menu items.
    7. Review and click Save.