Tag: Juvo Back Office

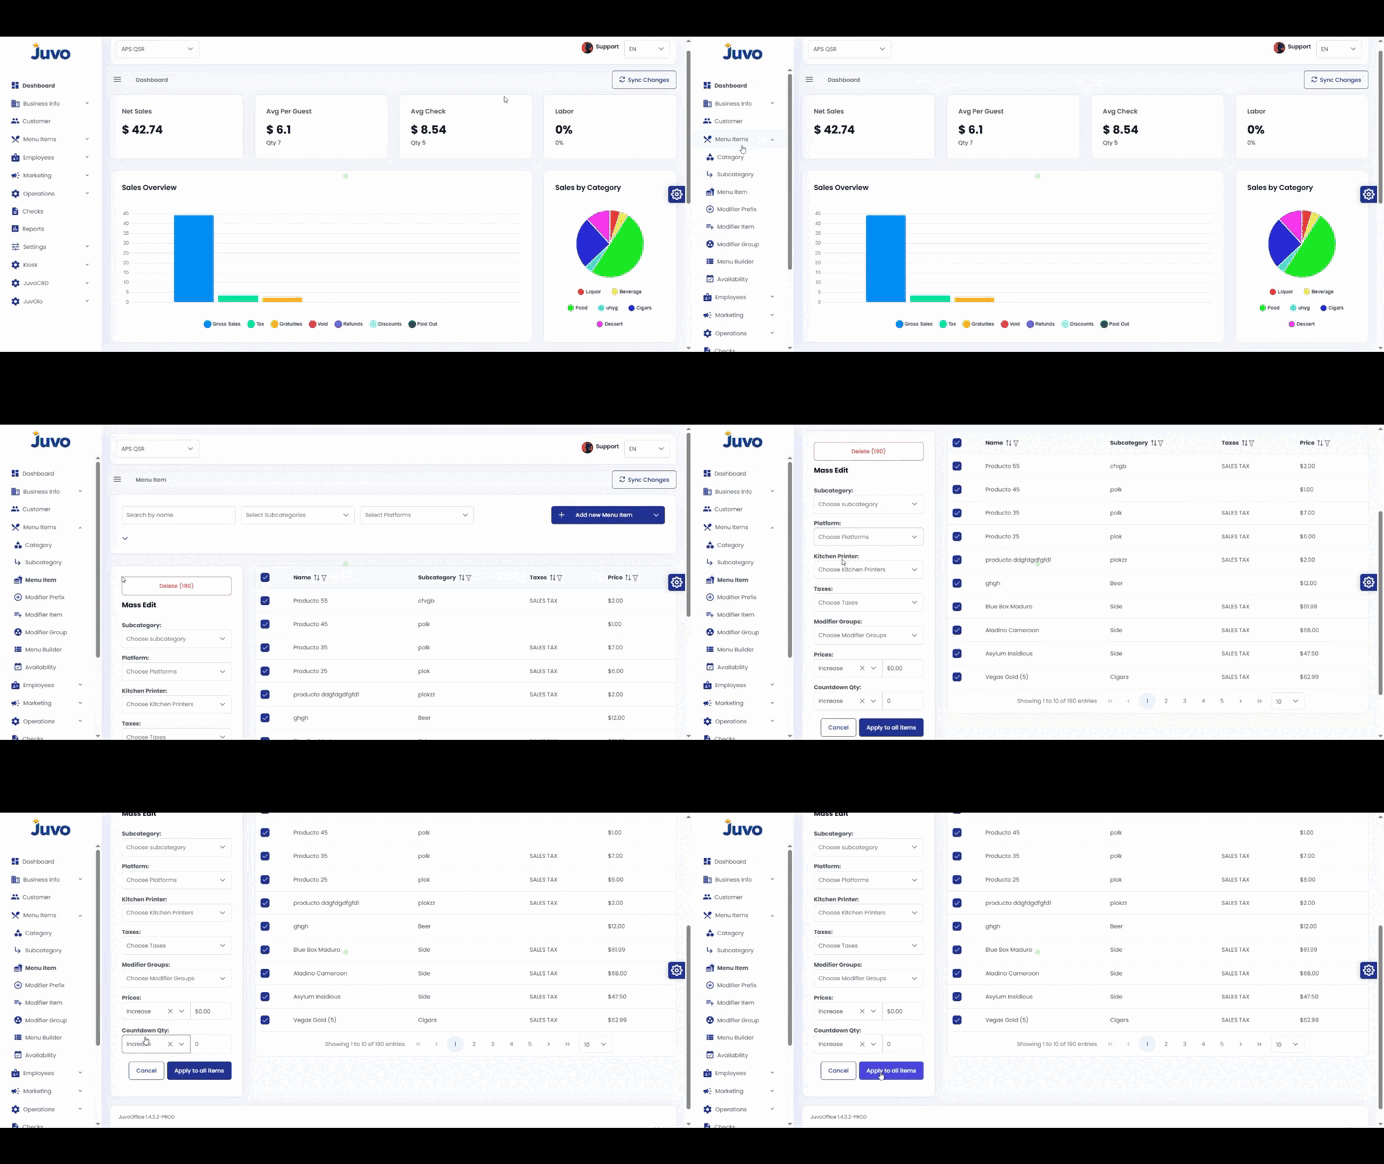
  • Menu Items → Mass Edit

    Edit multiple menu items efficiently.

    1. Open Menu Items.
    2. Locate the items to modify.
    3. Select the checkbox next to each item.
    4. Use the Mass Edit options.
    5. Review the selected items and apply or save the changes.

    Note: Double-check the selection before applying changes.
  • Menu Items → Availability

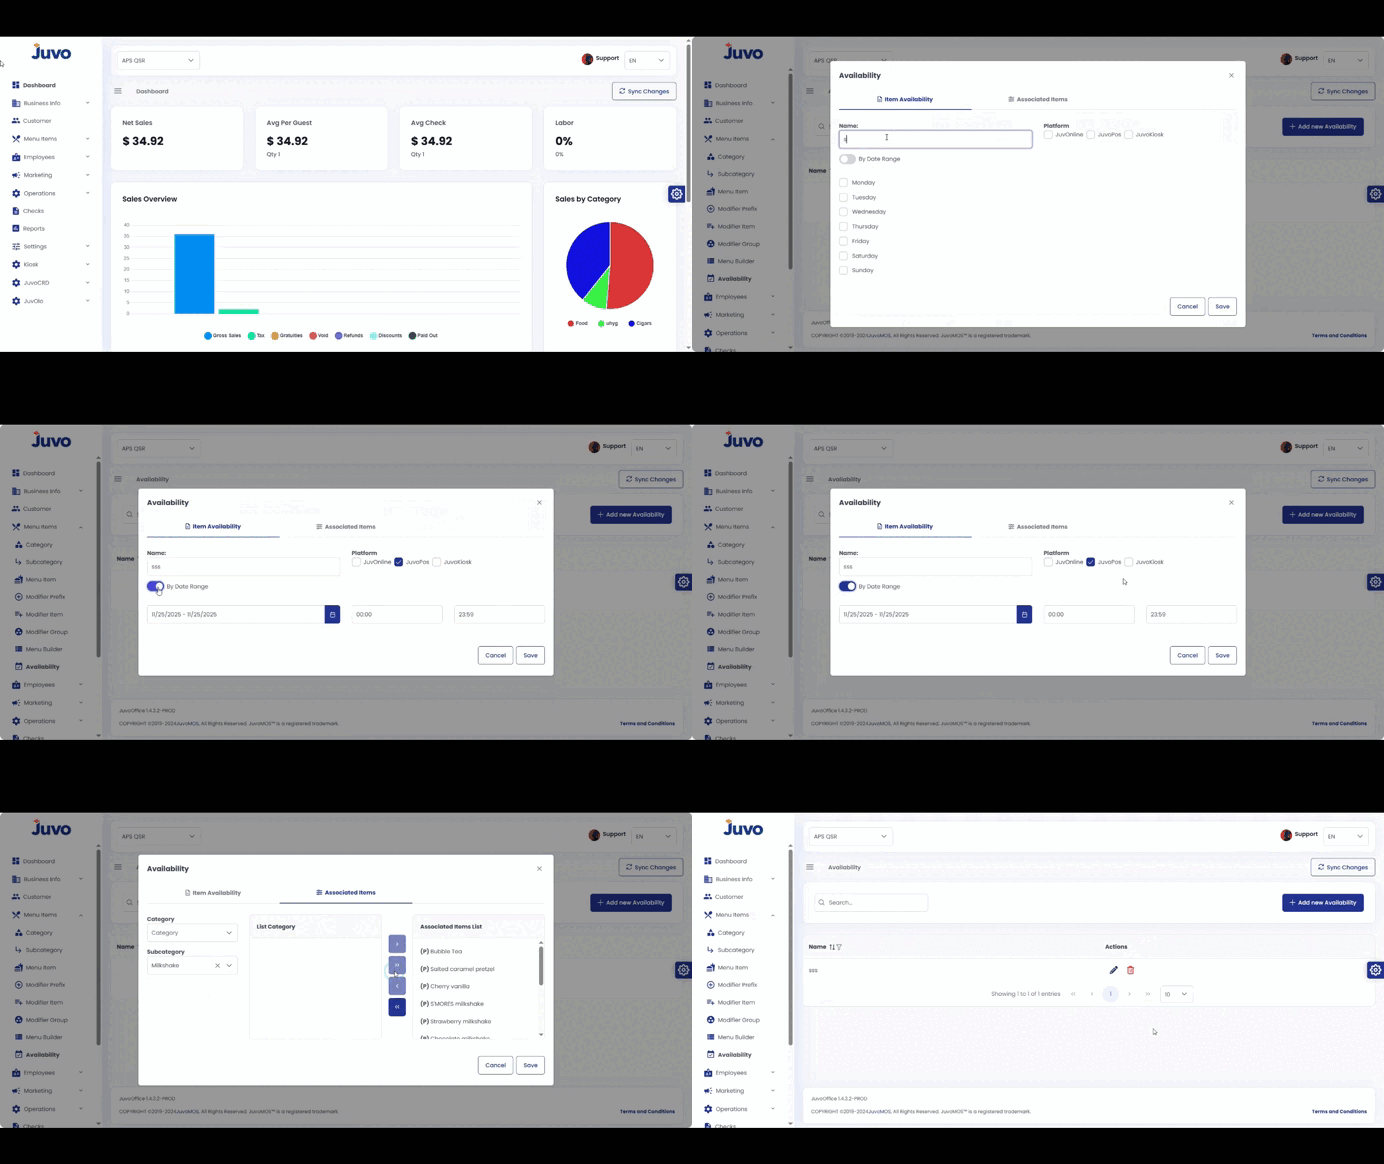
    Control when menu items appear on the POS.

    1. Open Menu Items → Availability.
    2. Choose a menu item, category, or modifier group.
    3. Click Edit Availability or Add Schedule.
    4. Set days and time ranges.
    5. Optionally add seasonal date ranges.
    6. Click Save, then Publish or Push to Devices.
    7. Verify in Preview or on the POS.
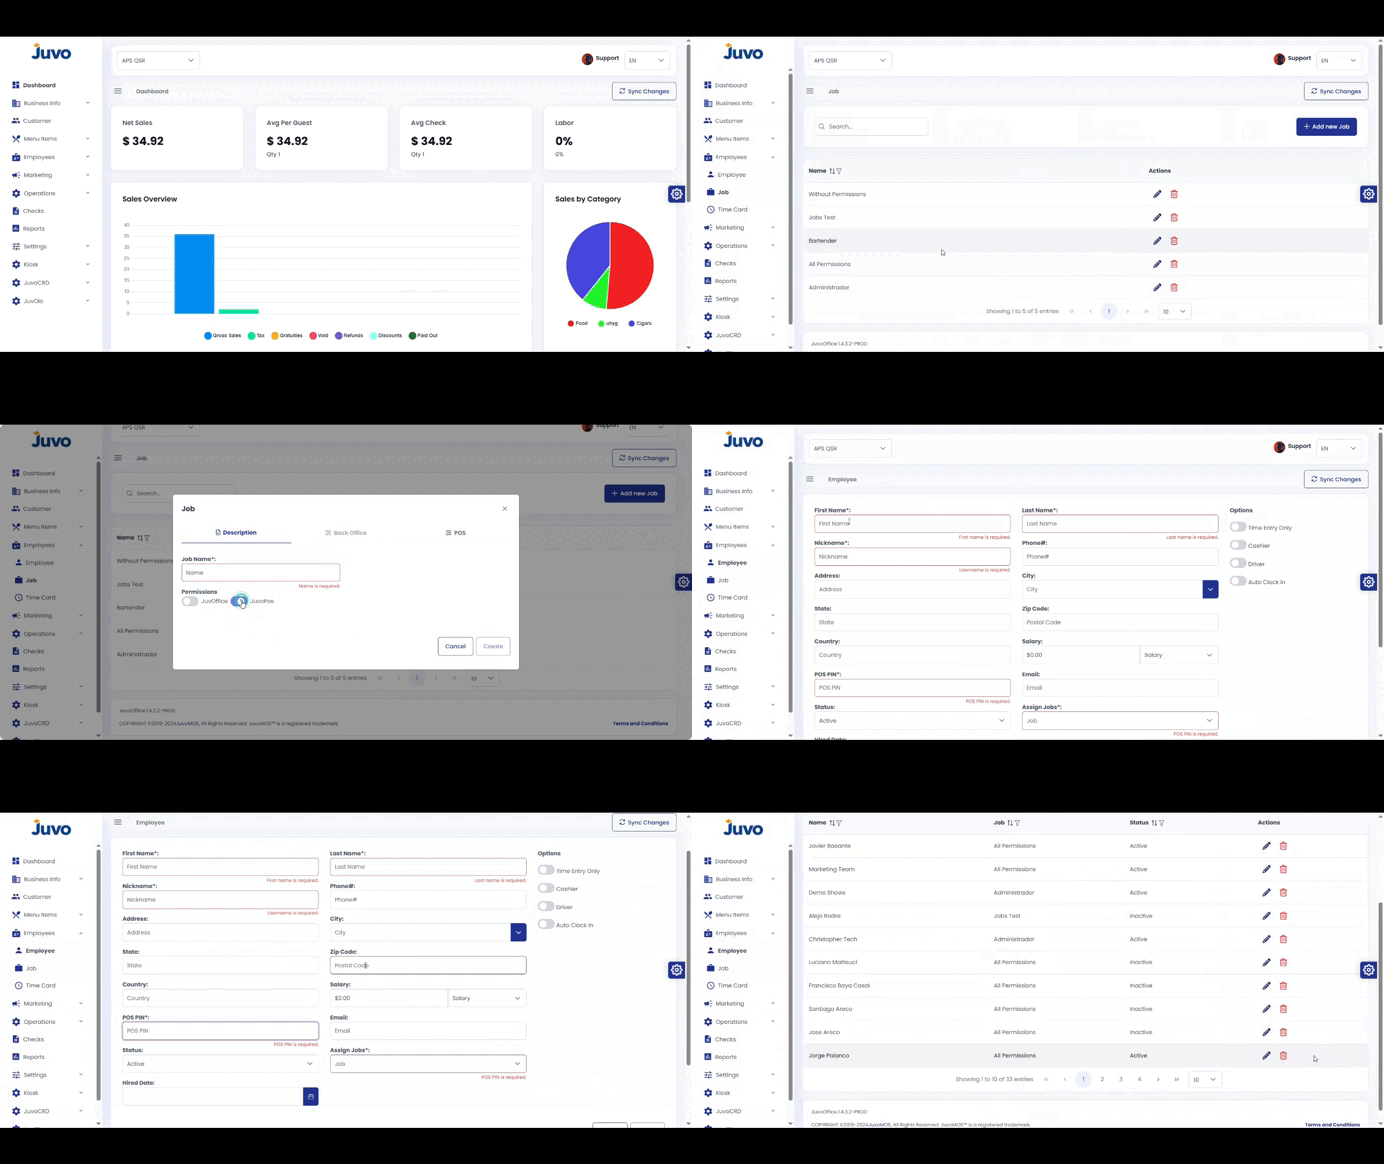
  • Employees

    Create employees and manage their roles and time records.

    1. Open Employees.
    2. Select Employee and click Add Employee.
    3. Enter contact information and a login PIN.
    4. Open Job/Roles to assign permissions.
    5. Use Time Cards to review, edit, or approve hours.
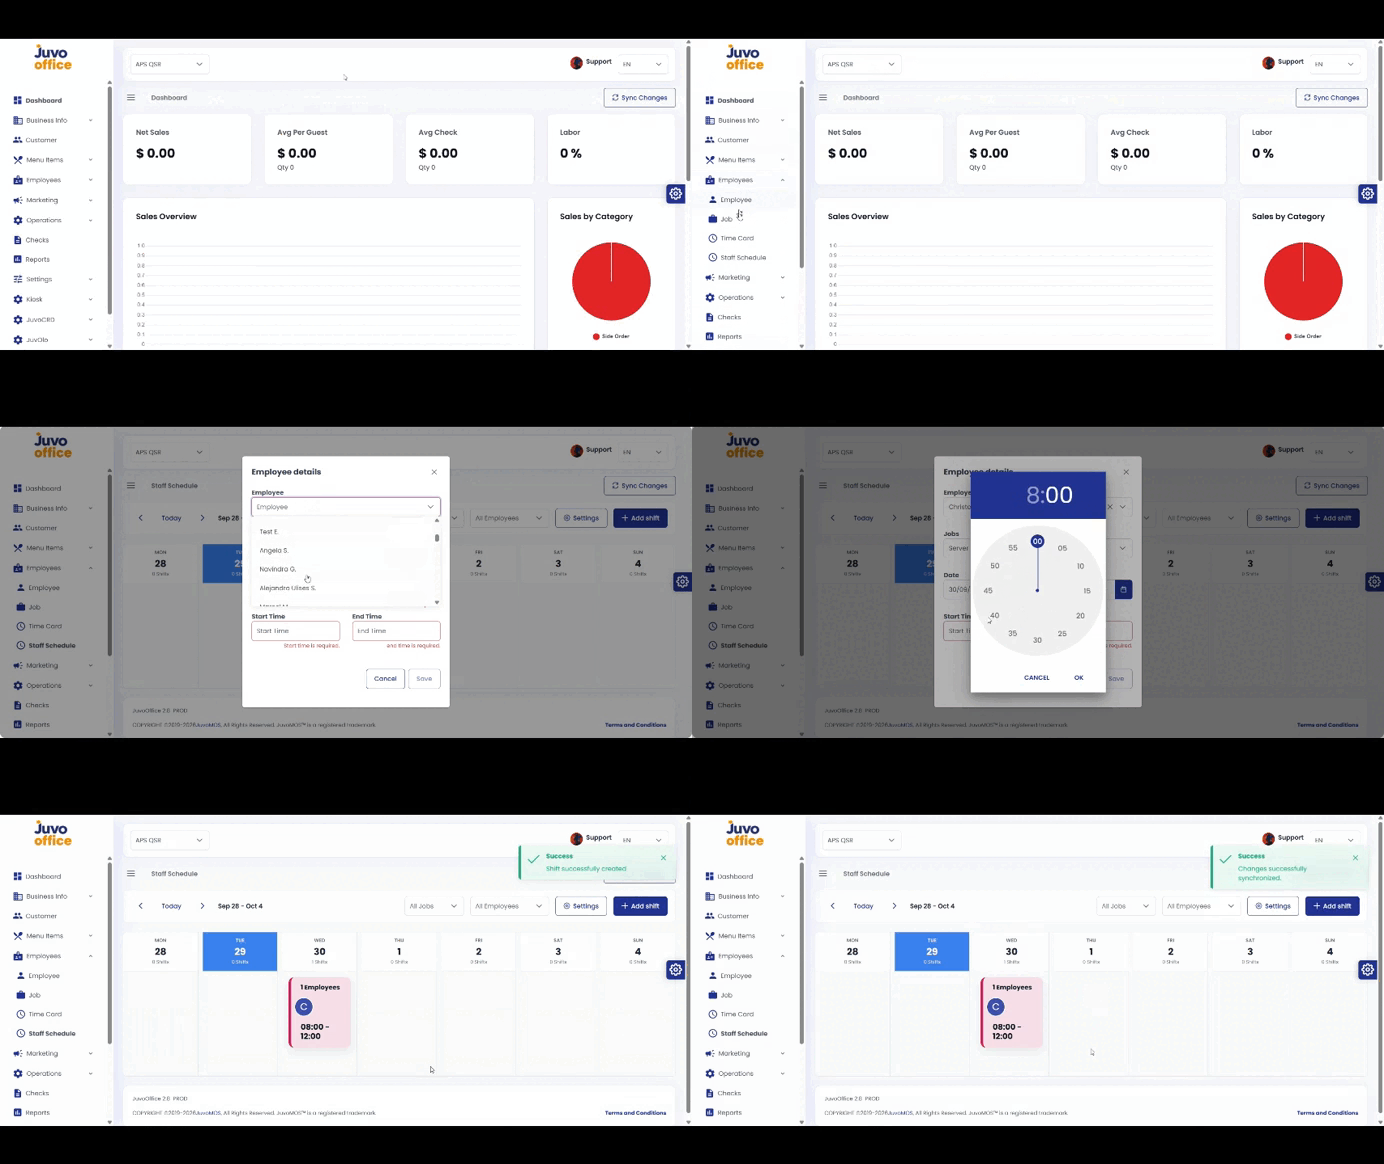
  • Staff Schedule – Add and View Employee Schedules

    Create employee schedules in Juvo Back Office so employees can view them on the POS Time Clock.

    1. Open Employees → Staff Schedule.
    2. Click Add Shift.
    3. Select the employee and review the automatically populated job.
    4. Choose the date, start time, and end time.
    5. Review and click Save.
    6. Sync the POS after creating or updating the schedule.
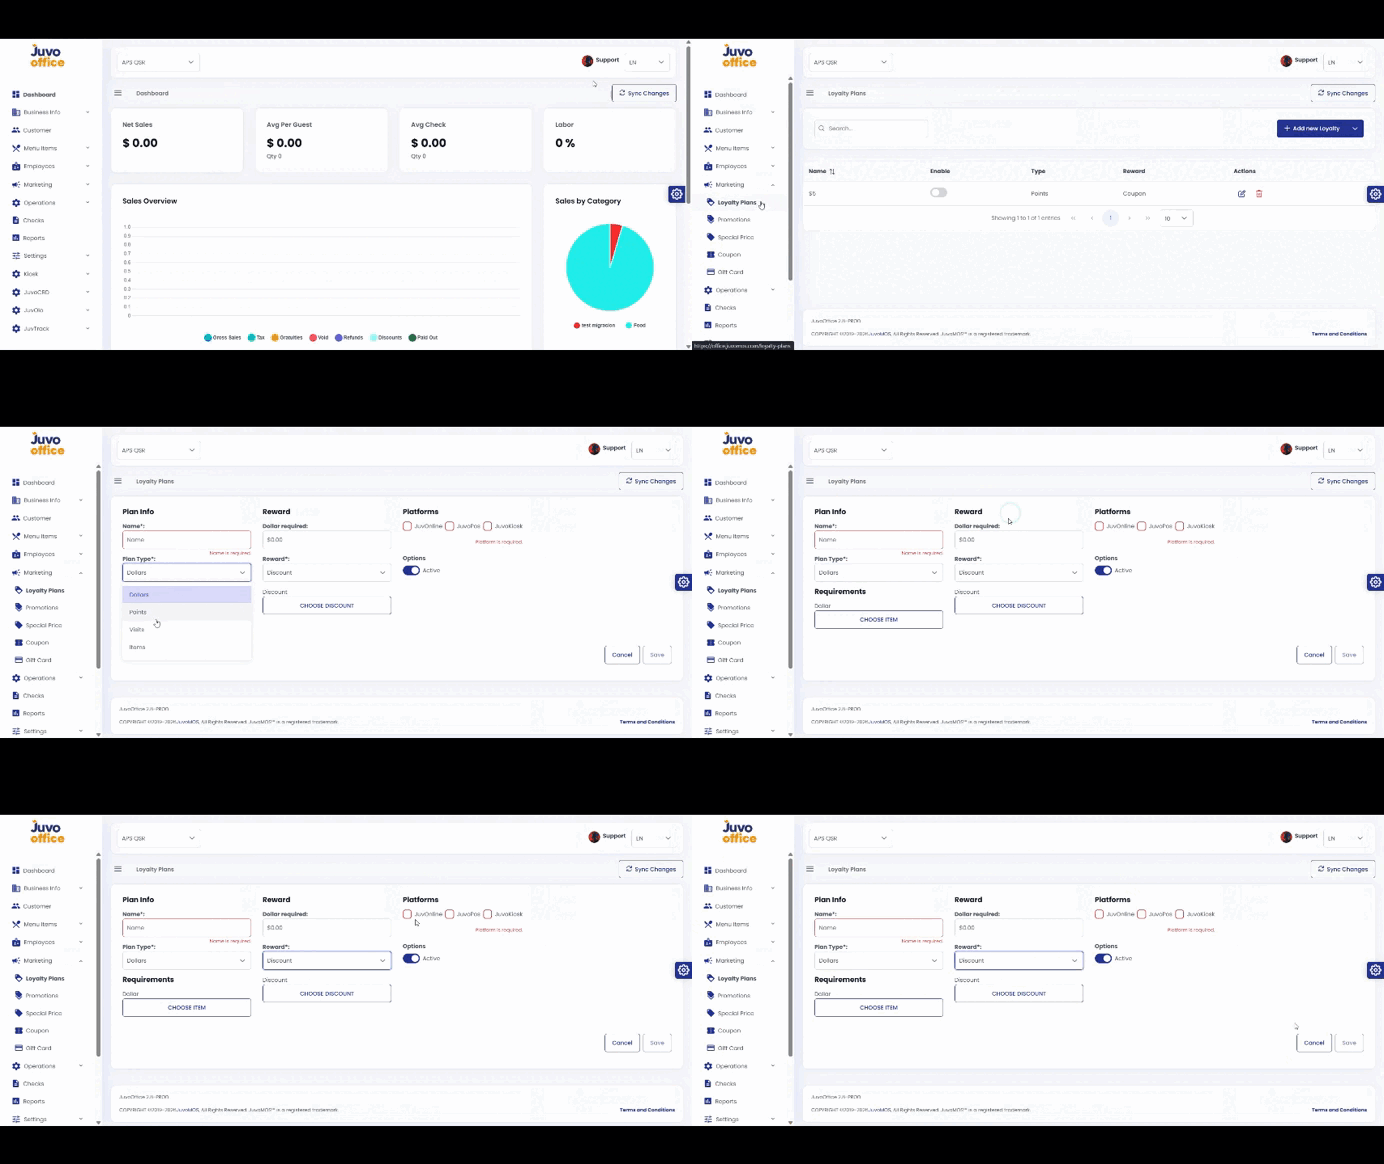
  • Marketing → Loyalty Plan

    Create a Loyalty Plan with rewards for customers.

    1. Open Marketing → Loyalty Plan.
    2. Enter the plan name.
    3. Select Dollars, Points, Visits, or Items.
    4. Configure the requirements and reward.
    5. Select POS, OLO, or KIOSK.
    6. Set the plan Active or Inactive.
    7. Review and save.
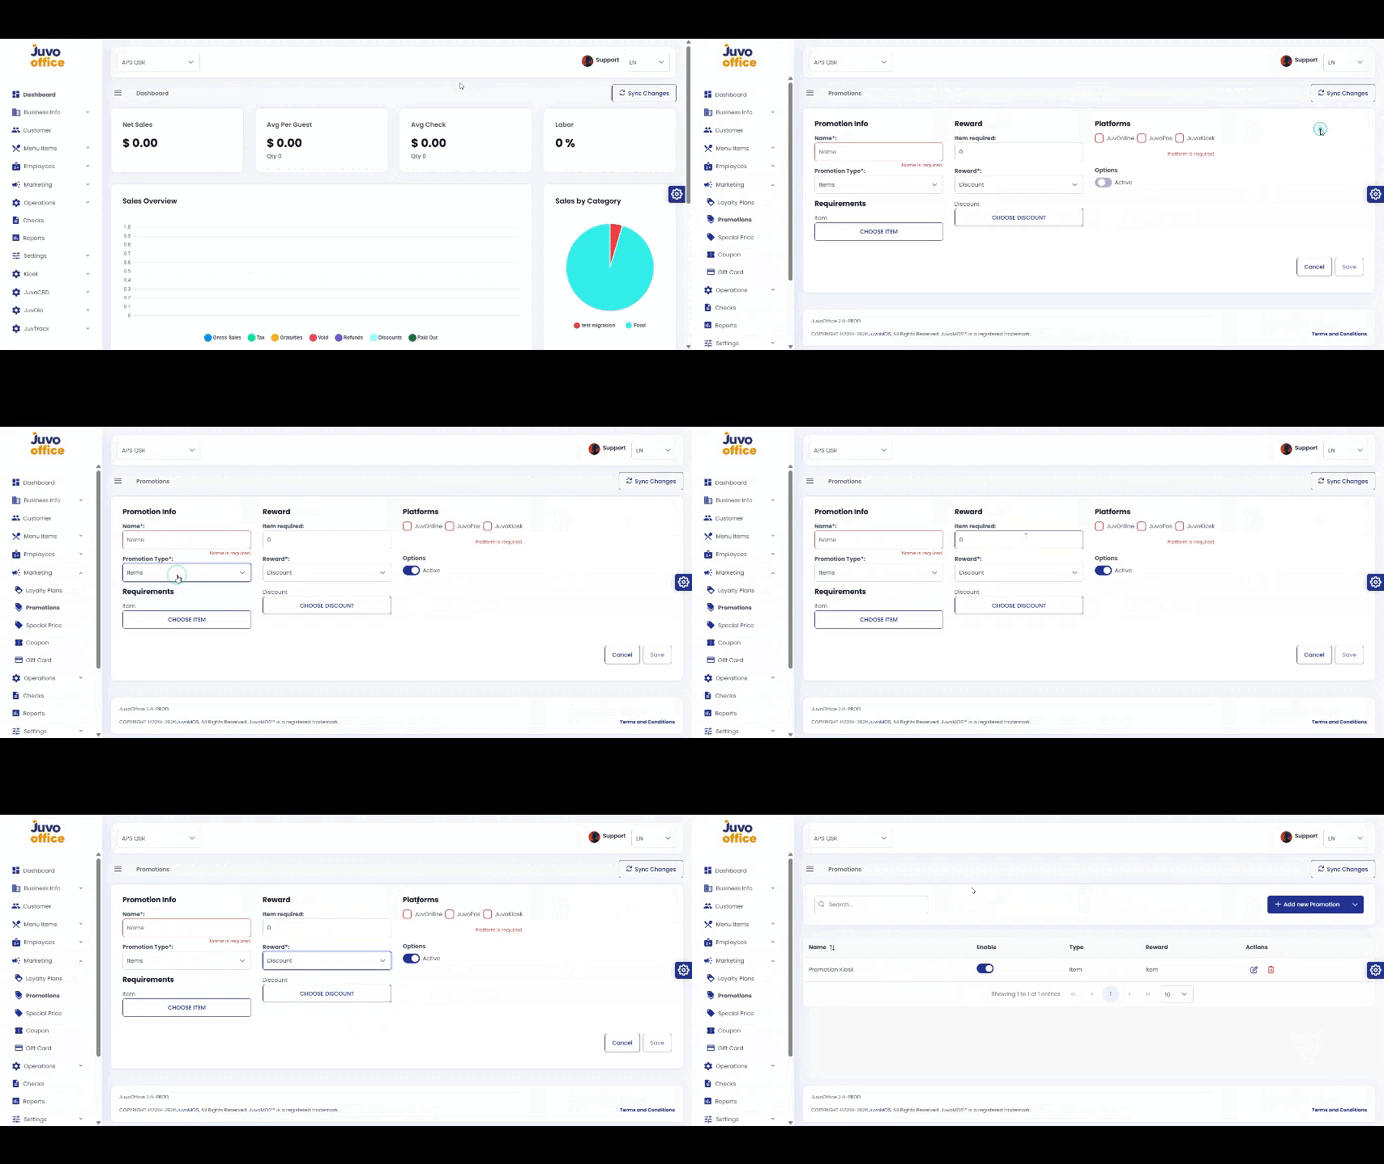
  • Marketing → Promotions

    Create promotions with requirements and rewards.

    1. Open Marketing → Promotions.
    2. Click Add Promotion.
    3. Enter the promotion name and type.
    4. Configure requirements and reward.
    5. Select POS, OLO, or KIOSK.
    6. Review the settings and Active/Inactive status.
    7. Save.
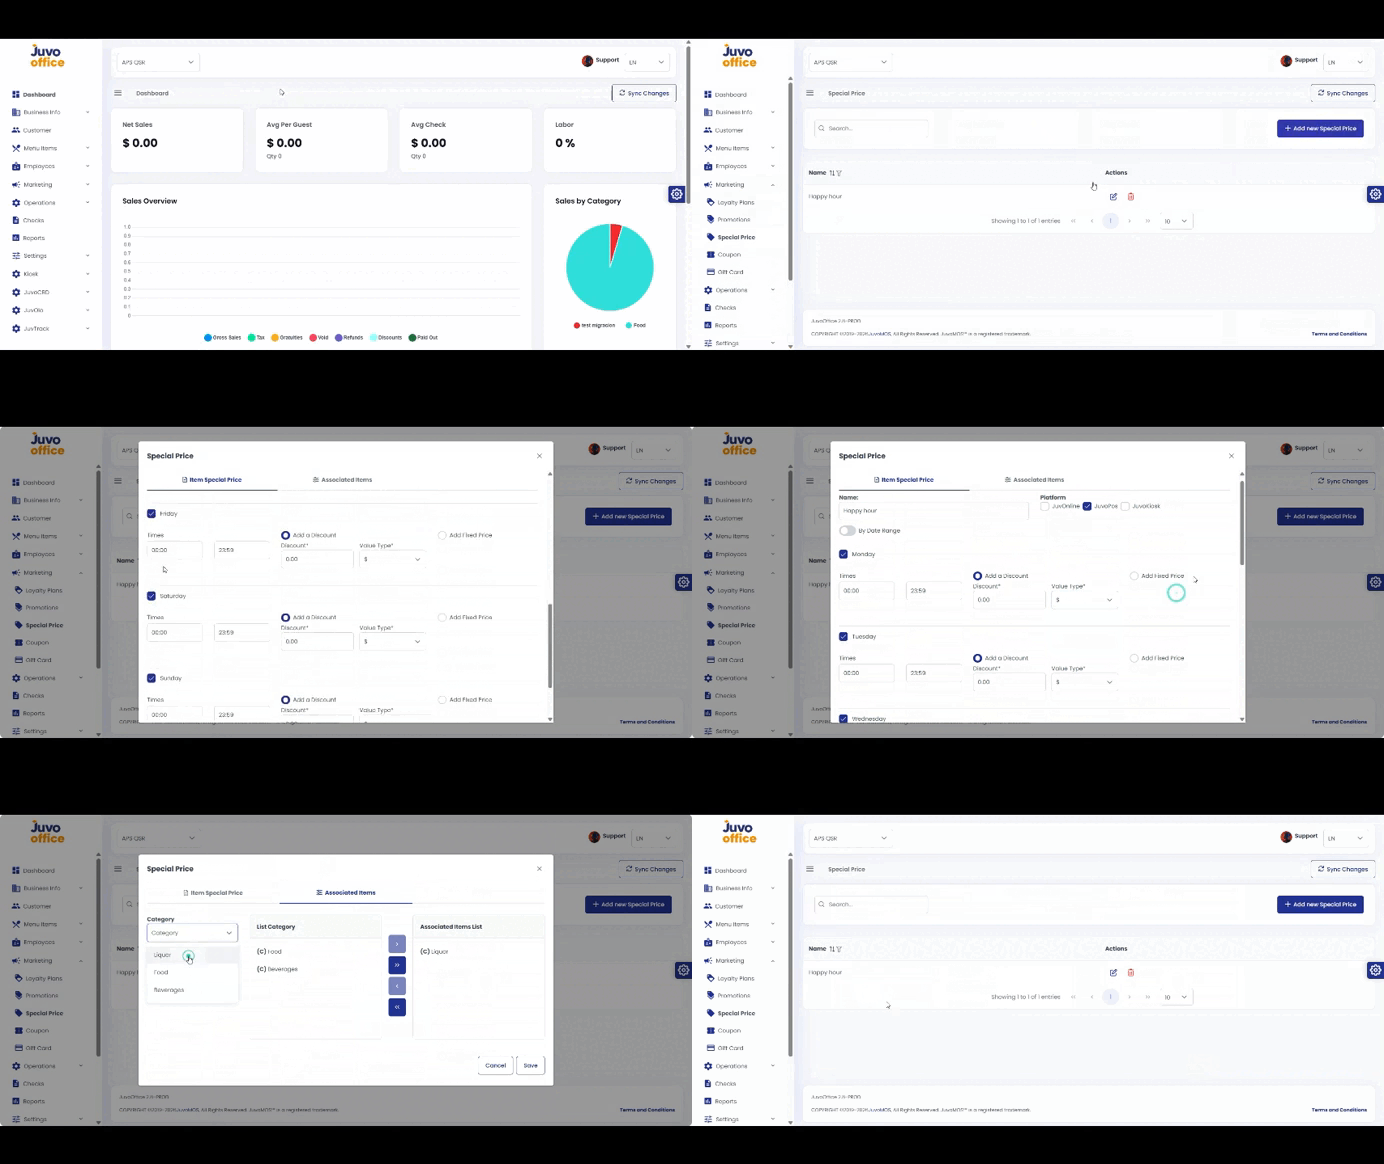
  • Marketing → Special Price

    Create scheduled special prices such as Happy Hour offers.

    1. Open Marketing → Special Price.
    2. Create a configuration and enter its name.
    3. Select the platforms.
    4. Set a date range or days of the week and a time range.
    5. Choose Amount, Percentage, or Fixed Price.
    6. Select categories, subcategories, or menu items.
    7. Review and click Save.
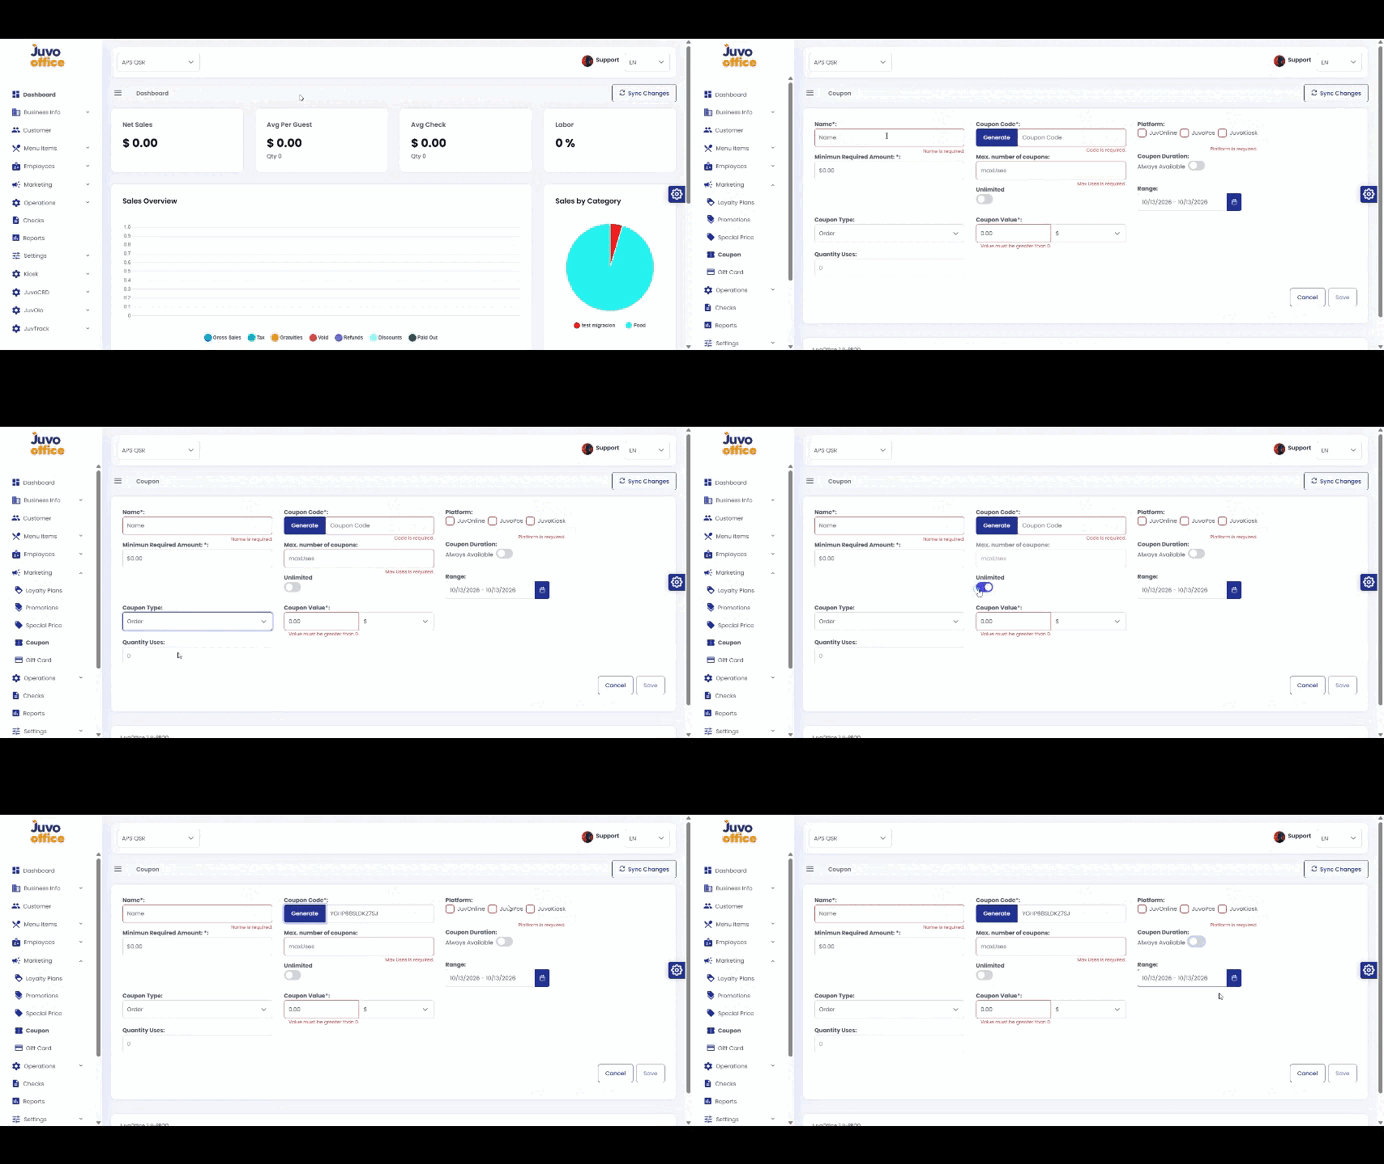
  • Marketing → Coupons

    Create coupons with discount, usage, and availability rules.

    1. Open Marketing → Coupons.
    2. Enter the coupon name and minimum requirement.
    3. Select the coupon type.
    4. Set quantity and maximum uses when applicable.
    5. Choose a fixed amount or percentage value.
    6. Select the available platforms.
    7. Choose Always Available or a date range.
    8. Review and click Save.