Author: marcoant2026

  • Juvo POS – Quick Edit in Menu

    Purpose: Learn how to quickly edit menu items directly from the Juvo POS without accessing the Back Office (BO).

    Step 1: Select a Menu Item

    From the main POS menu screen, locate the menu item you want to edit.

    Step 2: Press and Hold

    Press and hold the selected menu item until a warning message appears on the screen.

    Step 3: Confirm Edit Mode

    A warning message will inform you that you are about to enter Edit Mode. Review the message and confirm to proceed.

    Step 4: Edit Your Menu Items

    Once Edit Mode is activated, you can make changes to your menu items directly from the POS.

    Step 5: Complete Your Changes

    Make the necessary adjustments to your menu items and follow the on-screen options to complete your edits.

    Note: Use this feature carefully to ensure that any changes made to the menu are intentional and accurate.
  • Gift Card – Juvo POS

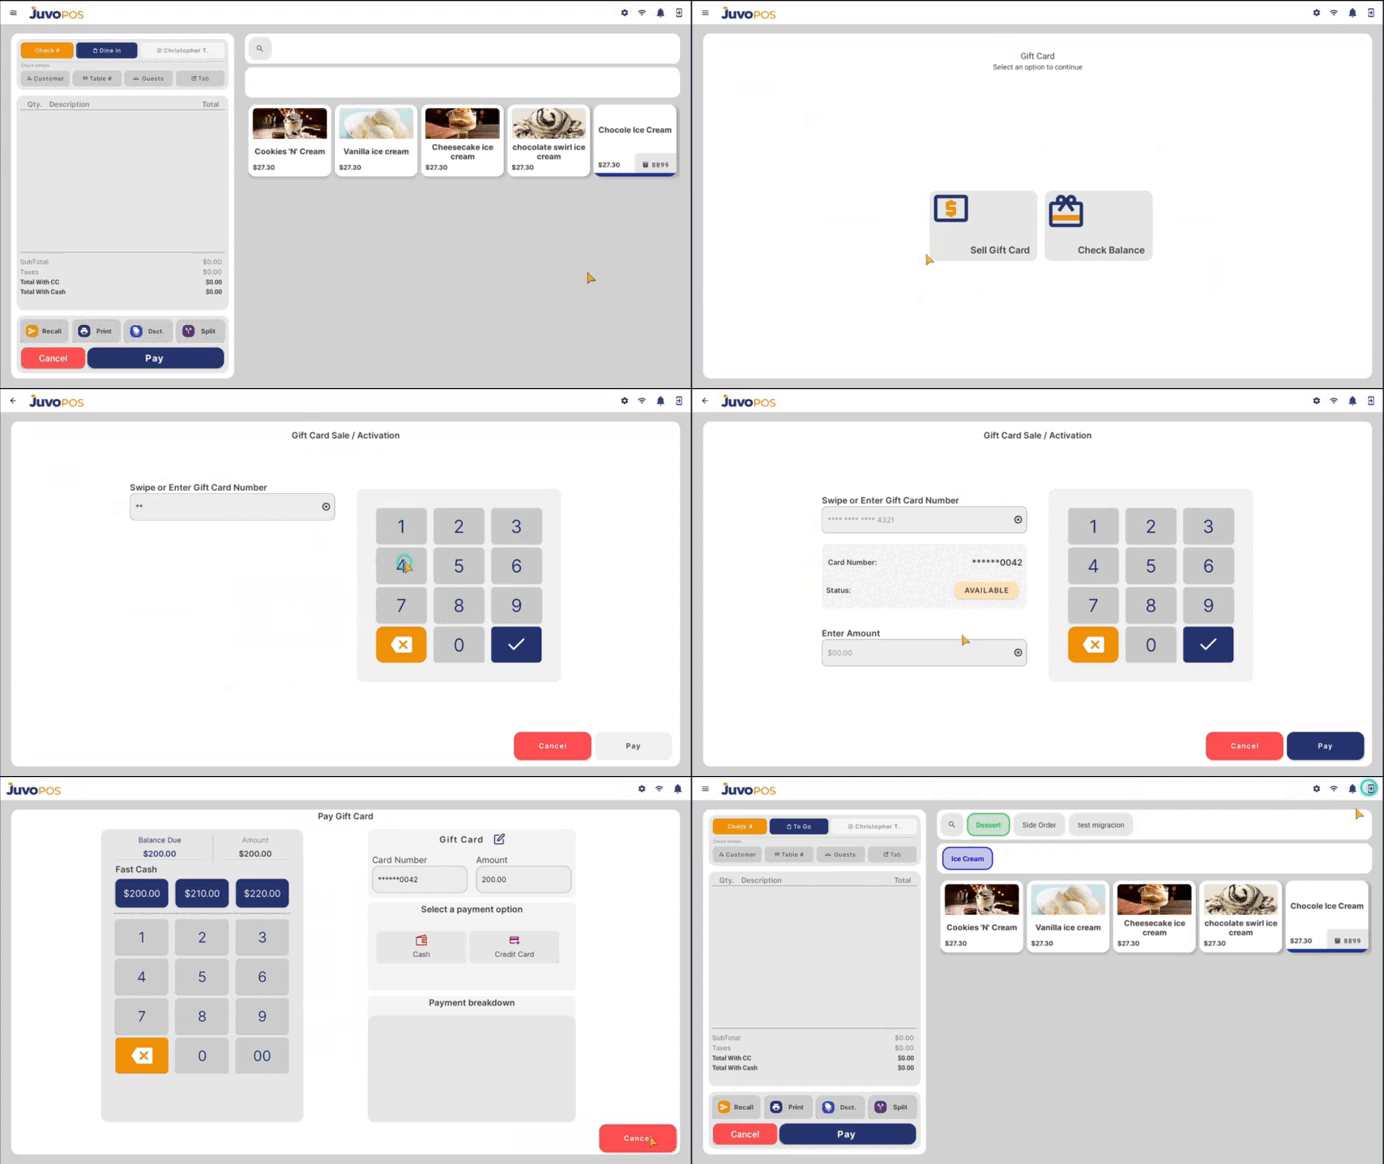
    After the gift cards have been successfully uploaded in the Back Office, use the POS to activate or sell a gift card or check its balance.

    1 Activate or Sell a Gift Card

    1. Go to the POS.
    2. Open the Functions Menu.
    3. Select BANK.
    4. Select Gift Cards.
    5. Enter the number of a gift card that was previously uploaded in the Back Office.
    6. Select the gift card you want to activate or sell.
    7. Follow the POS prompts to complete the transaction.
    8. Complete the sale according to the normal POS process.

    Navigation: Functions Menu → BANK → Gift Cards

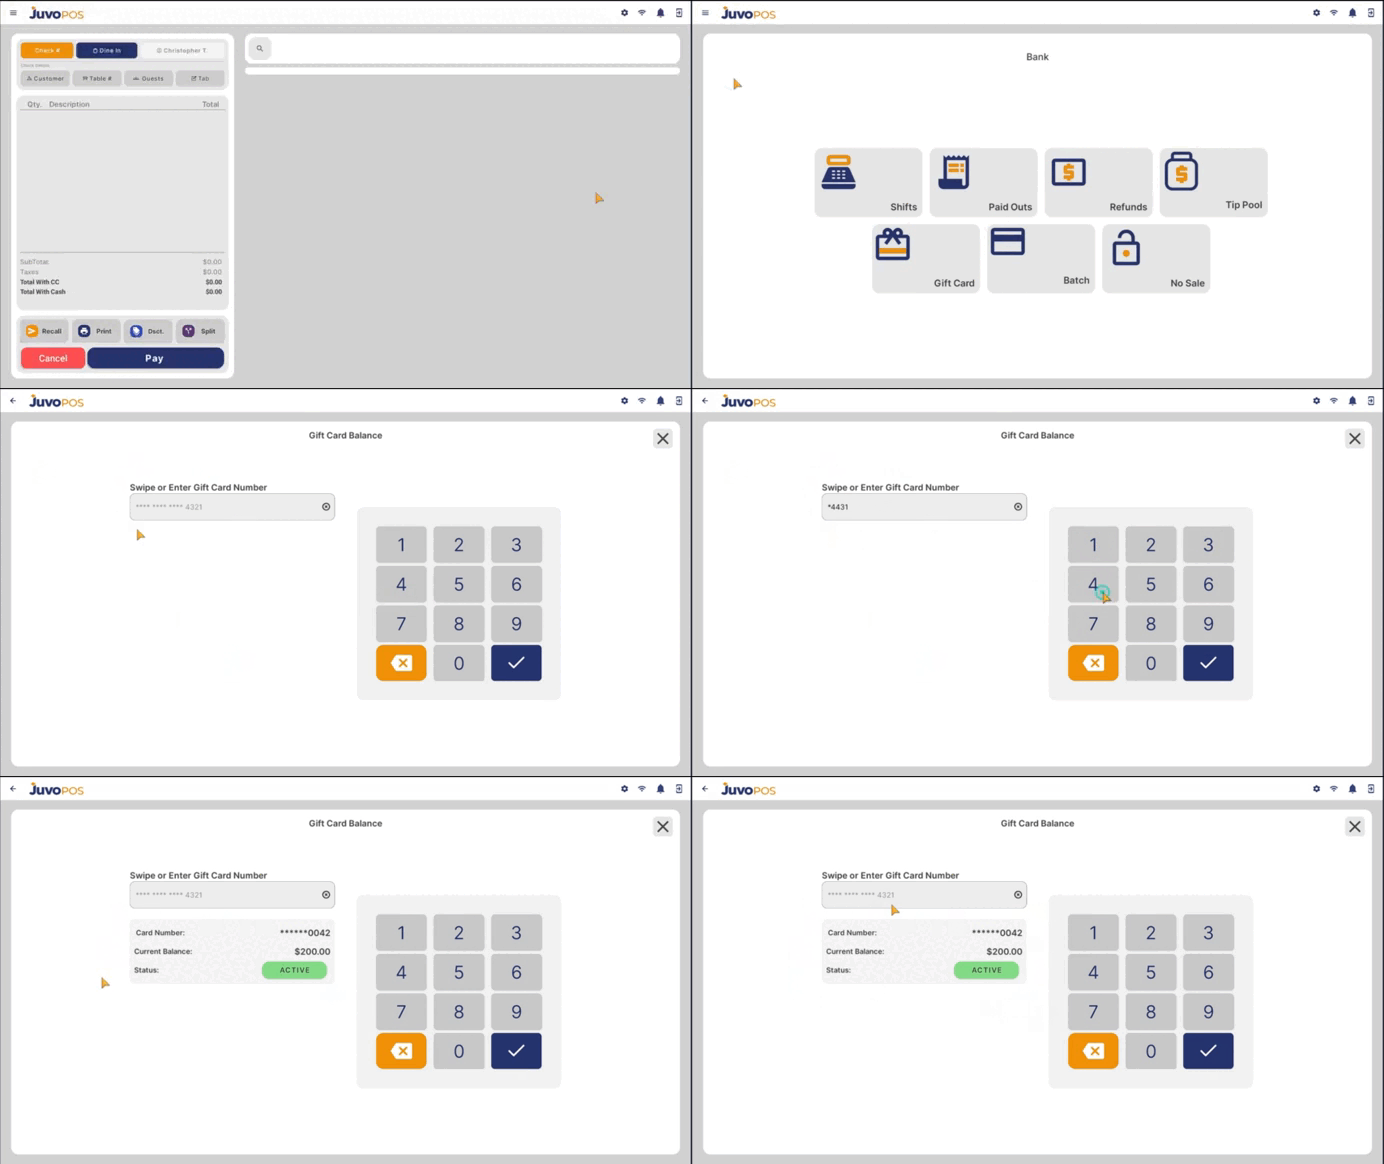
    2 Check Gift Card Balance

    1. Open the POS Functions Menu.
    2. Select BANK.
    3. Select Gift Cards.
    4. Enter the gift card number.
    5. Select the option to check the balance.
    6. Review the balance displayed by the system.

  • View Schedule – Juvo POS

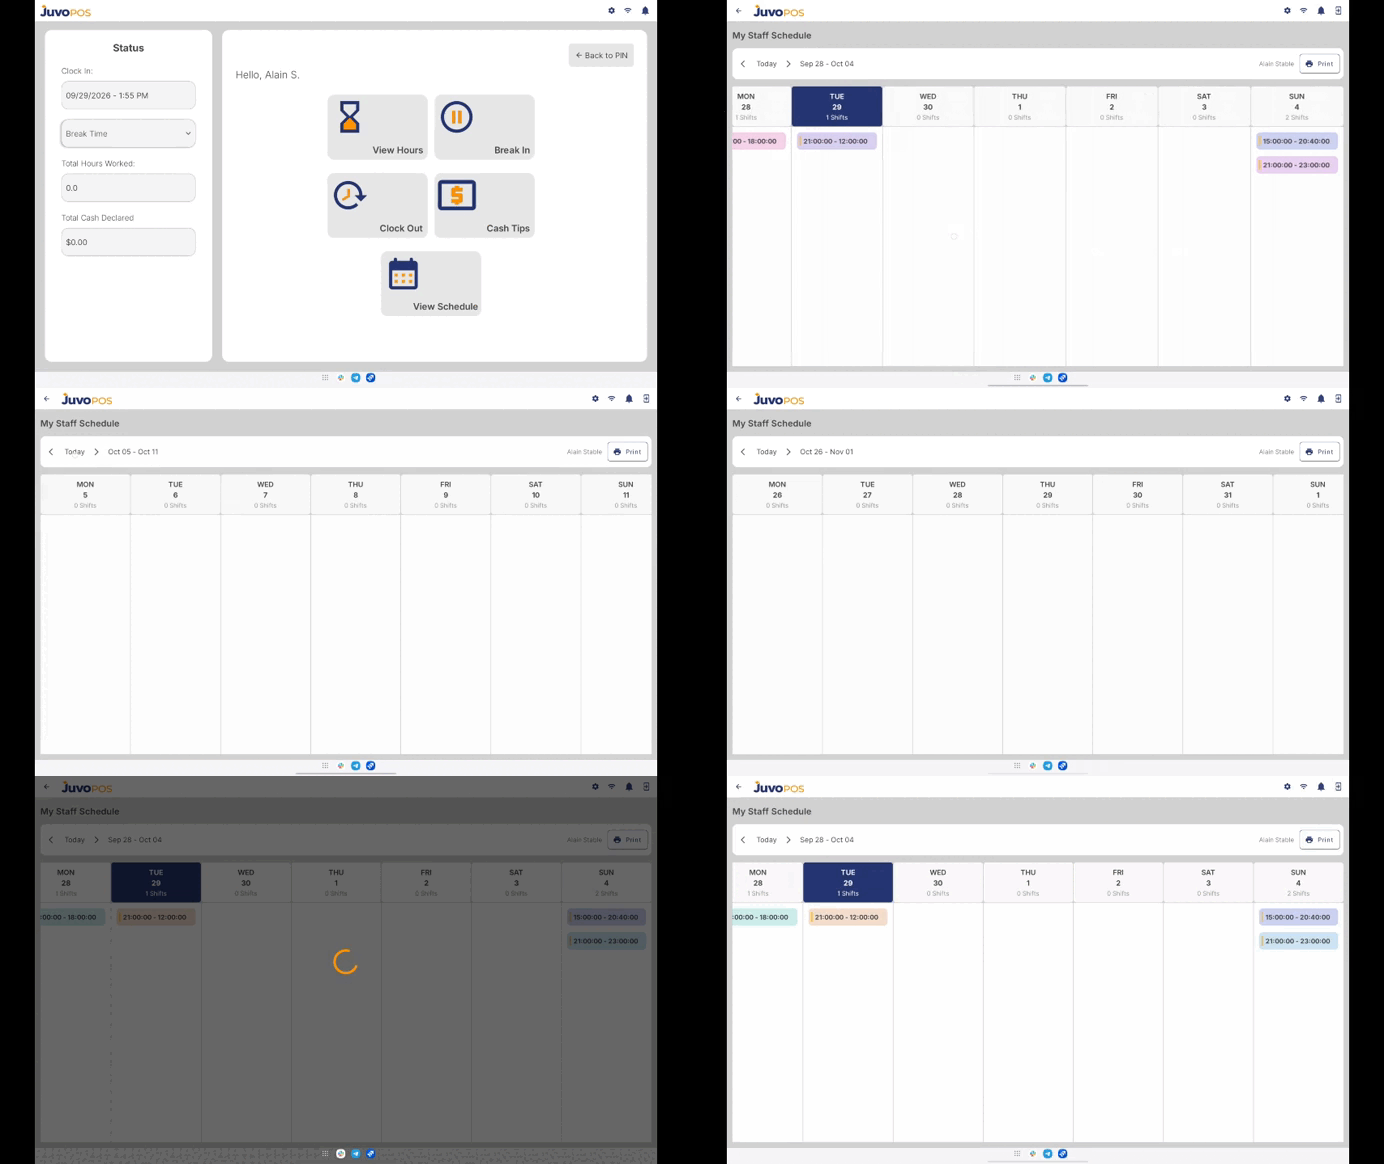
    Once the schedule has been created in the BO and synced with the POS, employees can view their schedule directly from the Time Clock.

    Step 1: Open Time Clock

    1. On the POS, select Time Clock.
    2. Enter your employee PIN to clock in.

    Step 2: Select View Schedule

    After entering the PIN, the employee will see the View Schedule option. Select View Schedule to access the schedule that was created in the BO.

    Step 3: View the Weekly Schedule

    Employees can:

    • View their scheduled shifts for the week.
    • Review their dates and scheduled times.
    • Check their upcoming shifts directly from the POS.

    Step 4: Print the Schedule

    If a physical copy is needed, employees can select the Print option to print their schedule.

    Important

    The schedule displayed on the POS comes directly from the Staff Schedule created in the BO. If a schedule is added or changed in the BO, make sure the POS is synced so the latest schedule is available to employees.